Learning how to draw a dog becomes clear when each part is built slowly using simple shapes. This drawing guide shows the full process from basic forms to a clean outline and light colour work. Every stage is shown step by step, making the dog shape easy to understand and follow without confusion.
let’s begin
Step 1: Draw Basic Shapes for Head and Body
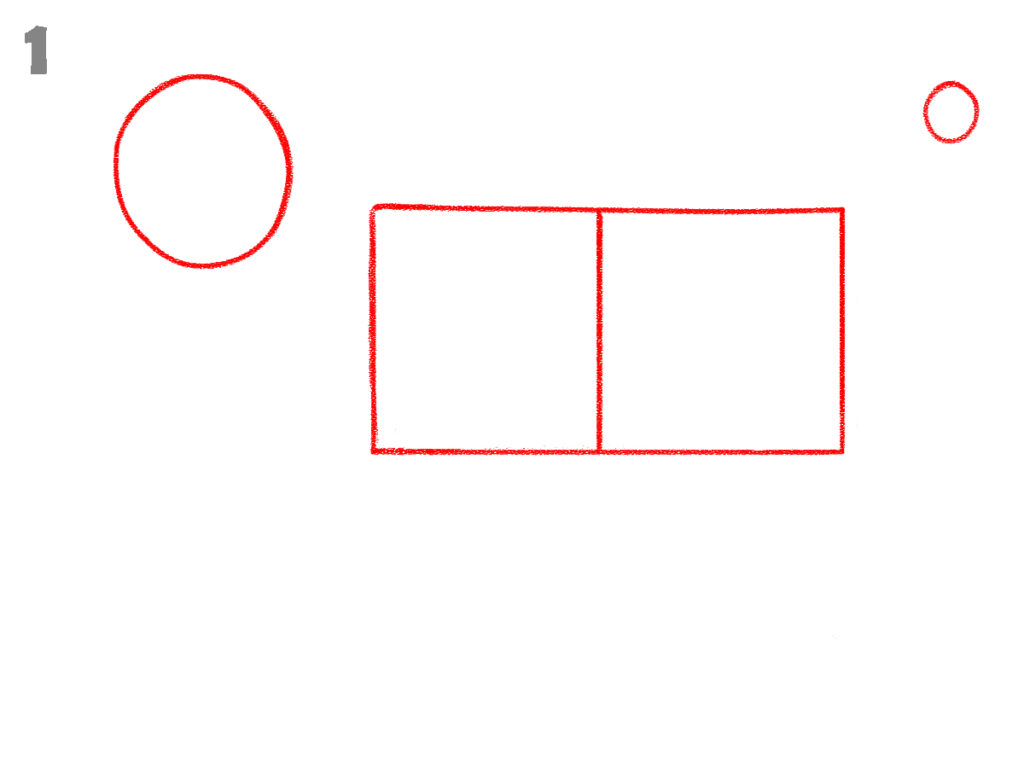
Start by drawing one large circle on the left side for the head. Next to it, draw two connected rectangular shapes forming the body length. Add a small circle away from the body area as shown. All lines are drawn in red and kept light. These shapes stay simple and straight, without any detail added.
Step 2: Add Neck, Legs, and Snout Shape
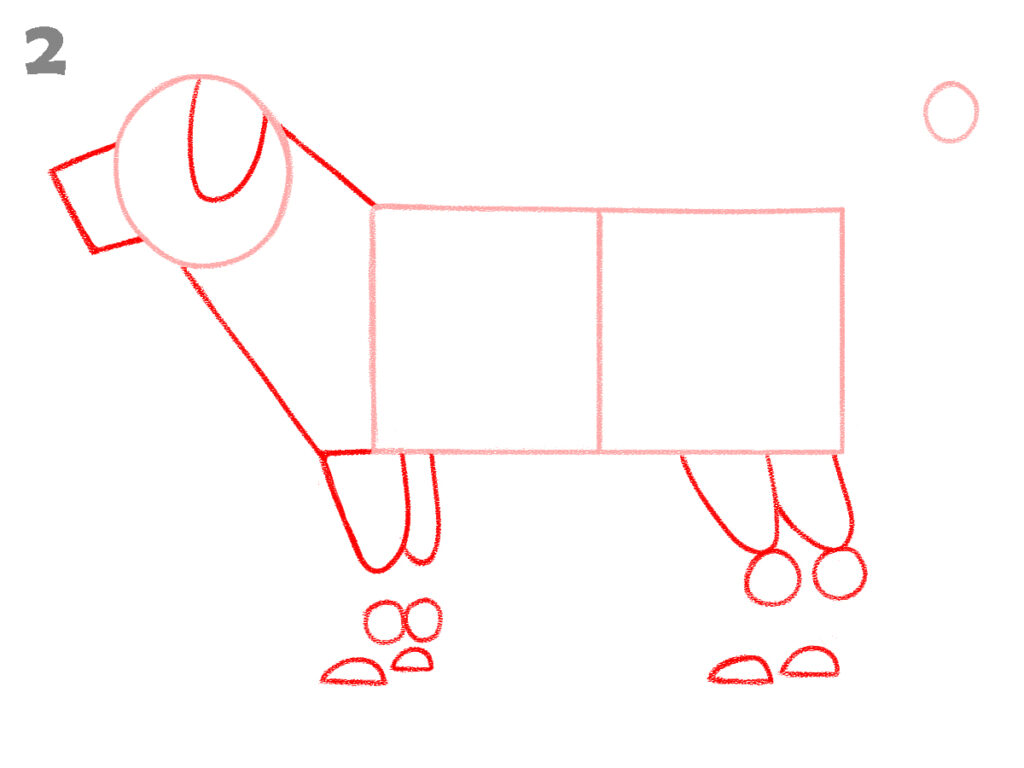
From the head circle, draw a slanted neck line connecting to the front rectangle. Add a small block shape in front of the head for the snout. Draw simple leg guides below the body using curved lines and small circles for joints. Paw shapes are added as small flat curves at the bottom.
Step 3: Refine Head and Body Outline
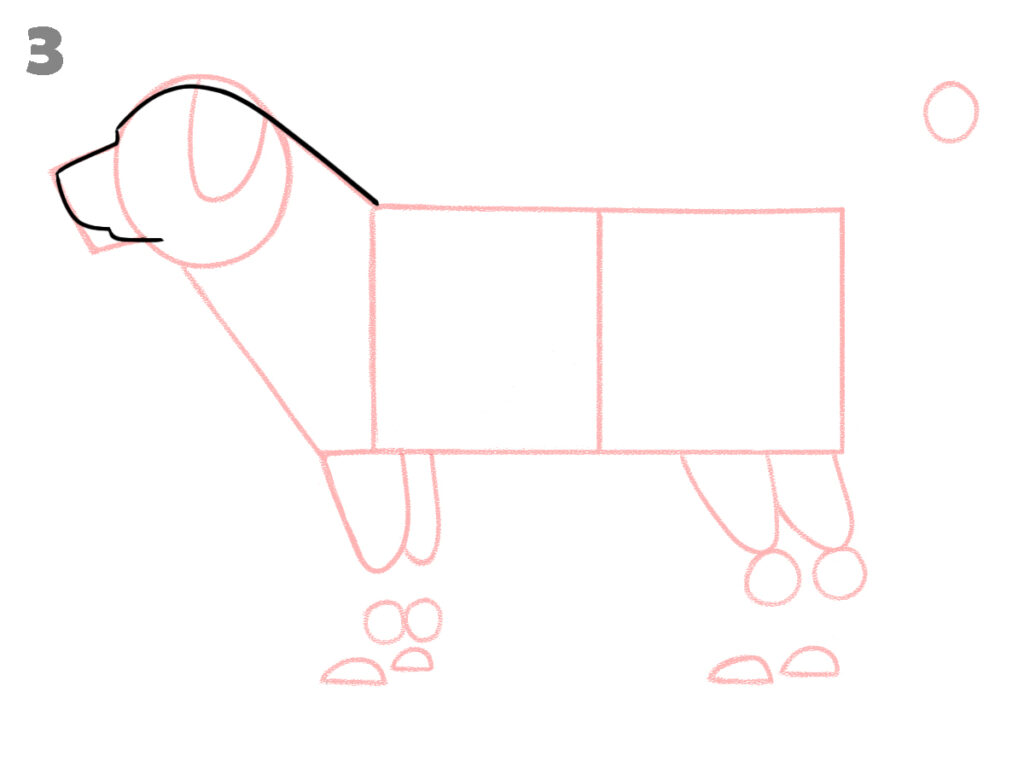
Using black lines, begin shaping the head more clearly over the red guide. The snout edge becomes smooth and defined. The back line is slightly curved from neck to body. Legs remain in guide form, but the outline of the dog’s body looks more connected and balanced in this stage.
Step 4: Draw Ear and Face Details
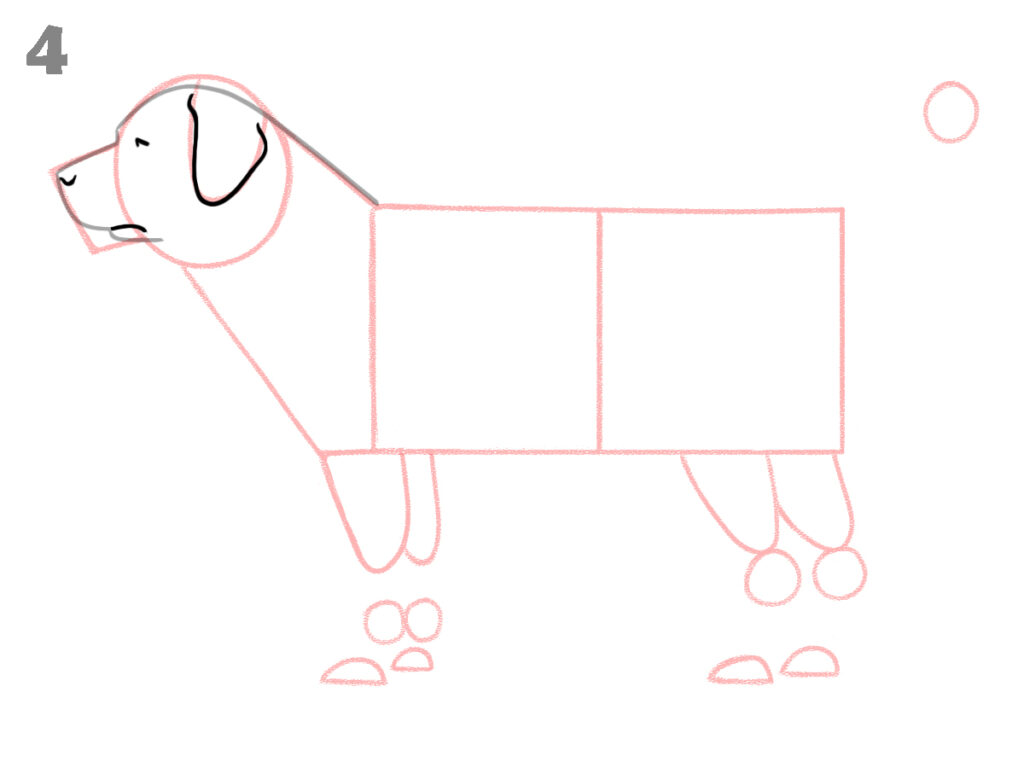
Add a clear ear shape on the head using a curved black line. Draw a small eye and a short nose mark at the front of the snout. The mouth line is added lightly. Red body guides remain visible, but the head now looks complete with basic facial details clearly shown.
Step 5: Shape the Body and Belly Line
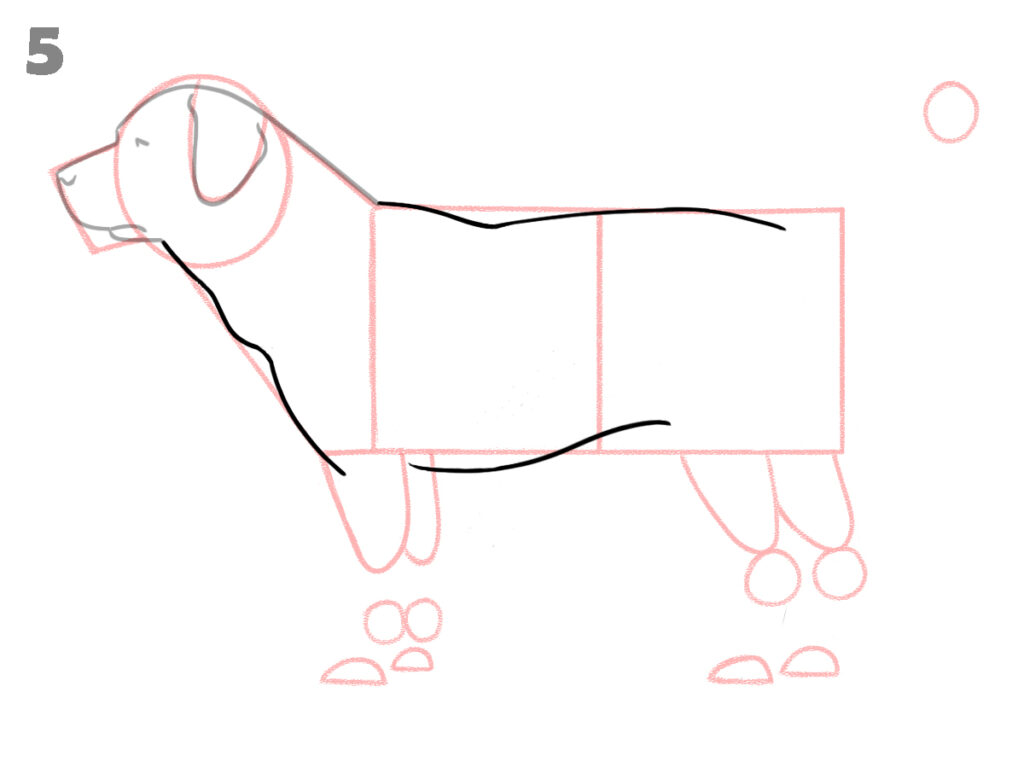
Draw a smooth black line along the back, following the top of the body blocks. Add a gentle curved line under the body to show the belly. The neck area is refined with a flowing line connecting head and chest. Legs are still guides, but the dog form is becoming clear.
Step 6: Define Front and Back Legs
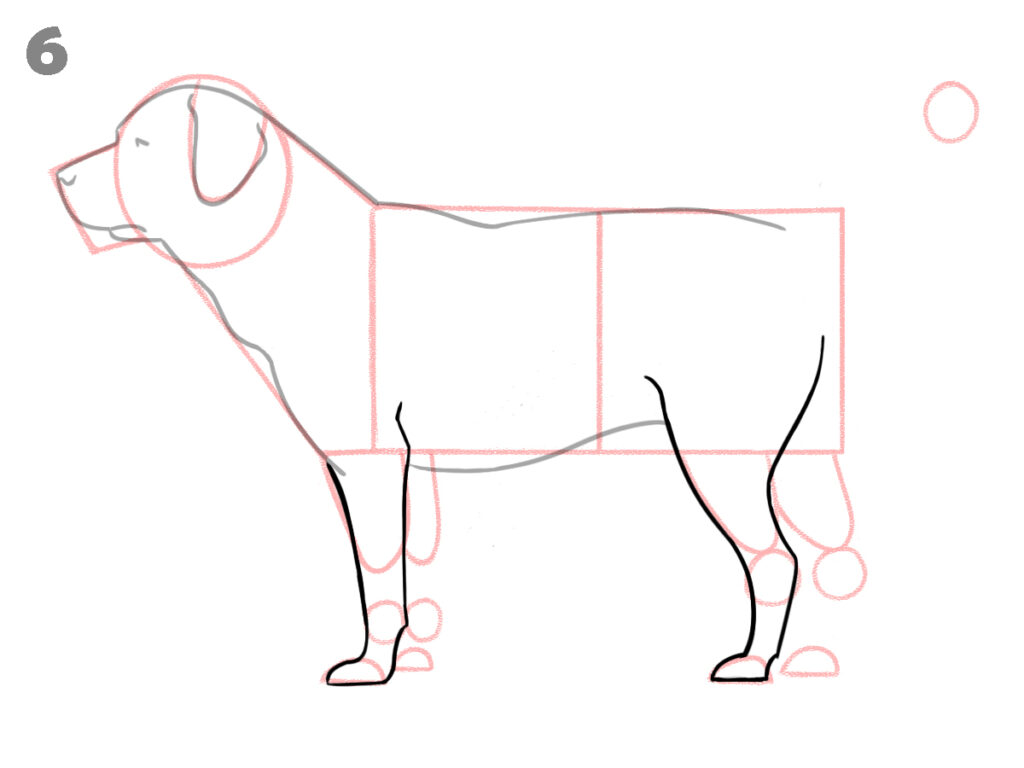
Replace the red leg guides with black outlines. Each leg is drawn with a clear curve, showing joints and paws properly. The front legs appear straight and firm, while the back legs bend slightly. Paws are drawn as small flat shapes touching the ground, matching the image exactly.
Step 7: Draw Legs on the Other Side
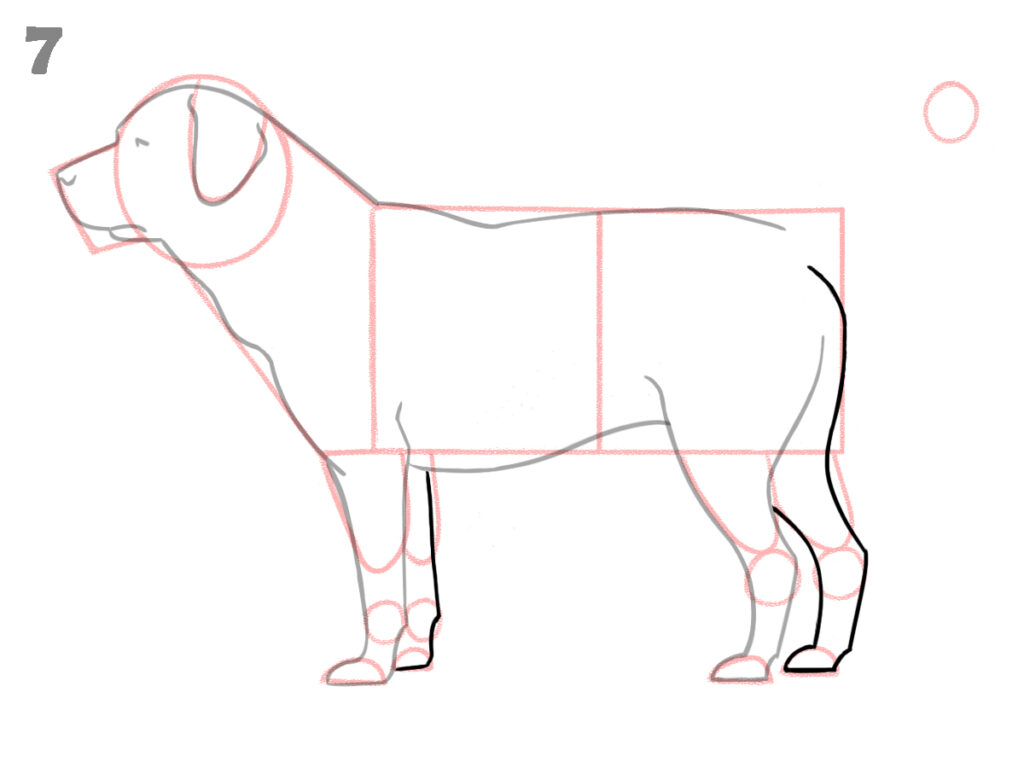
Add the legs visible on the far side of the body using black lines. These legs are drawn slightly behind the front ones, showing depth. Follow the same joint curves and paw shapes as before, but keep them partially hidden by the body. The full body outline stays clean, while red guides remain faint.
Step 8: Add Tail Shape
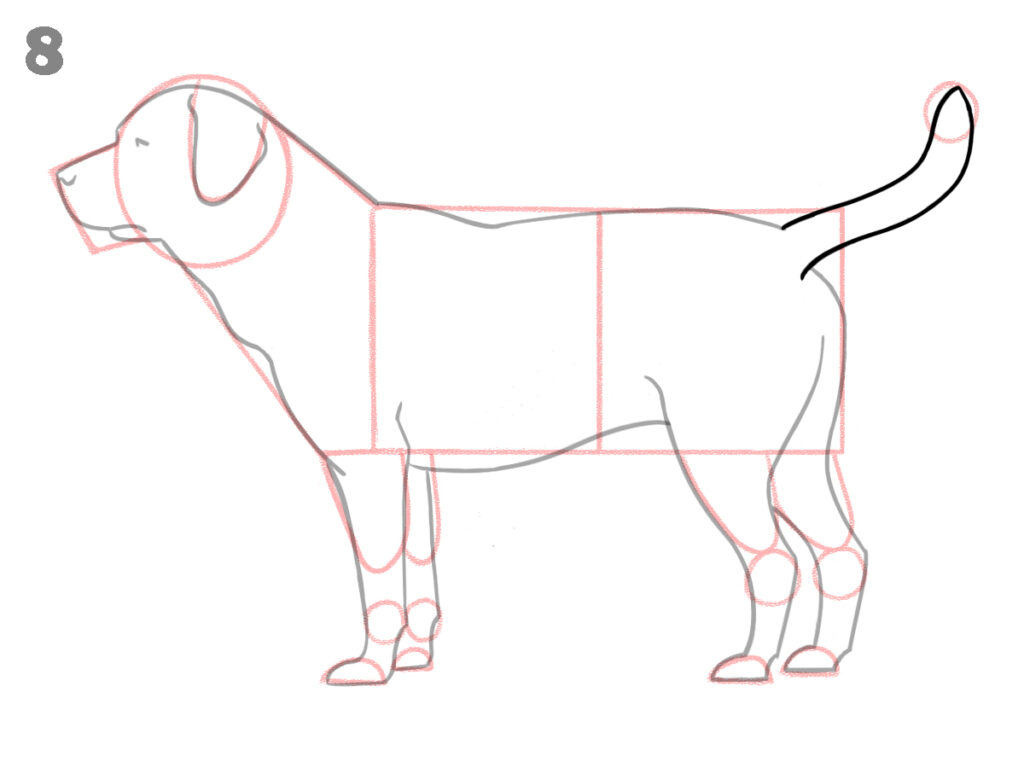
Draw a curved tail extending upward and slightly back from the rear of the body. The tail has a smooth bend and ends with a rounded tip. The rest of the body remains unchanged. This step only adds the tail line, keeping the overall outline clean and simple.
Step 9: Clean Outline and Light Shading
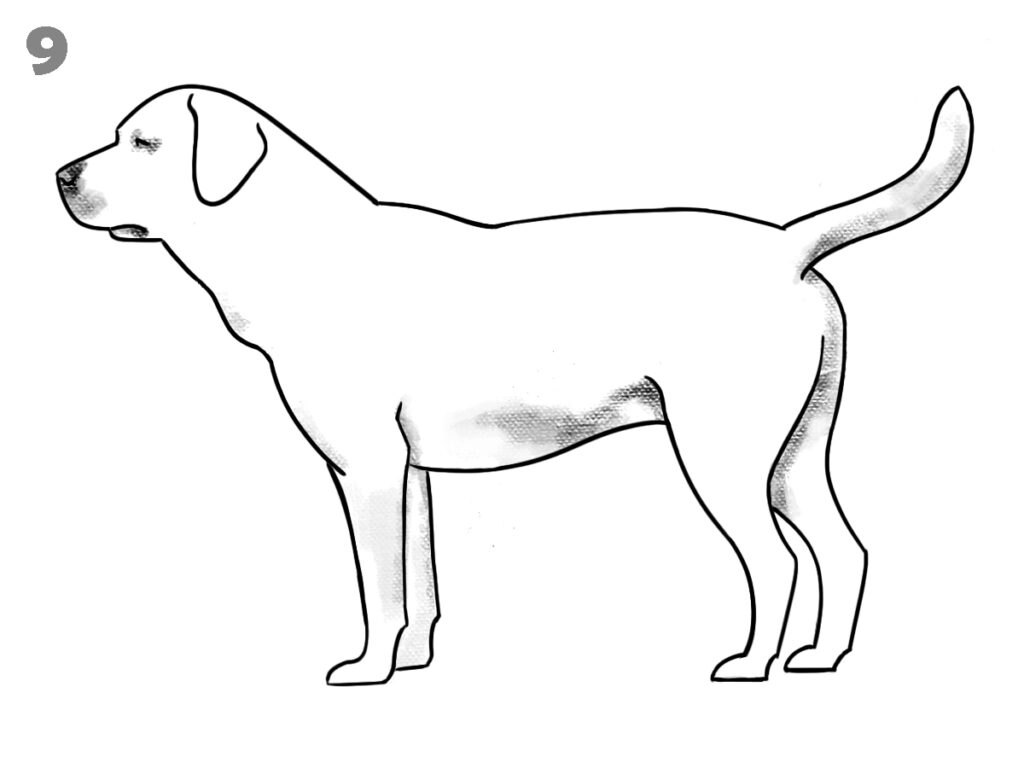
The red guide lines are no longer used. The full dog outline is clean and complete in black. Light grey shading is added under the belly and inside leg areas as shown. No new shapes are added here. The drawing now looks finished with only outline and soft shading visible.
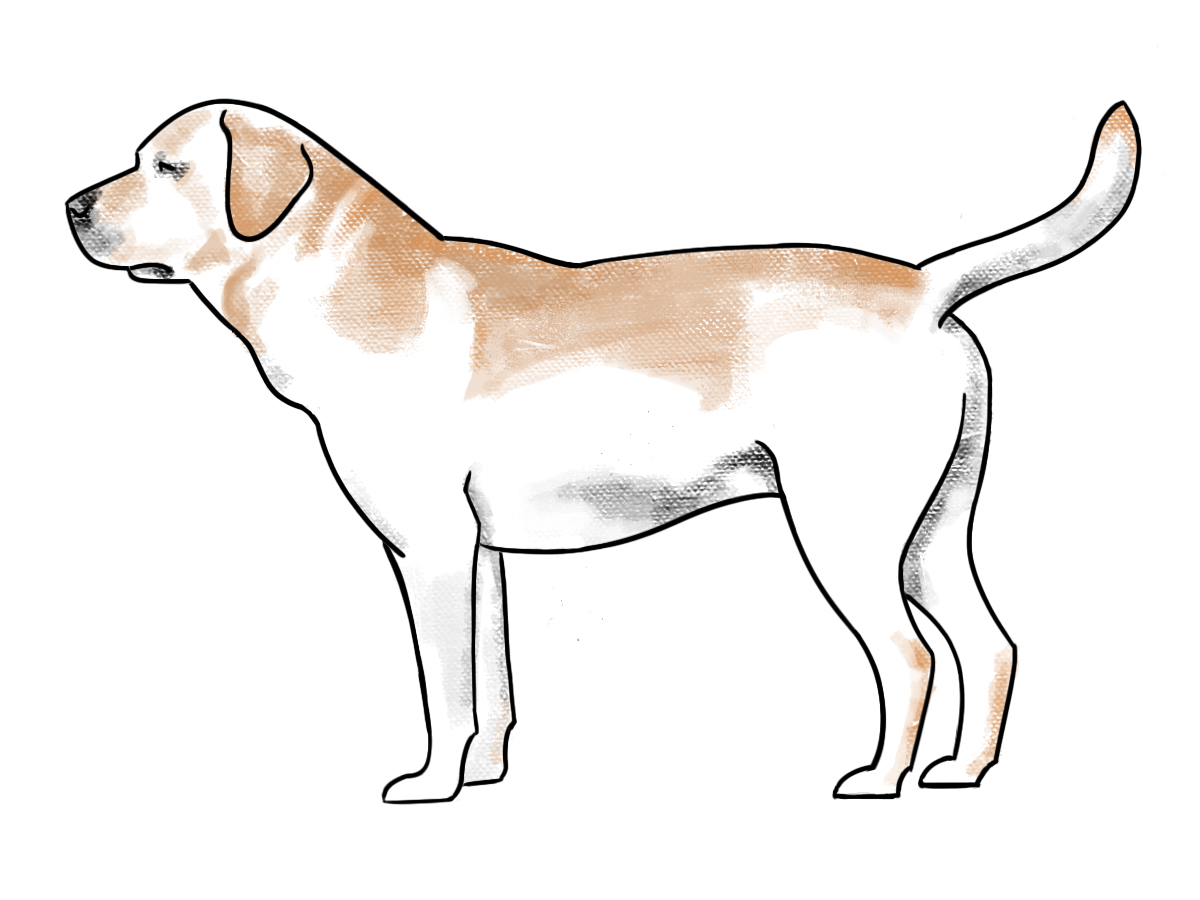
Step 10: Add Final Colour Touches
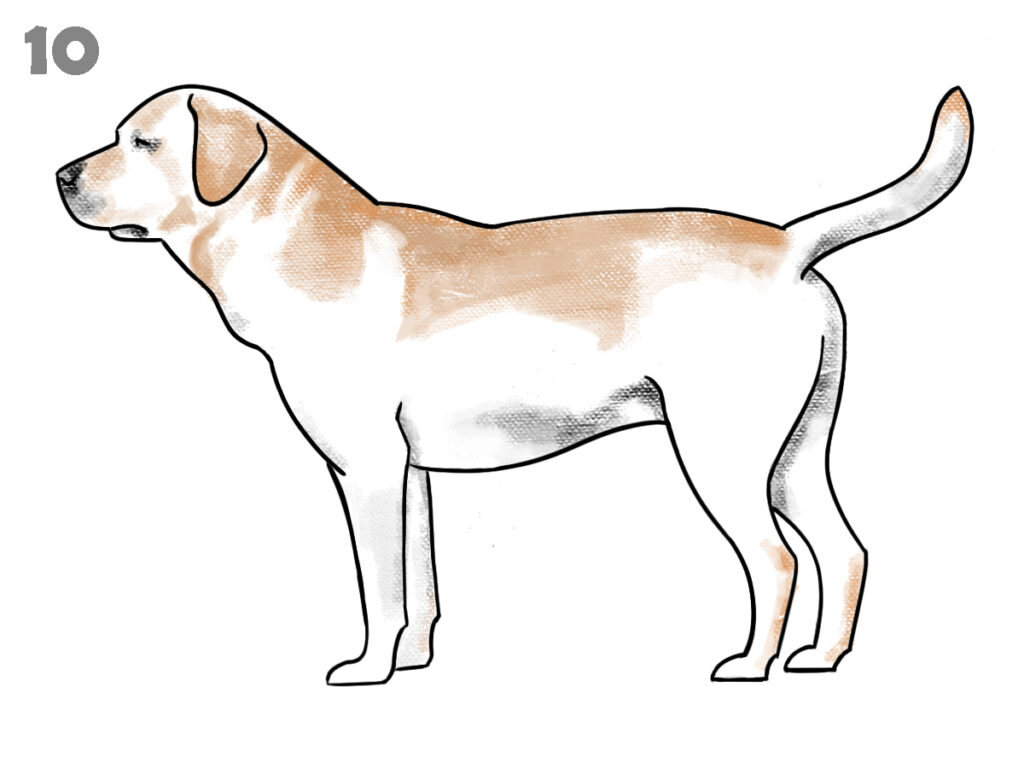
Apply light brown colour on the ear, back, tail, and some body areas. The rest of the body remains white. Colour is soft and uneven, matching the image style. No extra details are added. The final dog drawing looks complete with simple colouring and clear outlines.
Conclusion
This step-by-step dog drawing shows how simple shapes slowly turn into a complete figure. By following each image in order, the head, body, legs, and tail are drawn clearly. The final outline and light colour make the drawing neat and easy to understand, using only basic lines and smooth curves.