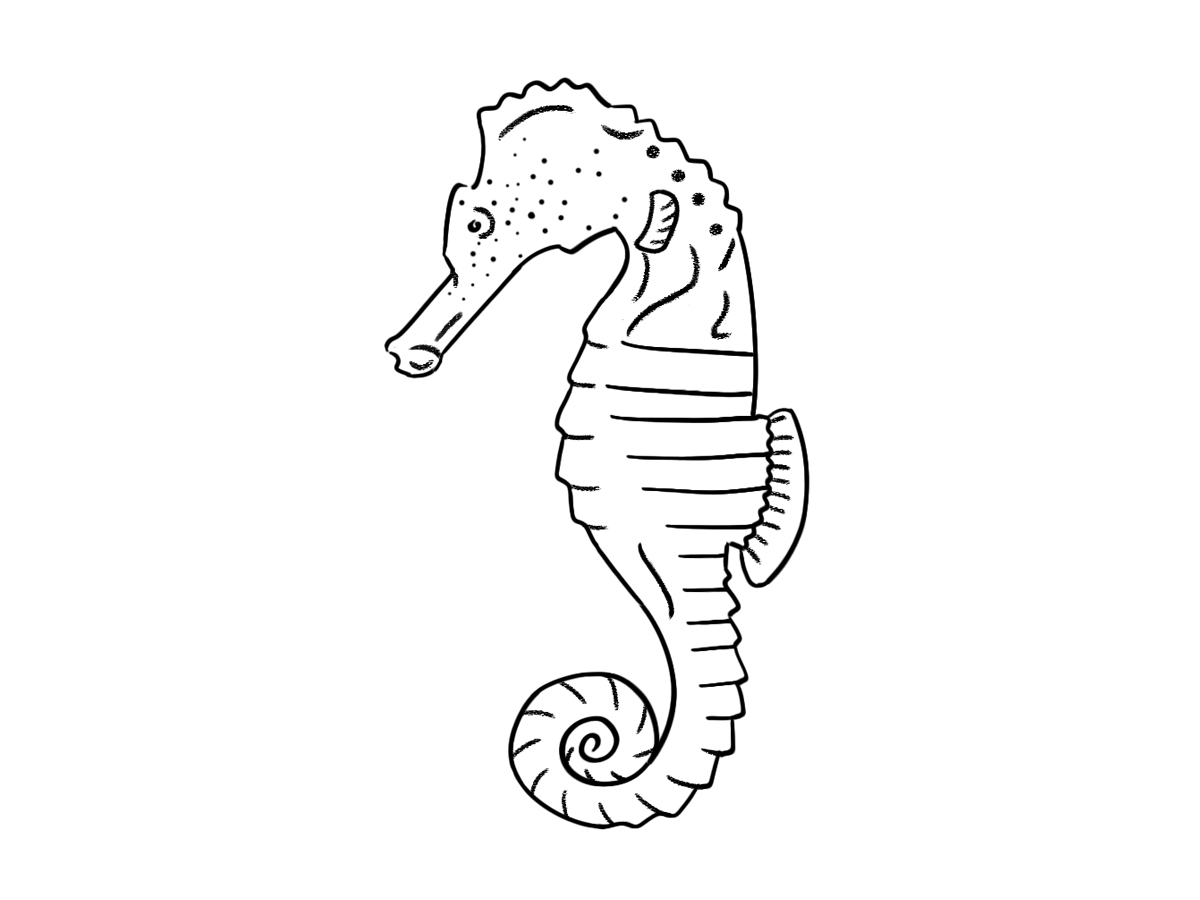
This blog post explains how to draw a seahorse step by step using clear shape guides and line progress. Each stage shows how simple circles and curves slowly change into a complete seahorse drawing. Follow the order carefully to understand how the body, head, and tail are formed.
let’s begin
Step 1: Draw Basic Shape Guides
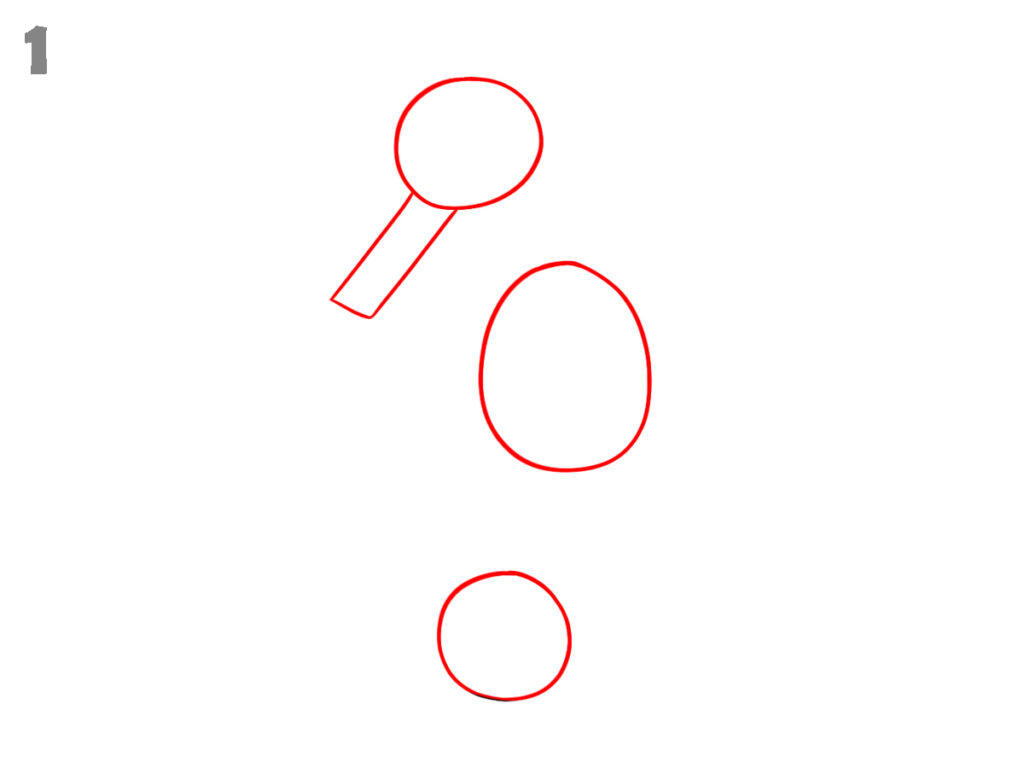
Start by drawing simple red guide shapes. Make one small circle for the head area, one long oval below for the body, and a small circle at the bottom for the tail base. Add a short slanted rectangular shape connected to the head circle to show the mouth direction.
Step 2: Outline the Head and Mouth
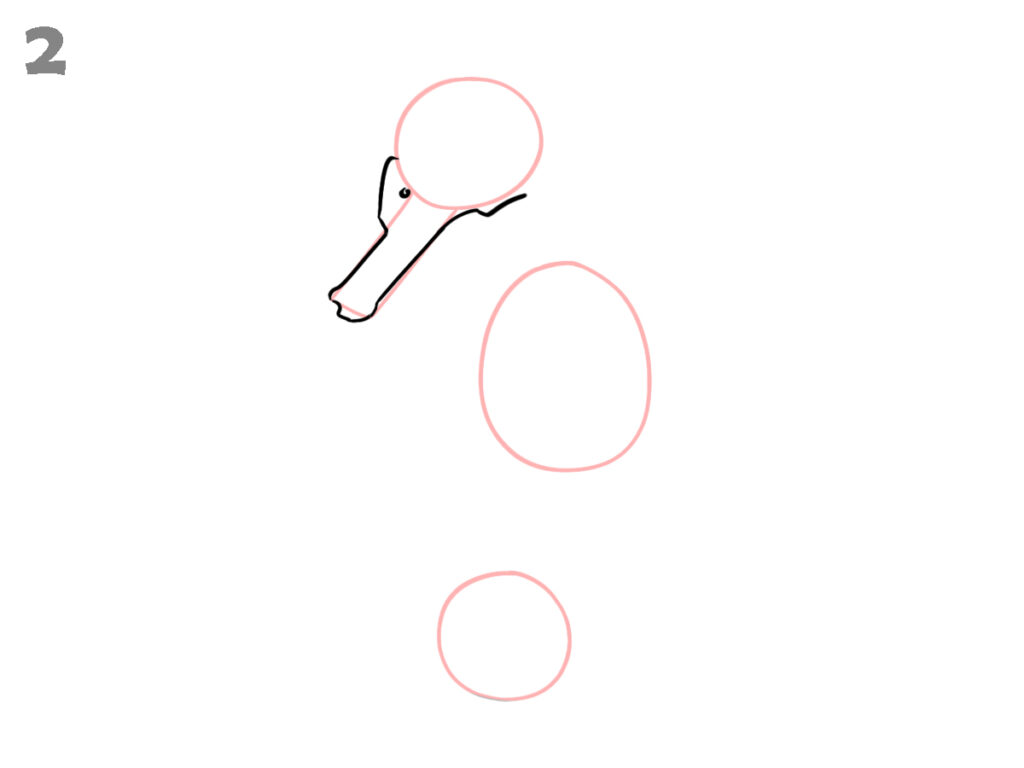
Using the head circle and mouth guide, draw clean black lines to shape the head and long mouth. The mouth appears narrow and slightly bent downward. Keep the outline smooth and follow the red guides closely. a mall circle like in the image shown for eye. Do not change the size or direction of the head shape.
Step 3: Begin the Body Curve
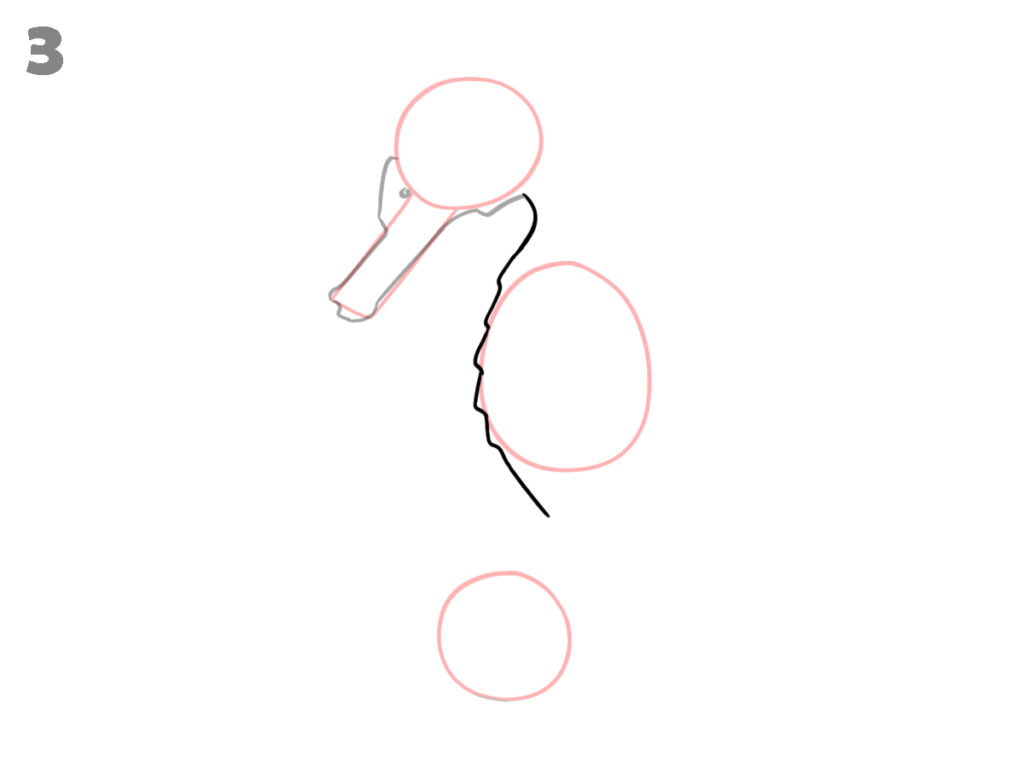
Draw a curved black line from the back of the head down toward the body oval. This line follows the outer body guide and creates the main body flow. The curve moves inward near the bottom, matching the seahorse posture shown in the image.
Step 4: Complete the Outer Body Line
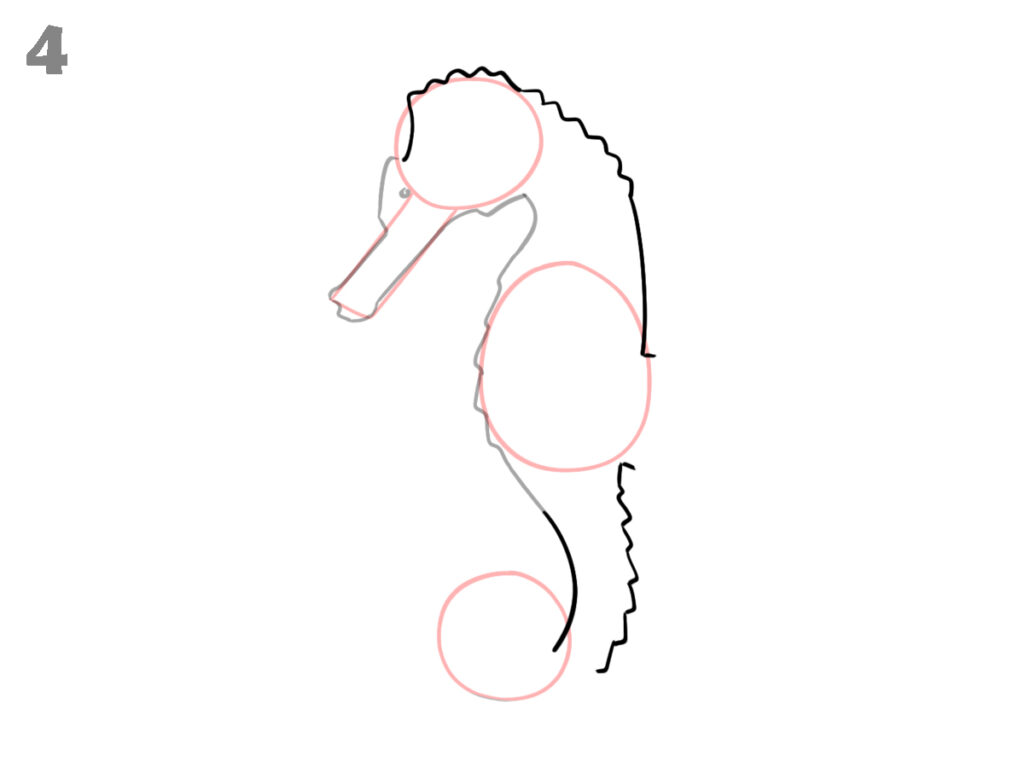
Extend the curved outline further down to the lower guide circle. Add small uneven edges along the back line to show the rough body surface. Keep the front body line smooth and light, following the oval shape without adding extra details at this stage.
Step 5: Add Inner Body and Tail Curl

Draw the inner body line from the chest down to the tail area. Start curling the tail using a spiral line inside the lower circle. Add small dot marks on the head area as shown. Draw the side fin shape near the middle body oval.
Step 6: outer Tail Spiral and Fin
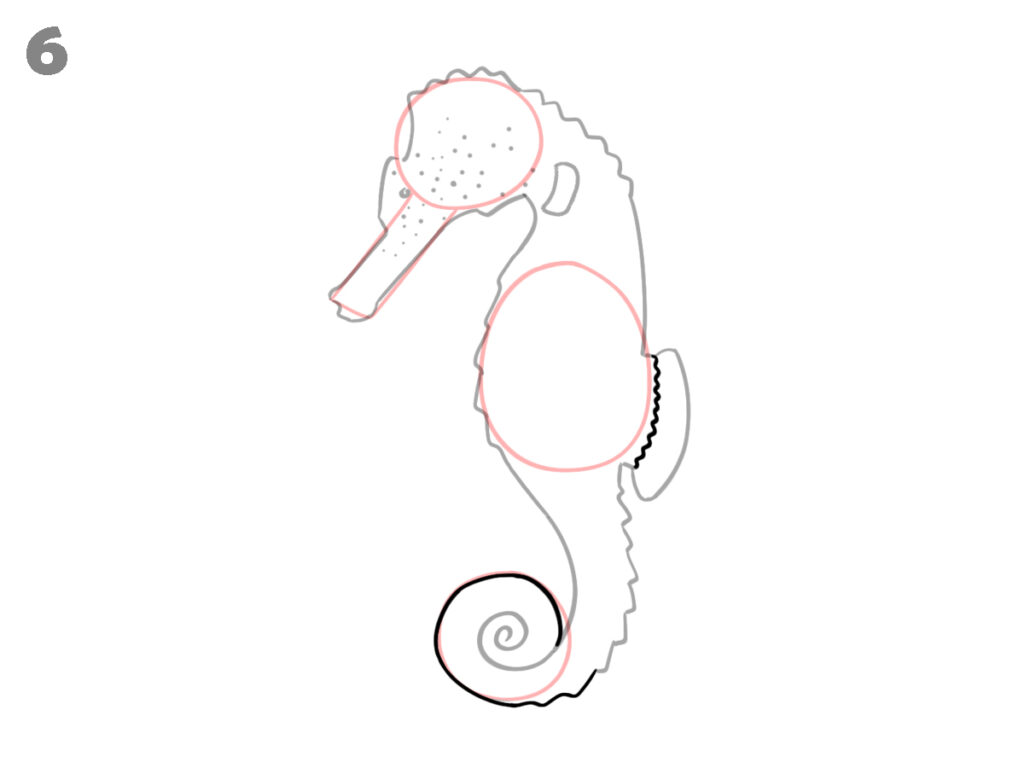
draw outer spiral tail line and make the curl clearer and round. Adjust the side fin shape with short curved lines. Keep the body outline steady and remove guide confusion by strengthening only the black lines shown in the image.
Step 7: Remove Guides and Draw Body Segments
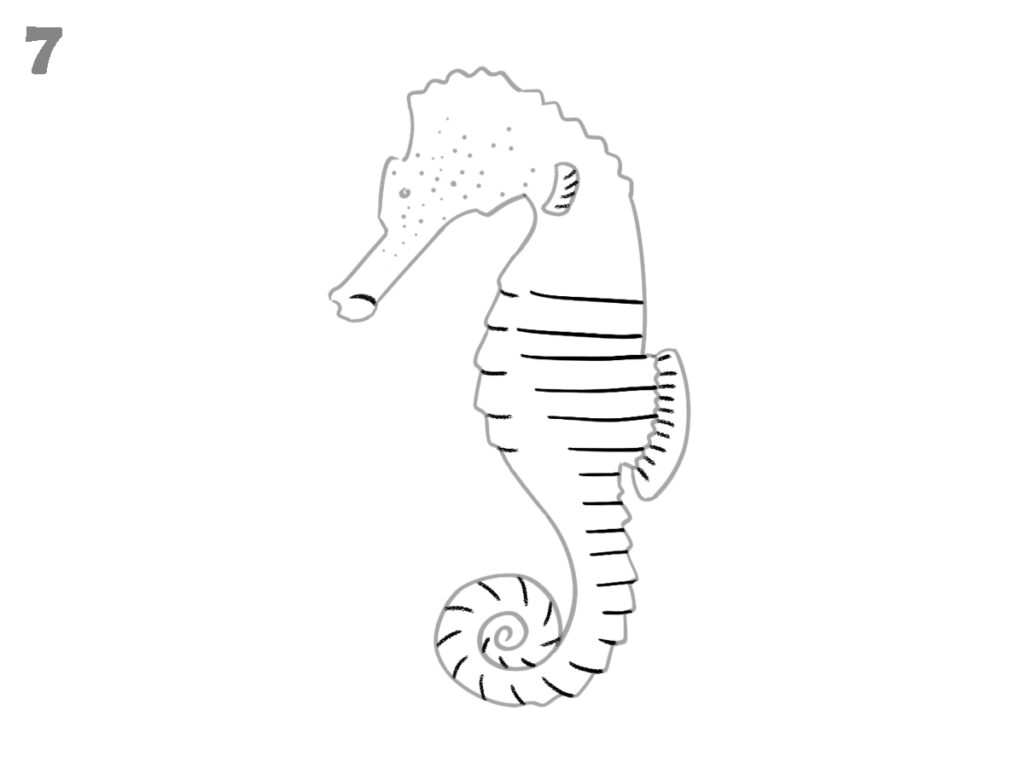
Carefully remove all remaining red and grey guidelines from the drawing. Add horizontal short lines across the body to show segment sections. These lines are evenly spaced from the chest area down to the tail base. Keep them straight and simple. Do not extend them outside the body outline.
Step 8: Add Head Details
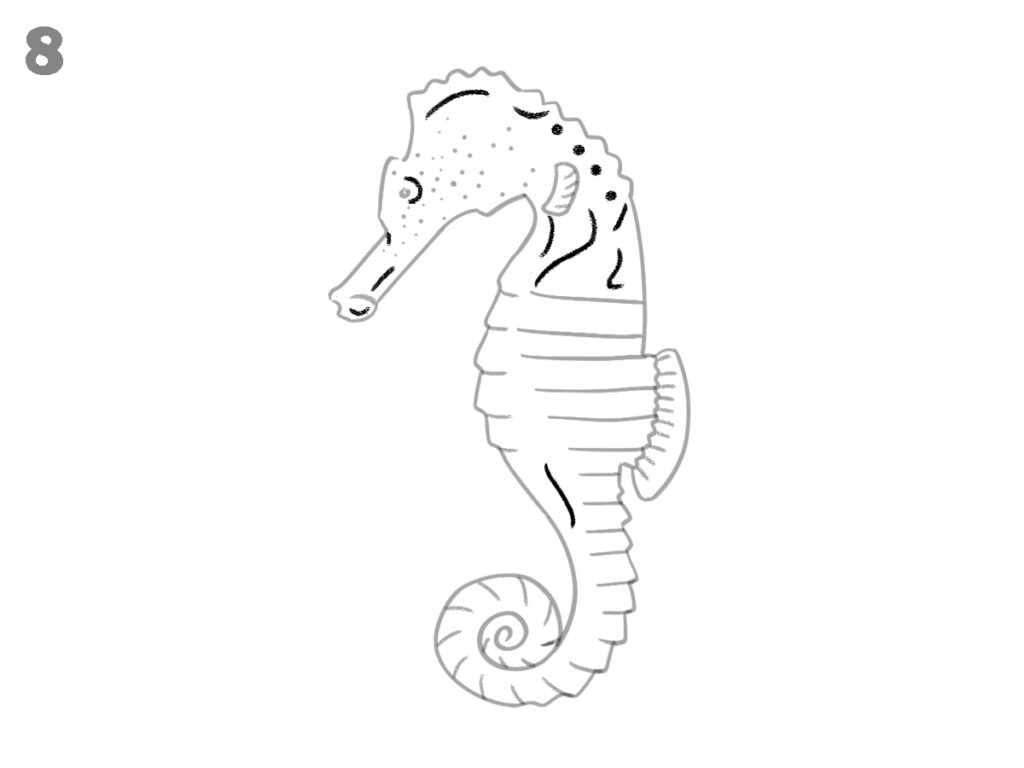
Draw small dot textures on the head area and add curved lines near the eye and neck. Add small dark spots and short lines on the upper body. These details are light and follow the image exactly without filling large areas.

Step 9: Final Corrections and Clean Drawing
Check the full drawing carefully and correct any line mistakes visible when compared with the image. Adjust uneven outlines, body segment lines, tail curl, or small head marks to match the final shown shape. Keep only clean black lines. Remove overlaps, extra strokes, or unclear edges so the seahorse looks neat and accurate.
Conclusion
This seahorse drawing is completed by moving from simple guides to clear outlines and small details. Each step builds the shape slowly using curves, segments, and light textures. Following the order shown in the images helps maintain proper form, balance, and clean structure throughout the drawing.