This blog post explains how to draw a tiger step-by-step using clear shapes and smooth lines. The images guide you from basic body forms to final details. Each step helps you understand structure, balance, and simple drawing flow without using hard words or confusing terms.
Let’s get started
Step 1: Draw the Main Body Shape

Start by drawing a long horizontal rectangle to form the tiger’s body. Add a neat circle on the front right side of the rectangle for the head position. Keep the lines light and clean. This step helps you set the correct size, direction, and overall balance before adding any details or extra shapes.
Step 2: Add Simple Leg Guides
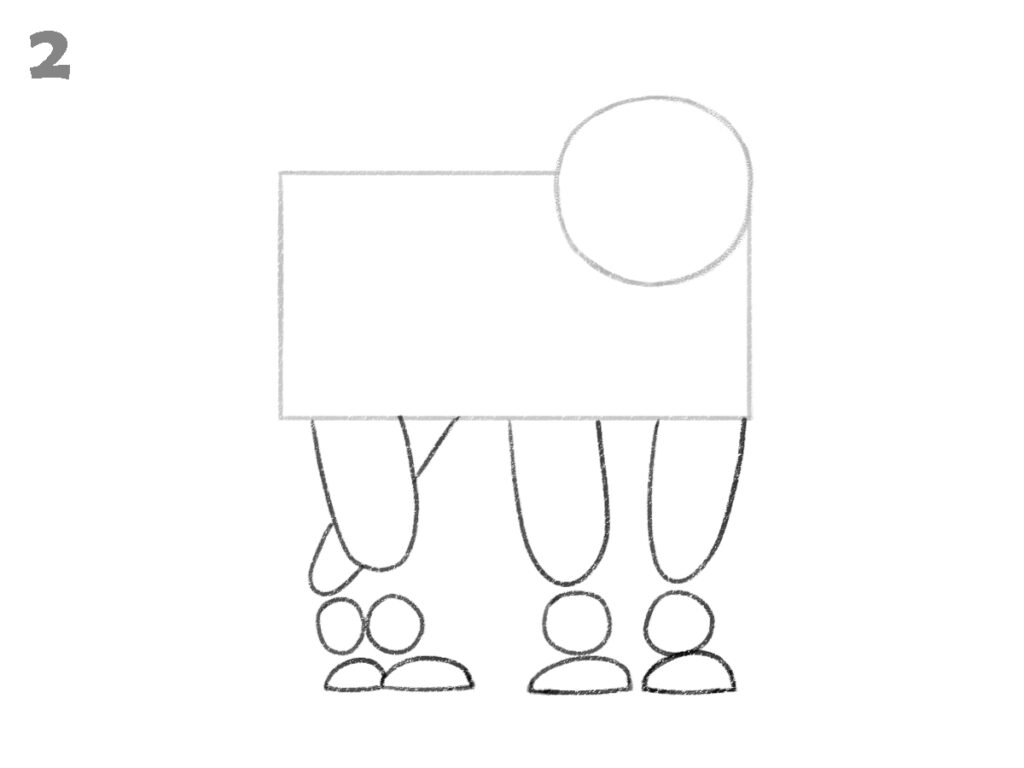
Under the rectangle, draw four hanging shapes to guide the legs. These shapes should look soft and slightly curved, showing how the legs will stand. Add small oval shapes at the bottom for feet placement. No need to add details now. This step helps fix posture and ground contact clearly.
Step 3: Shape the Head and Face Guide
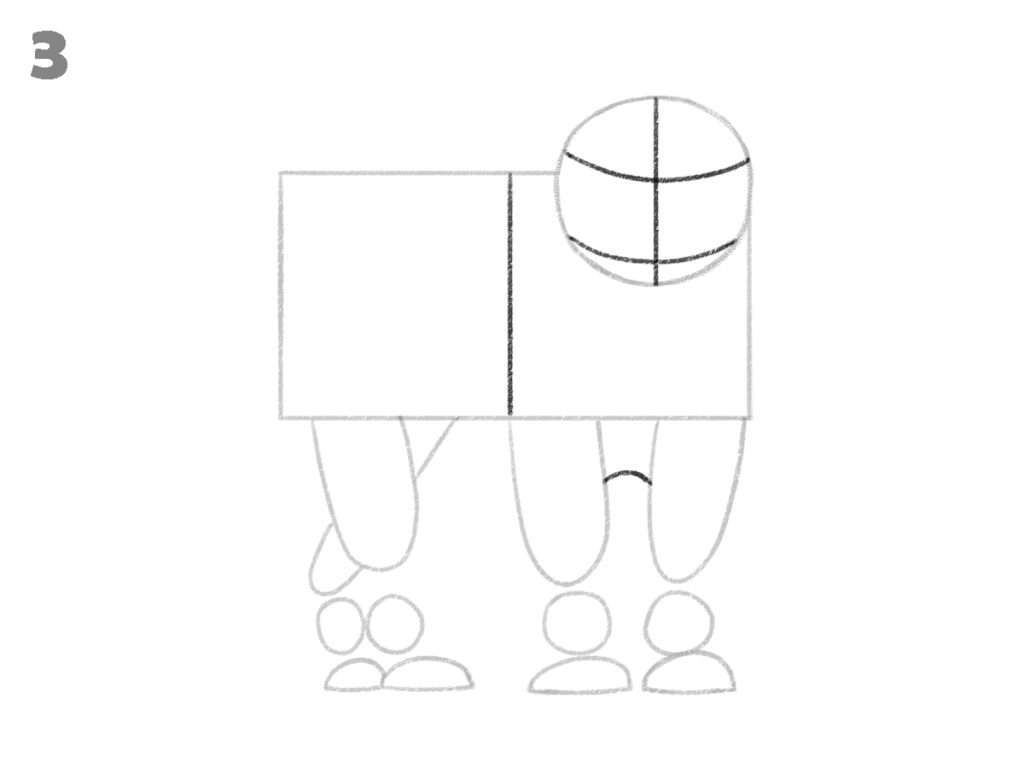
Inside the head circle, draw one vertical and two horizontal lines according to the above image. These lines help place eyes, nose, and mouth evenly. Also draw one vertical line in the center of horizontal rectangle. Remember to keep all lines light so changes are easy in later steps.
Step 4: Add Ears and Tail Line
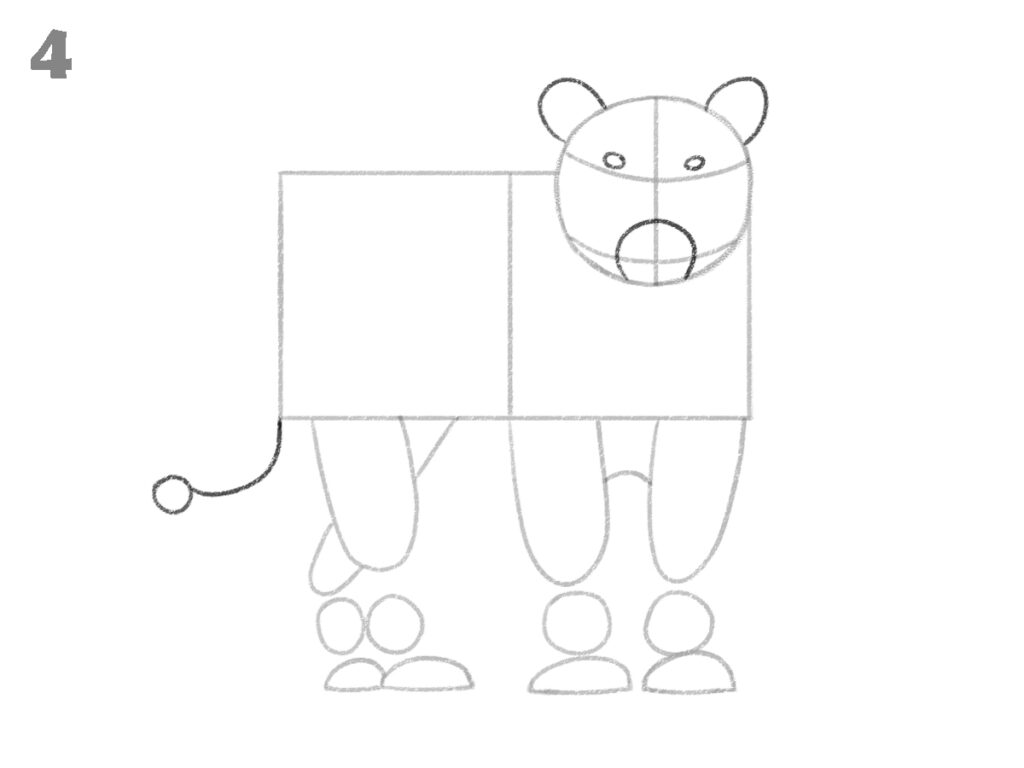
Draw two small rounded ear shapes on top of the head, one on each side. From the back of the body, add a thin curved tail line with a small circle at the end. This step improves the animal form and shows direction without adding thickness or final details.
Step 5: Draw Basic Facial Features
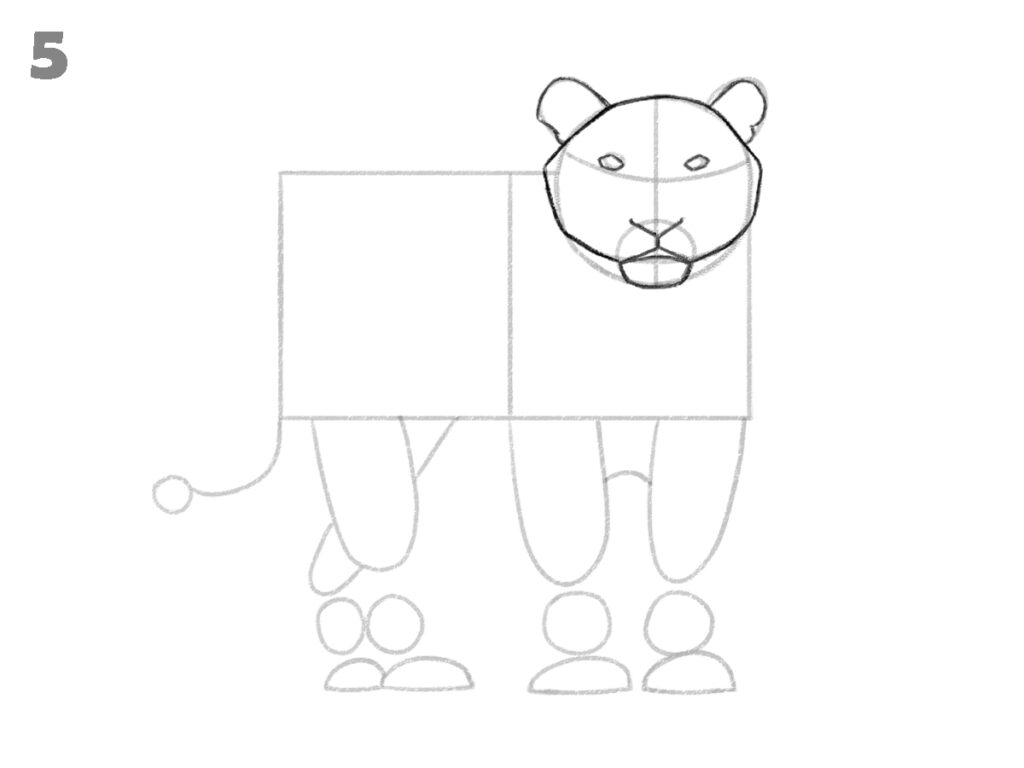
Using the face guidelines, sketch simple eye shapes, a small nose, and a short mouth line. Keep expressions calm and natural. Do not darken lines yet. This step focuses only on correct placement, helping the face look balanced and aligned with the body shape.
Step 6: Refine the Body Shape
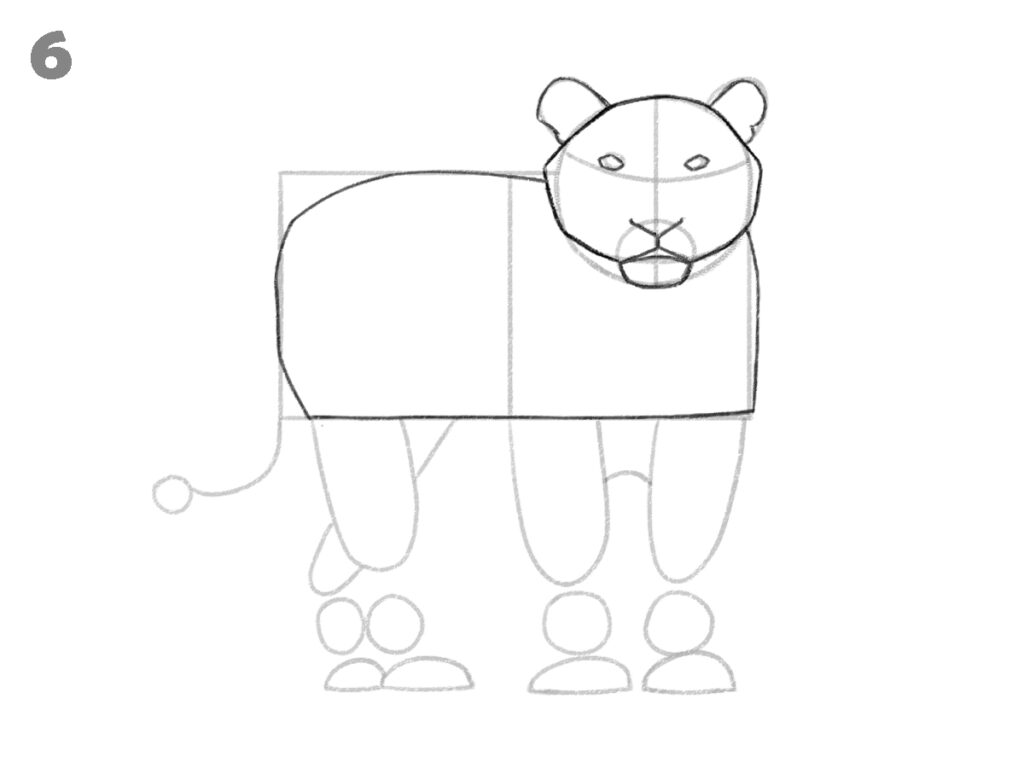
Now focus on the main body. Smooth the rectangle into a soft, curved shape by rounding the corners. Make the body look according to the above image. Make sure the head joins the body smoothly. Keep lines clean and remove sharp edges slowly.
Step 7: Shape the Legs Clearly
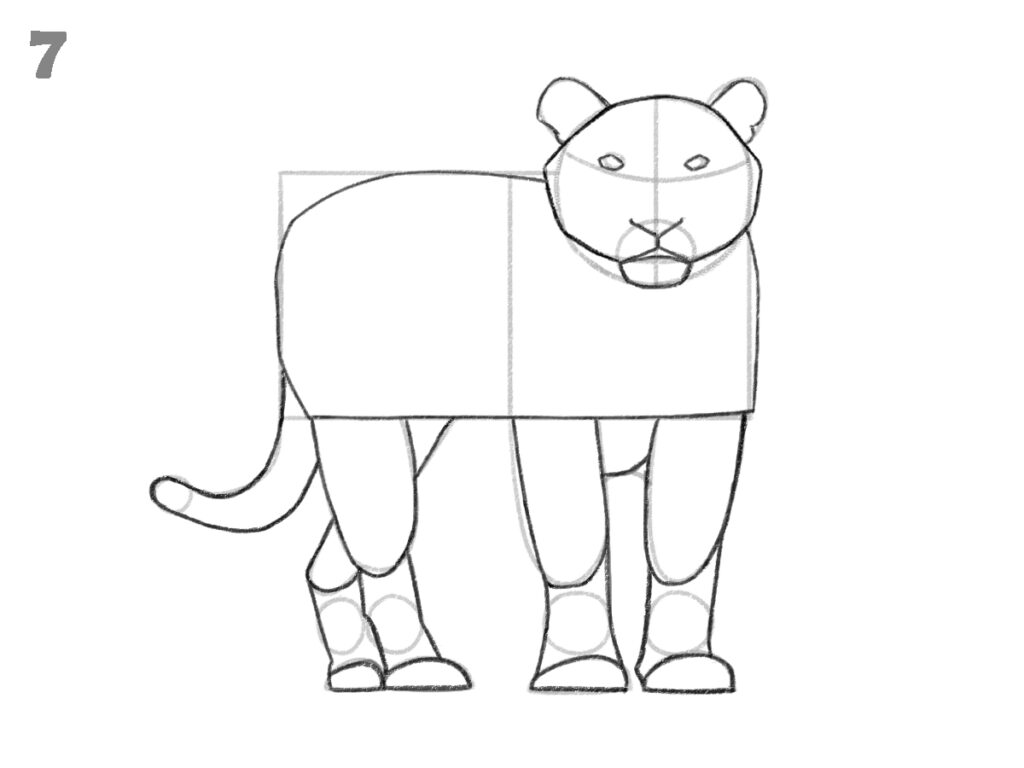
Next, work on the legs. Use the earlier guides to give each leg proper thickness and smooth curves. Make sure all four legs look balanced and touch the ground evenly. Refine the joints and lower parts without adding paws yet. This step helps fix posture.
Step 8: Clean the Face Outline
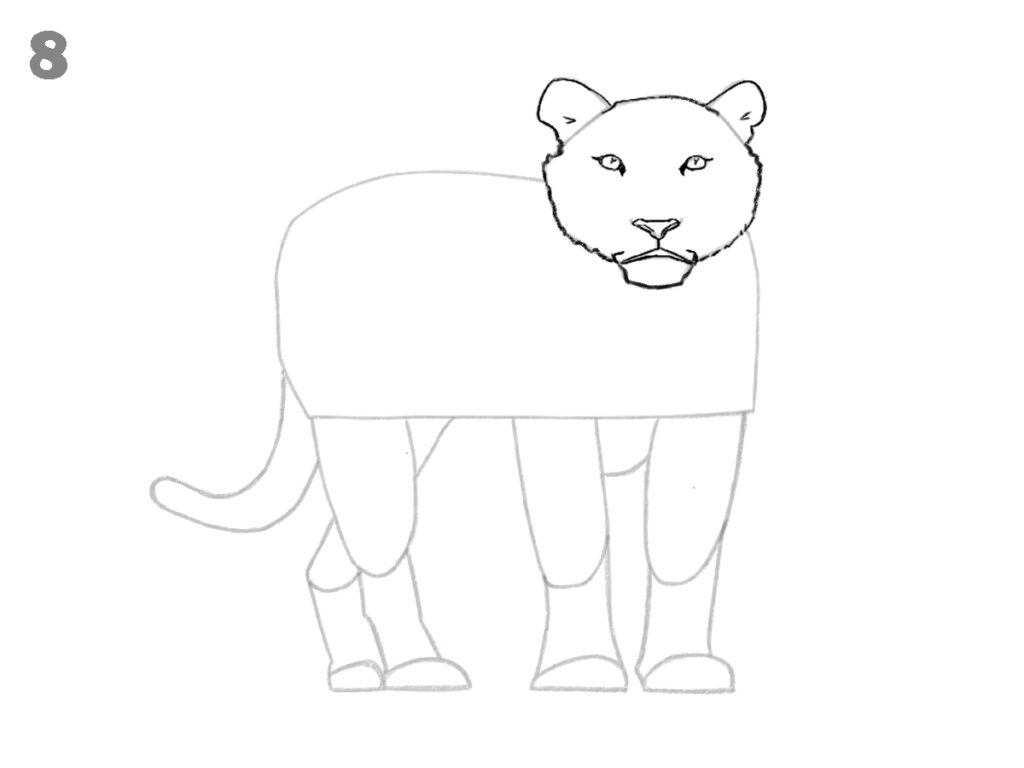
Refine the face shape by smoothing the cheeks, jaw, and forehead. Adjust ears slightly and clean eye and mouth lines. Remove guide marks gently. This step gives the tiger a clear identity and prepares the face for final detail.
Step 9: Final Outline Without Patterns
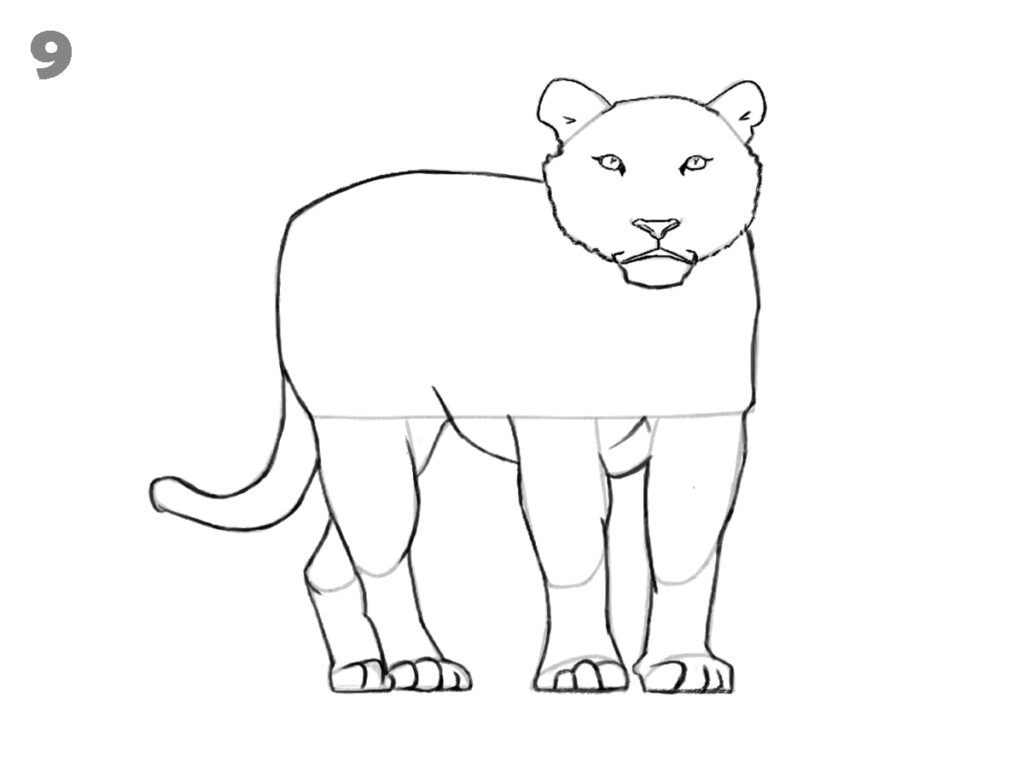
Draw clean, confident outlines over the full body, legs, paws, tail, and face. Remove all construction lines completely. Keep the surface plain without stripes. This step shows the finished tiger form clearly and helps you check shape accuracy before adding surface details.
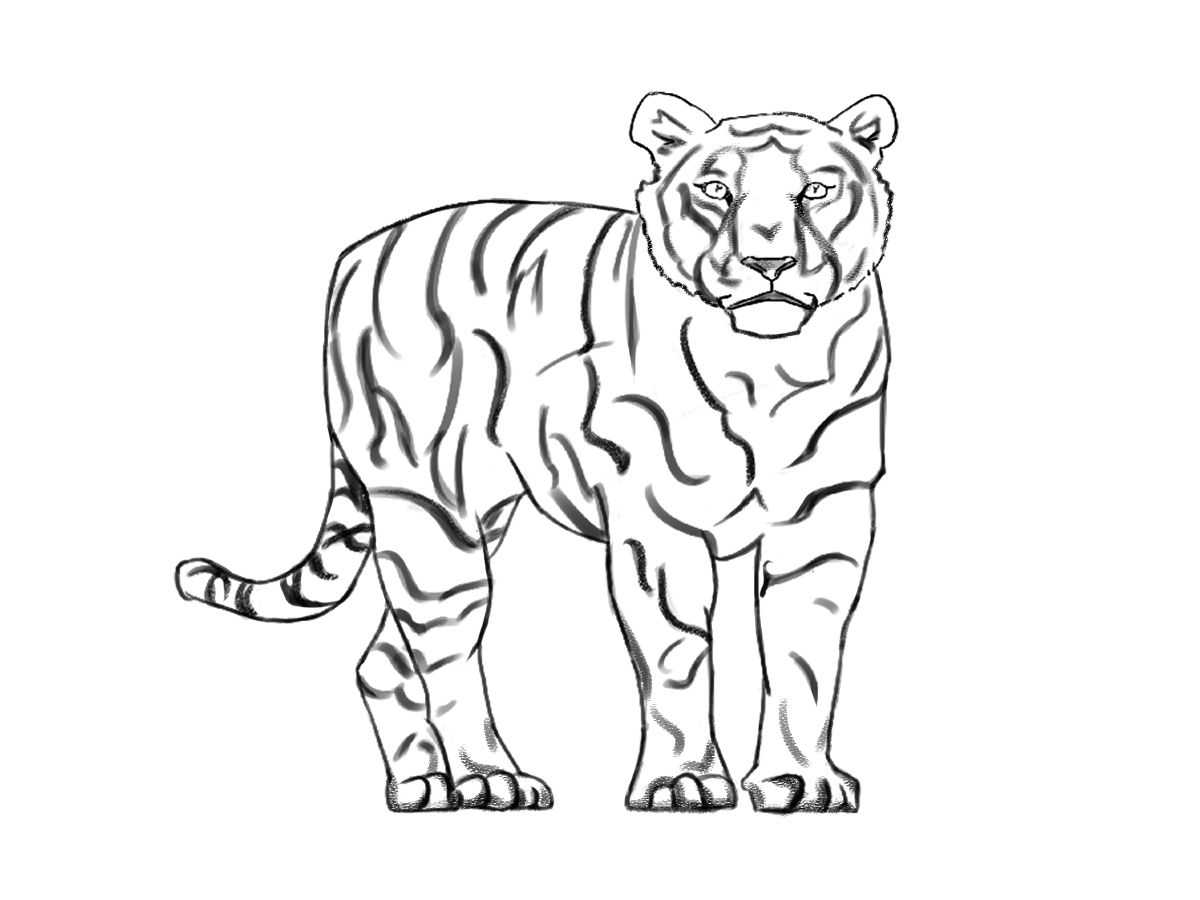
Step 10: Add Stripes and Final Touches

Carefully draw stripe patterns on the face, body, legs, and tail as shown. Keep the stripe flow natural and spaced well. Darken the final outline slightly for clarity. This step completes the tiger drawing, giving it recognizable character while keeping the structure neat and simple.
Conclusion
Following these steps shows how to draw a tiger in a clear and steady way using simple shapes and clean lines. Each stage builds form, balance, and detail slowly. By moving step by step from structure to final stripes, you can create a neat tiger drawing.