Learning how to draw boots becomes easy when each step is shown clearly. This guide explains the full boot drawing using simple shapes and clean lines. Every stage follows a clear order, starting from guide shapes to final details, making the process simple to understand and follow.
let start
Step 1: Draw the Base Guides
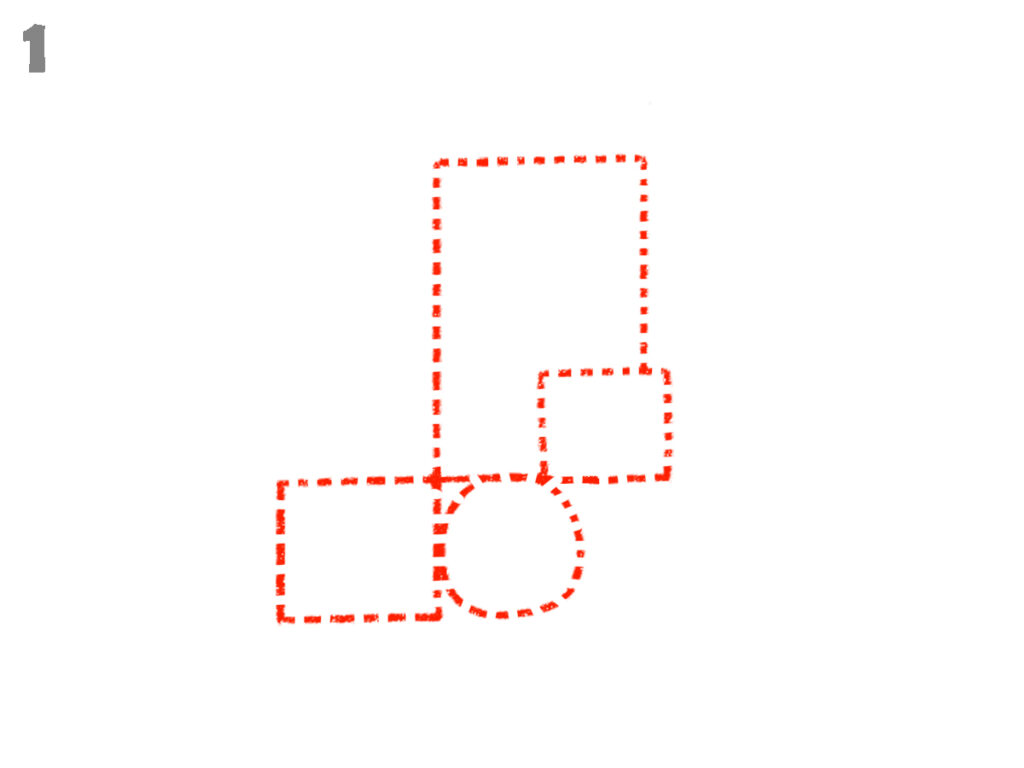
Draw a tall vertical dotted rectangle for the main upper section. Add a small dotted rectangle on the right side touching the first shape. Draw another horizontal dotted rectangle near the bottom left area. Add a dotted circle at the front bottom. Position all shapes overlapping as shown.
Step 2: Draw the Outer Outline

Draw the curved top opening following the upper guide. Draw the straight back edge down to the bottom. Shape the front toe area with a smooth, rounded curve. Draw the bottom sole line following the lower guide shape. Keep the lines smooth and connected.
Step 3: Refine the Boot Shape
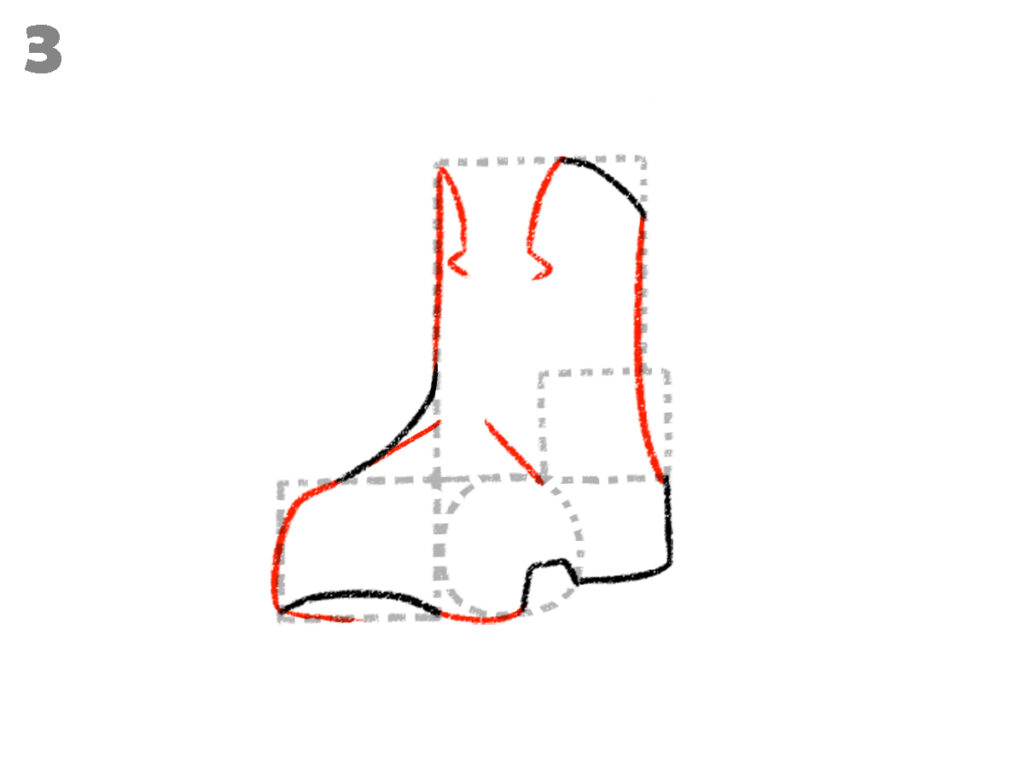
Draw an inner curved line near the ankle section. Adjust the front toe curve slightly inward. Draw a clearer heel curve at the back bottom. Draw the lower sole edge with a smoother curved line. Follow the shape shown in the image carefully.
Step 4: Add Inner Panel Lines
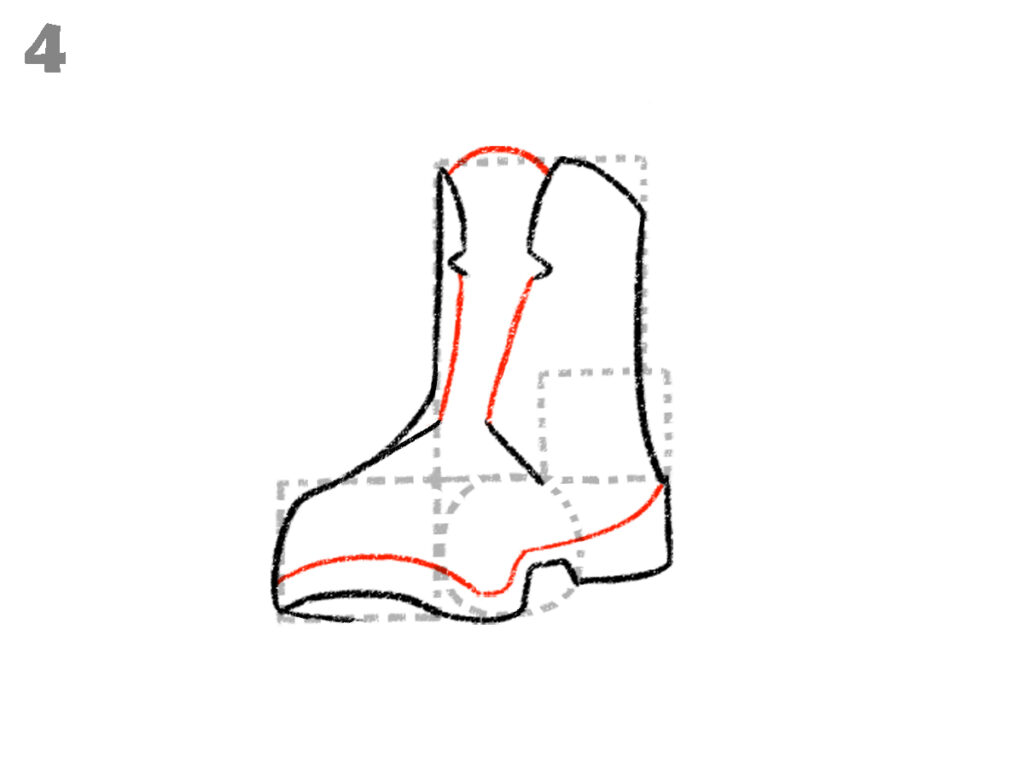
Draw a curved line on the upper front section of the boot. Add a longer curved line running downward toward the sole area. Connect it smoothly near the lower part. Follow the exact placement and direction shown in the image reference.
Step 5: Draw the Lace Panel and Holes
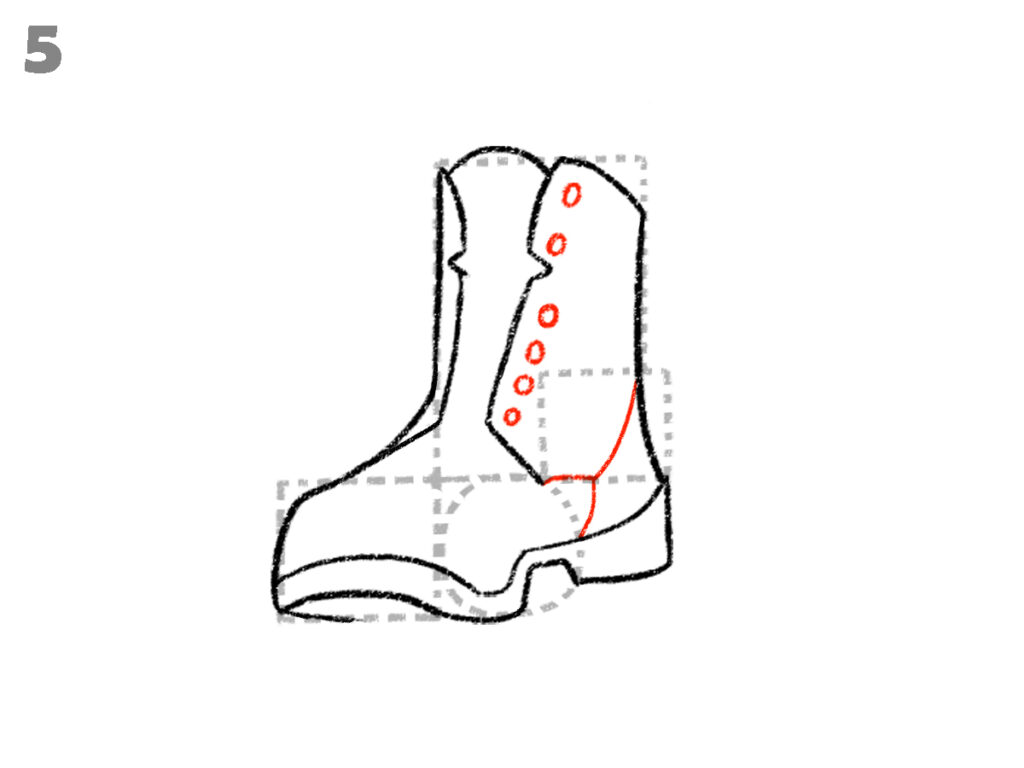
Draw the lace panel shape on the front upper area of the boot. Keep the edges straight and slightly angled. Inside the panel, draw small circular holes arranged vertically. Maintain even spacing between each hole from top to bottom.
Step 6: Add Lace Lines and Sole Details
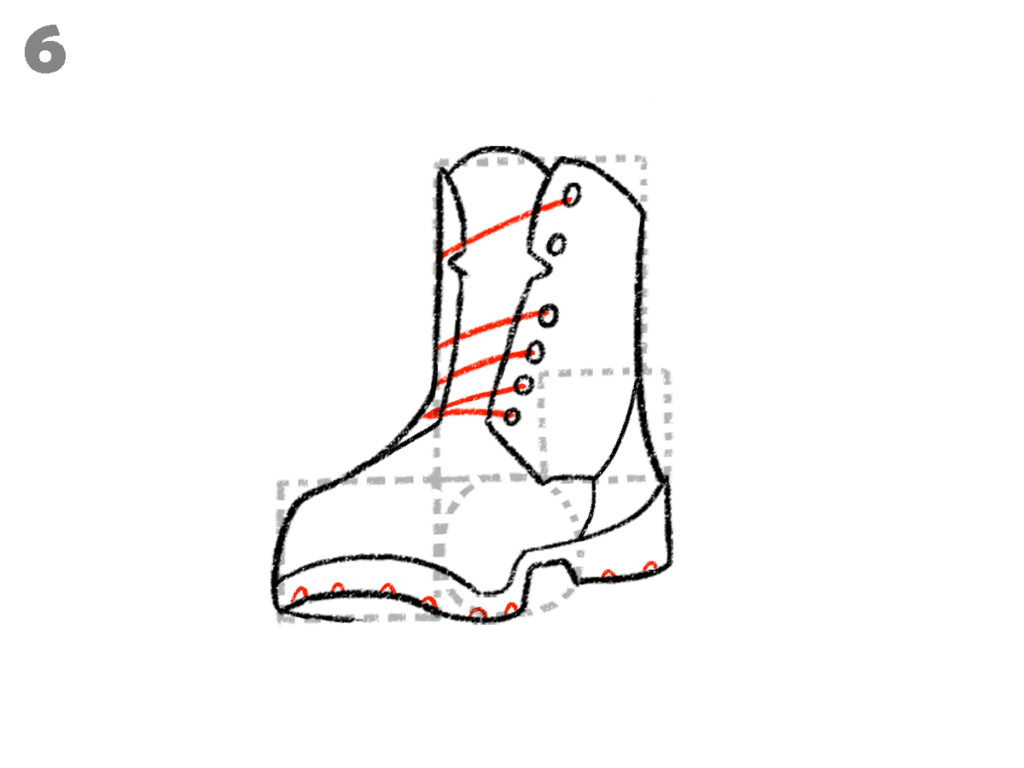
Draw diagonal lines connecting the lace holes from left to right. Continue the pattern downward between each hole. Add small curved shapes along the bottom sole edge. Draw the heel base line and small sole extensions as shown.
Step 7: Complete the Laces and Remove Guides
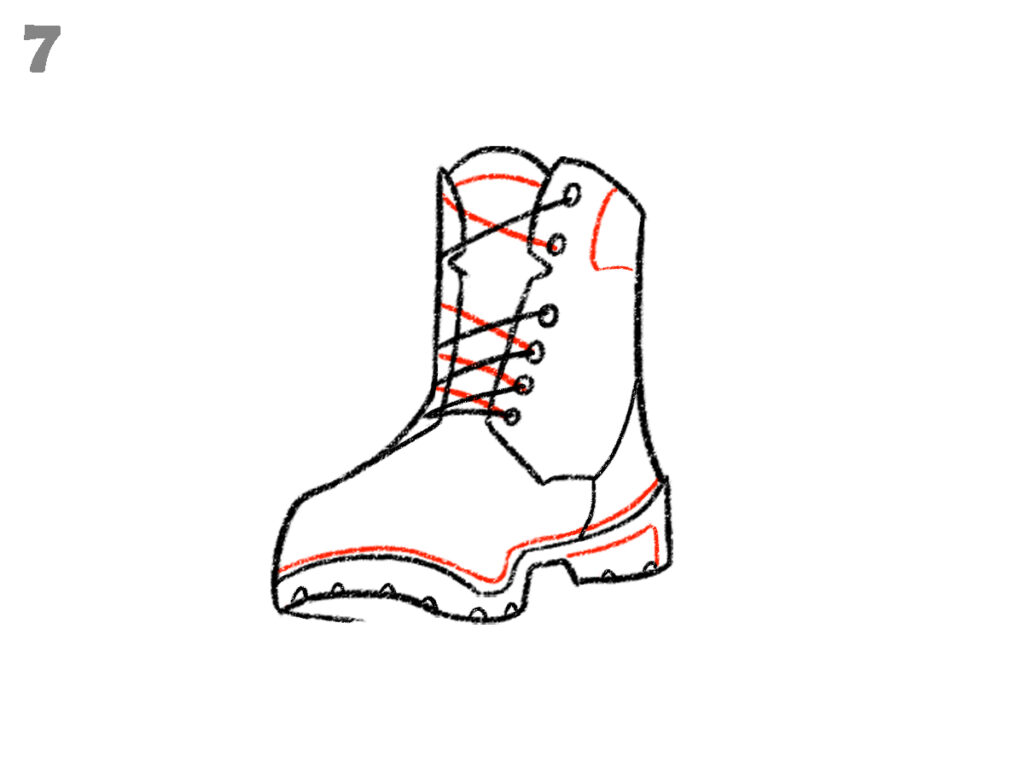
Draw crossing lace lines between the holes from top to bottom. Continue the crisscross pattern evenly across all eyelets. Add small curved lace ends near the top opening as shown. In this step, erase all dotted guide rectangles and the dotted circle completely.
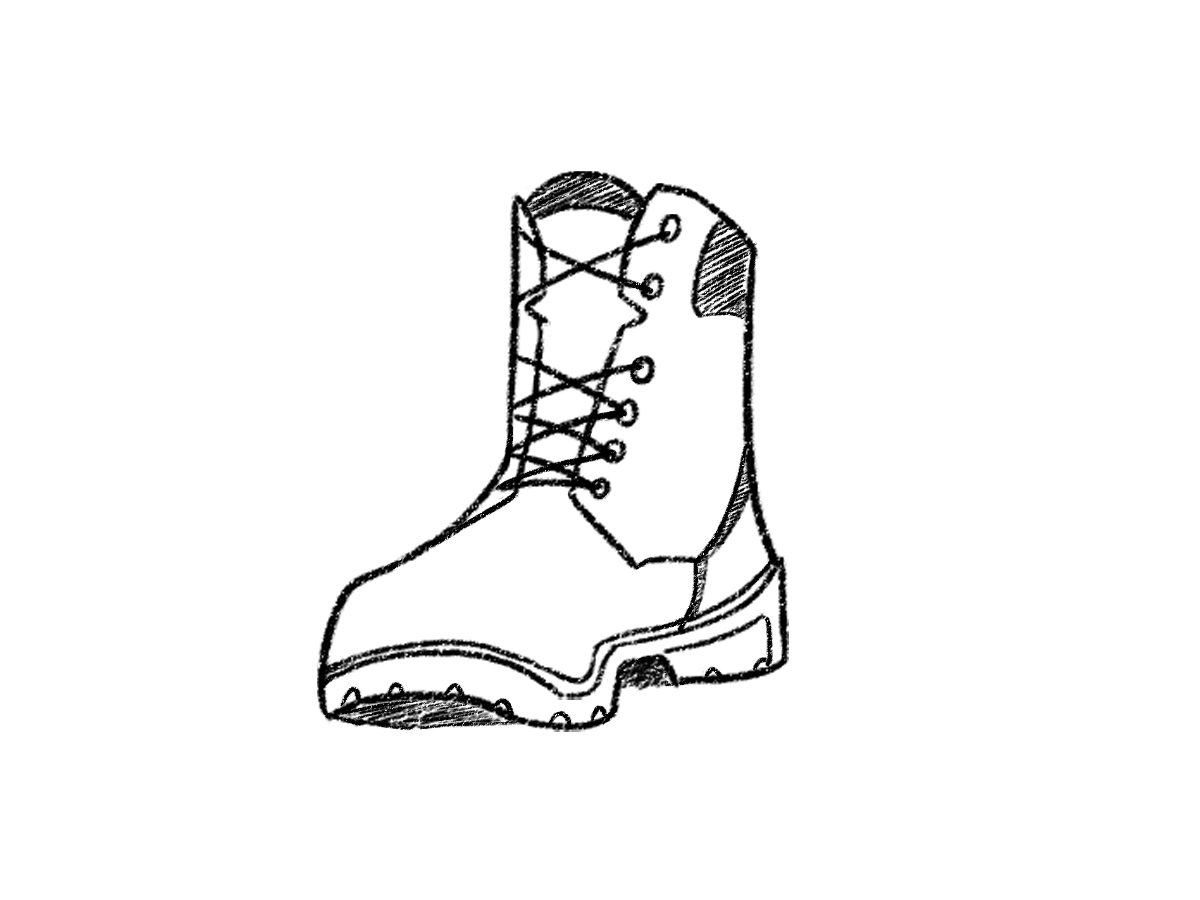
Step 8: Add Shading and Texture Marks
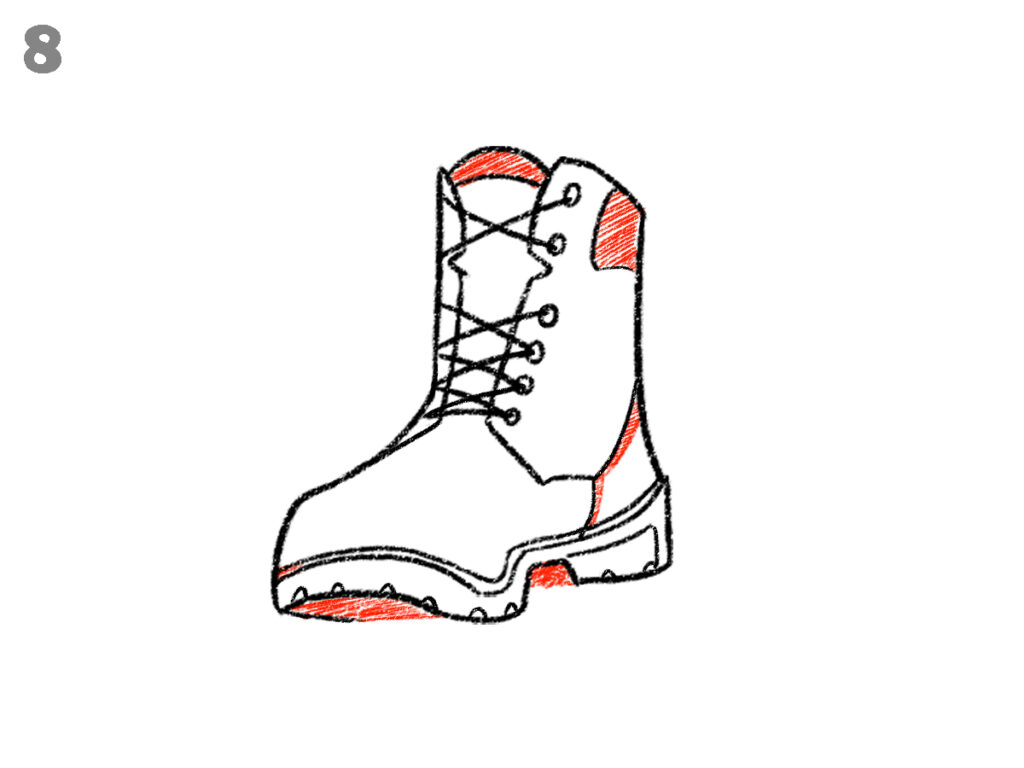
Draw short slanted lines inside the upper boot opening area. Add similar short lines on the back side panel. Draw small short marks under the sole area to show tread lines. Place them evenly along the bottom edge.
Step 9: Check and Clean the Drawing
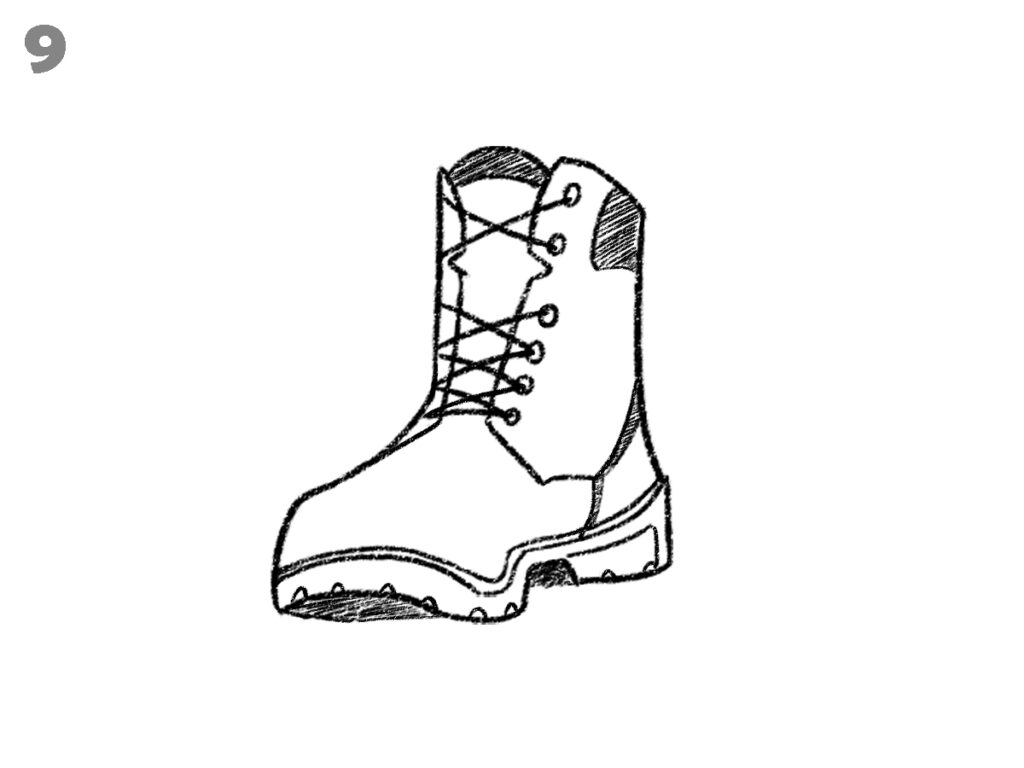
Check the full boot drawing carefully. Correct any uneven lines as shown in the image. Clean the outline around the top opening, toe, heel, and sole. Remove any remaining dotted guide marks completely. Keep the lace panel, lace pattern, shading lines, and tread marks neat and clear.
Conclusion
This how to draw boots tutorial shows the full drawing process using clear steps and visible changes. By following each stage in order, the boot shape, lace details, and sole become easy to complete. Practice the steps slowly, remove guide lines at the end, and focus on clean outlines for better results.