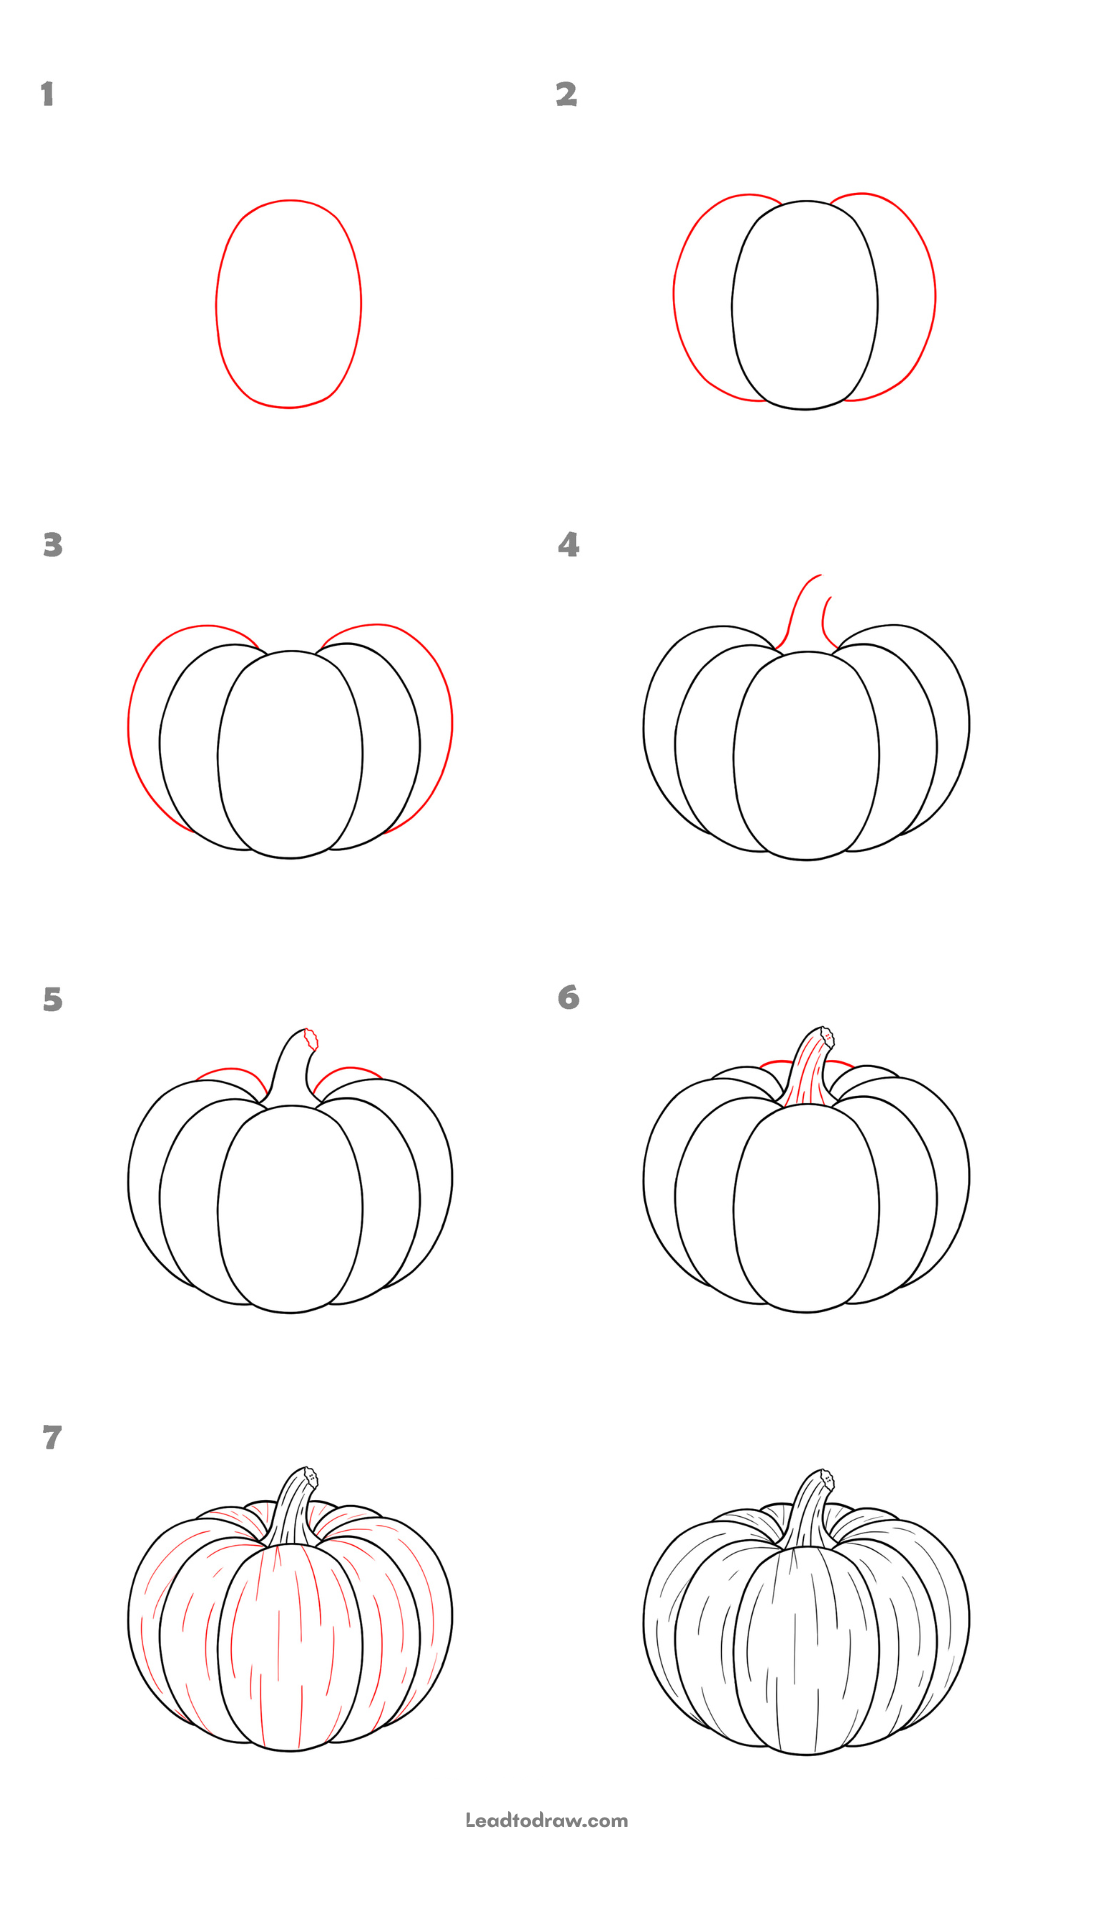
Learn how to draw pumpkin with this simple step-by-step tutorial. Start with a rounded middle shape, add the side sections, then draw the stem and pumpkin lines. Follow each stage in order and use the final picture as a reference while completing the drawing.
Lets start
Step 1: Draw the Middle Shape
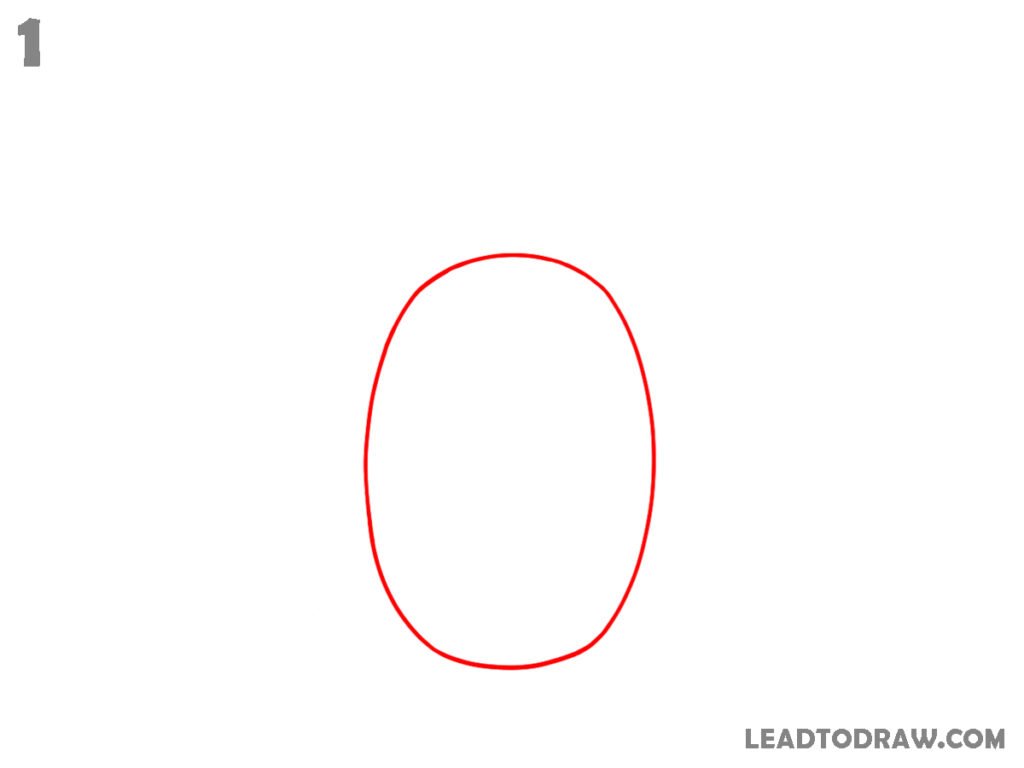
Start the pumpkin with one tall, rounded oval in the middle of the page. Draw the shape slightly wider around the centre and gently narrower near the top and bottom. Keep the outline smooth and closed, with the lower part rounded instead of flat. This oval forms the middle section of the pumpkin drawing.
Step 2: Add the Outer Sections
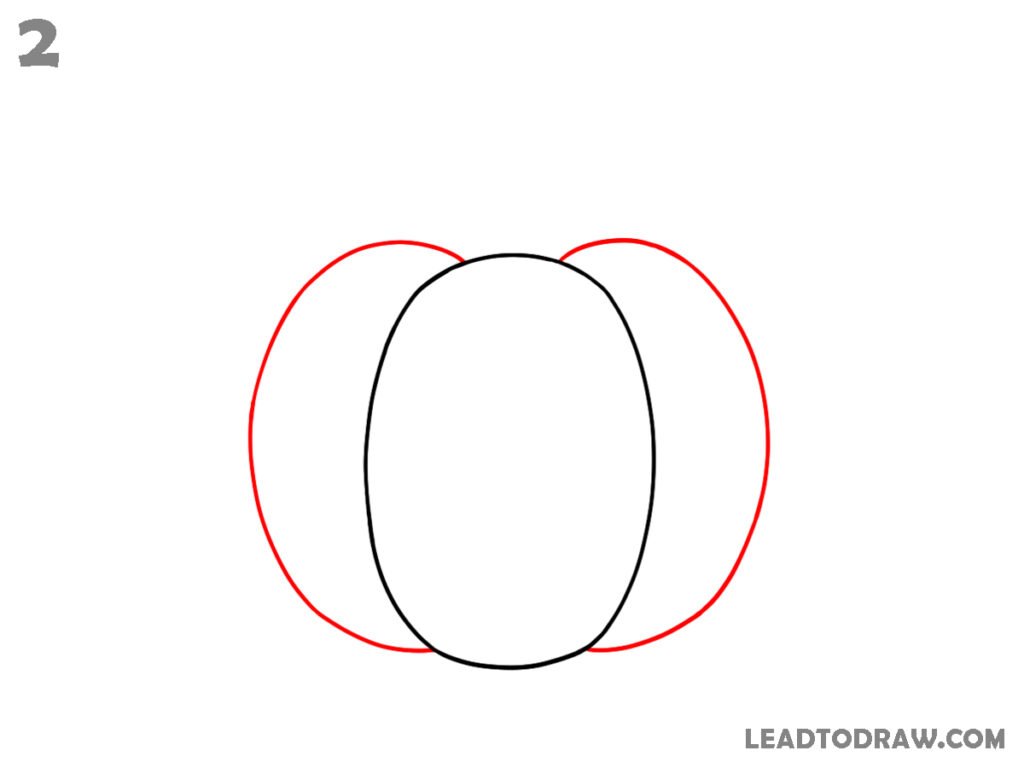
Add two curved sections around the middle oval. Draw one large rounded curve on the left, starting near the upper side and moving down to the lower side. Repeat the same type of curve on the right. Let both outer curves meet the central shape at the top and bottom areas naturally.
Step 3: Add the Inner Side Sections
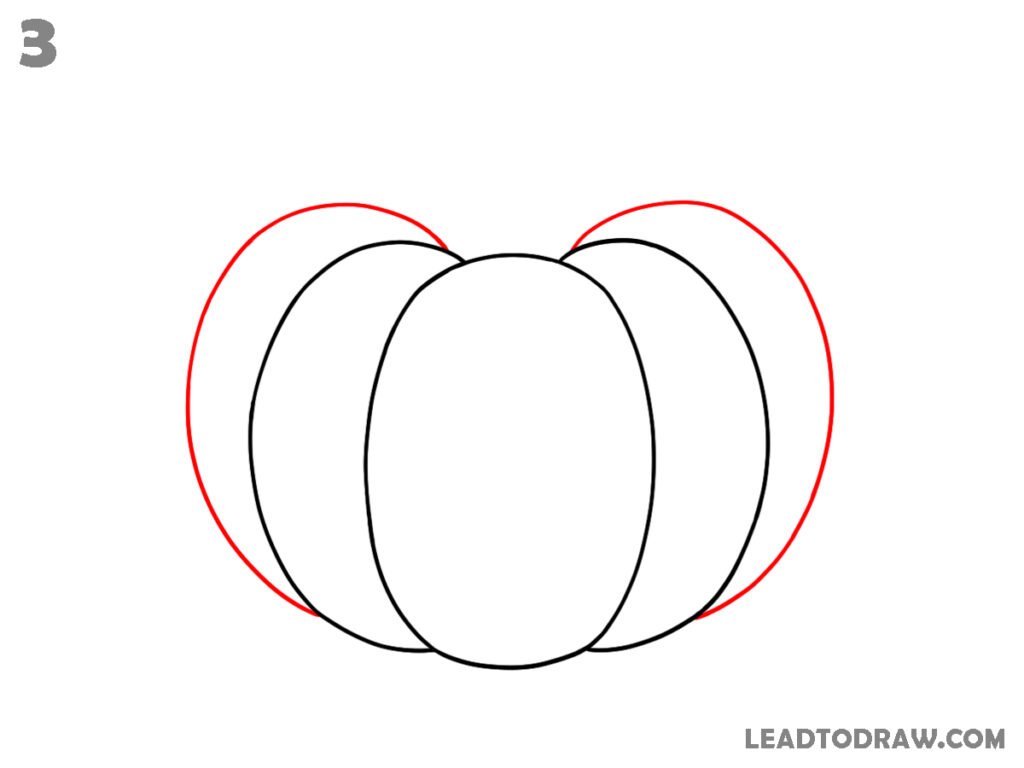
Draw another rounded section inside each outer side of the pumpkin. On the left, add a curved line from the upper centre area down towards the lower side. Repeat on the right with a matching curved line. These lines divide the pumpkin into more visible sections around the middle oval shape clearly.
Step 4: Draw the Stem
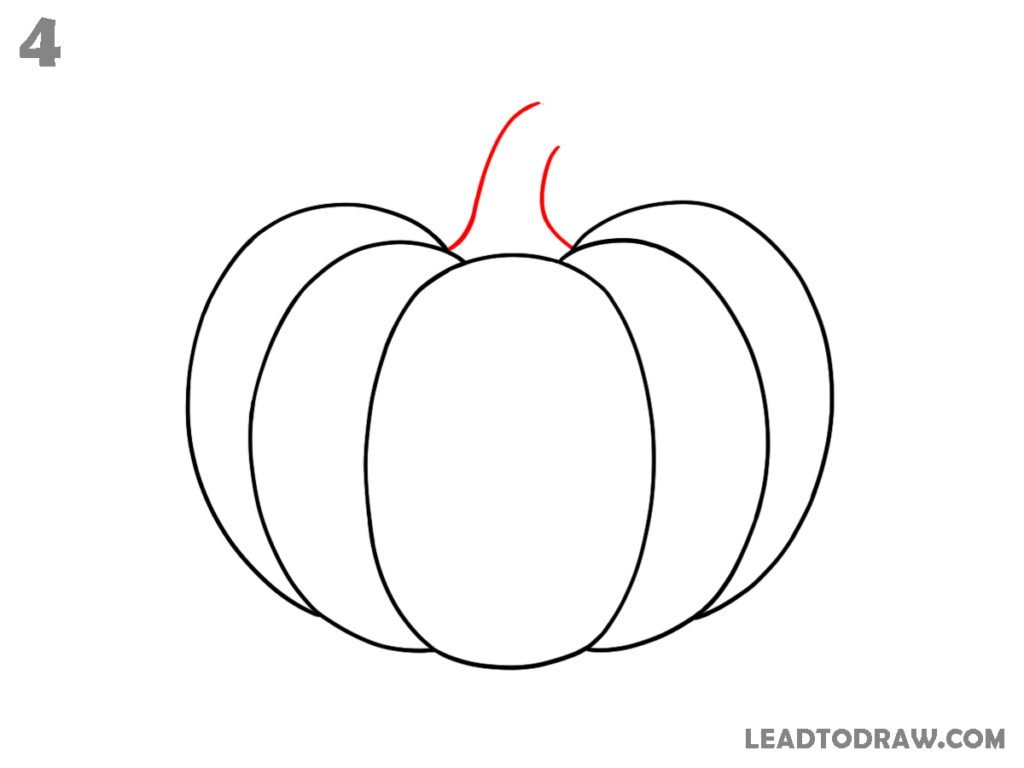
Draw the pumpkin stem at the top centre. Start from the upper edge of the middle section and curve the stem upward. Make the stem slightly narrow, then bend it gently to one side near the top. Close the stem with a small curved top and connect both sides to the pumpkin body.
Step 5: Add the Top Details
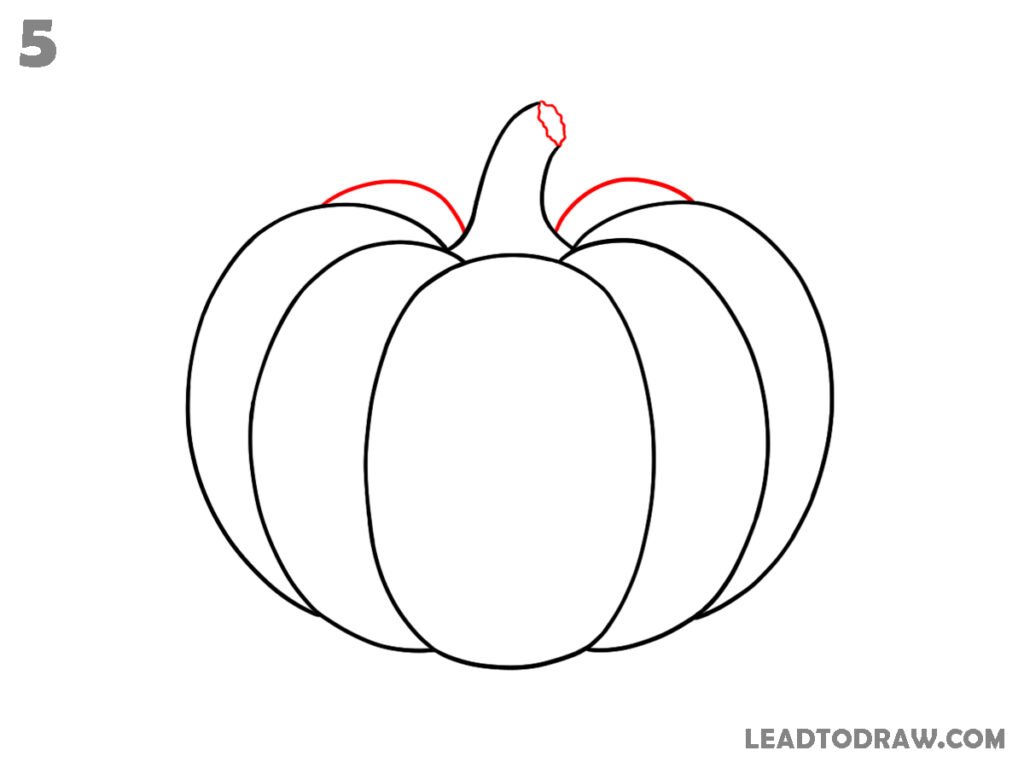
Add the small curved details around the top of the pumpkin. Draw short curved lines on the left and right where the upper sections meet the stem. Then add a small curved line across the top of the stem to define its end. Keep these lines close to the existing outlines without adding shapes or marks.
Step 6: Add Stem Lines
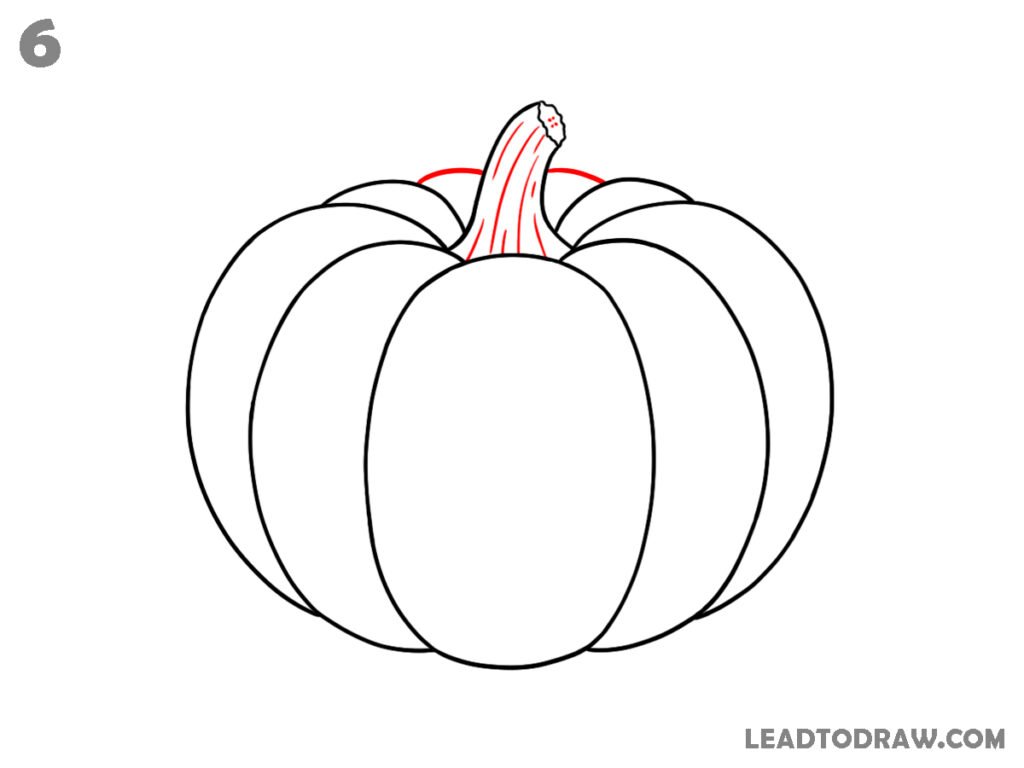
Add the details inside the pumpkin stem. Draw several long, narrow curved lines running upward along the stem. Follow the direction of the stem so the lines bend slightly with its shape. Add the small curved marks near the top, then keep the stem connected to the centre of the pumpkin body.
Step 7: Add Pumpkin Lines
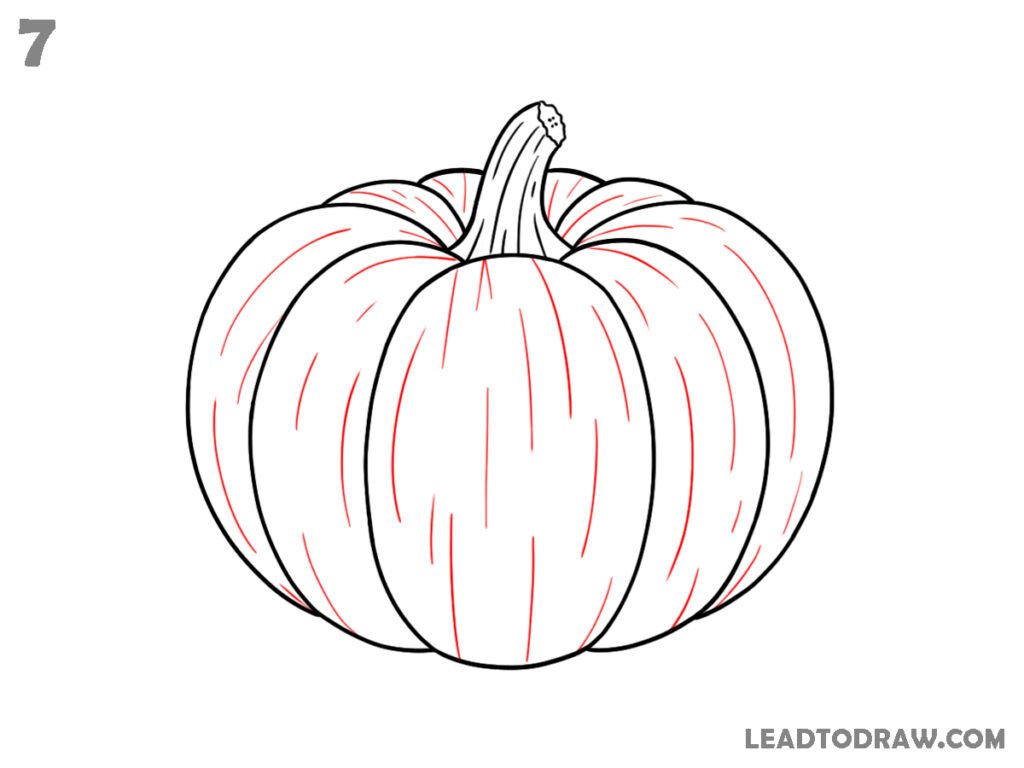
Add curved texture lines across the pumpkin sections. Draw several long, slightly curved lines from the upper area towards the lower area, following the shape of each section. Place shorter lines between some longer ones. Add a few curved marks near the top around the stem to finish the pumpkin surface details.
Step 8: Check the Drawing
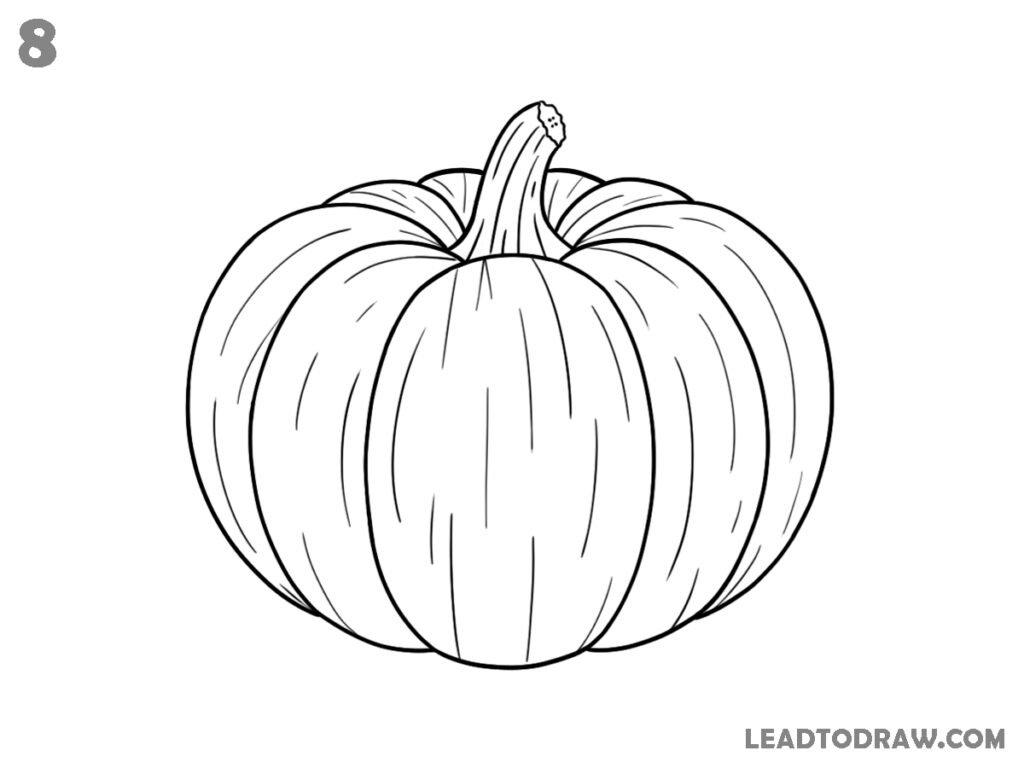
Check the pumpkin drawing from top to bottom. Look at the outer outline, the curved sections, the stem, and the lines inside each pumpkin section. Correct any uneven or unwanted line by cleaning it carefully. Remove stray marks around the drawing, then leave the finished pumpkin with only the needed lines visible.
For more similar drawing tutorials, explore the guides below.
- How to draw a tulip easy step by step
- How to Draw a Cactus Step by Step
- How to draw a strawberry step by step easily
Conclusion
Now the pumpkin drawing is complete with its rounded sections, curved stem, and simple surface lines. Check the outline once more and clean any extra marks around the shape. The finished picture can be used as a reference for colouring or for practising the same pumpkin drawing again with the same simple steps.