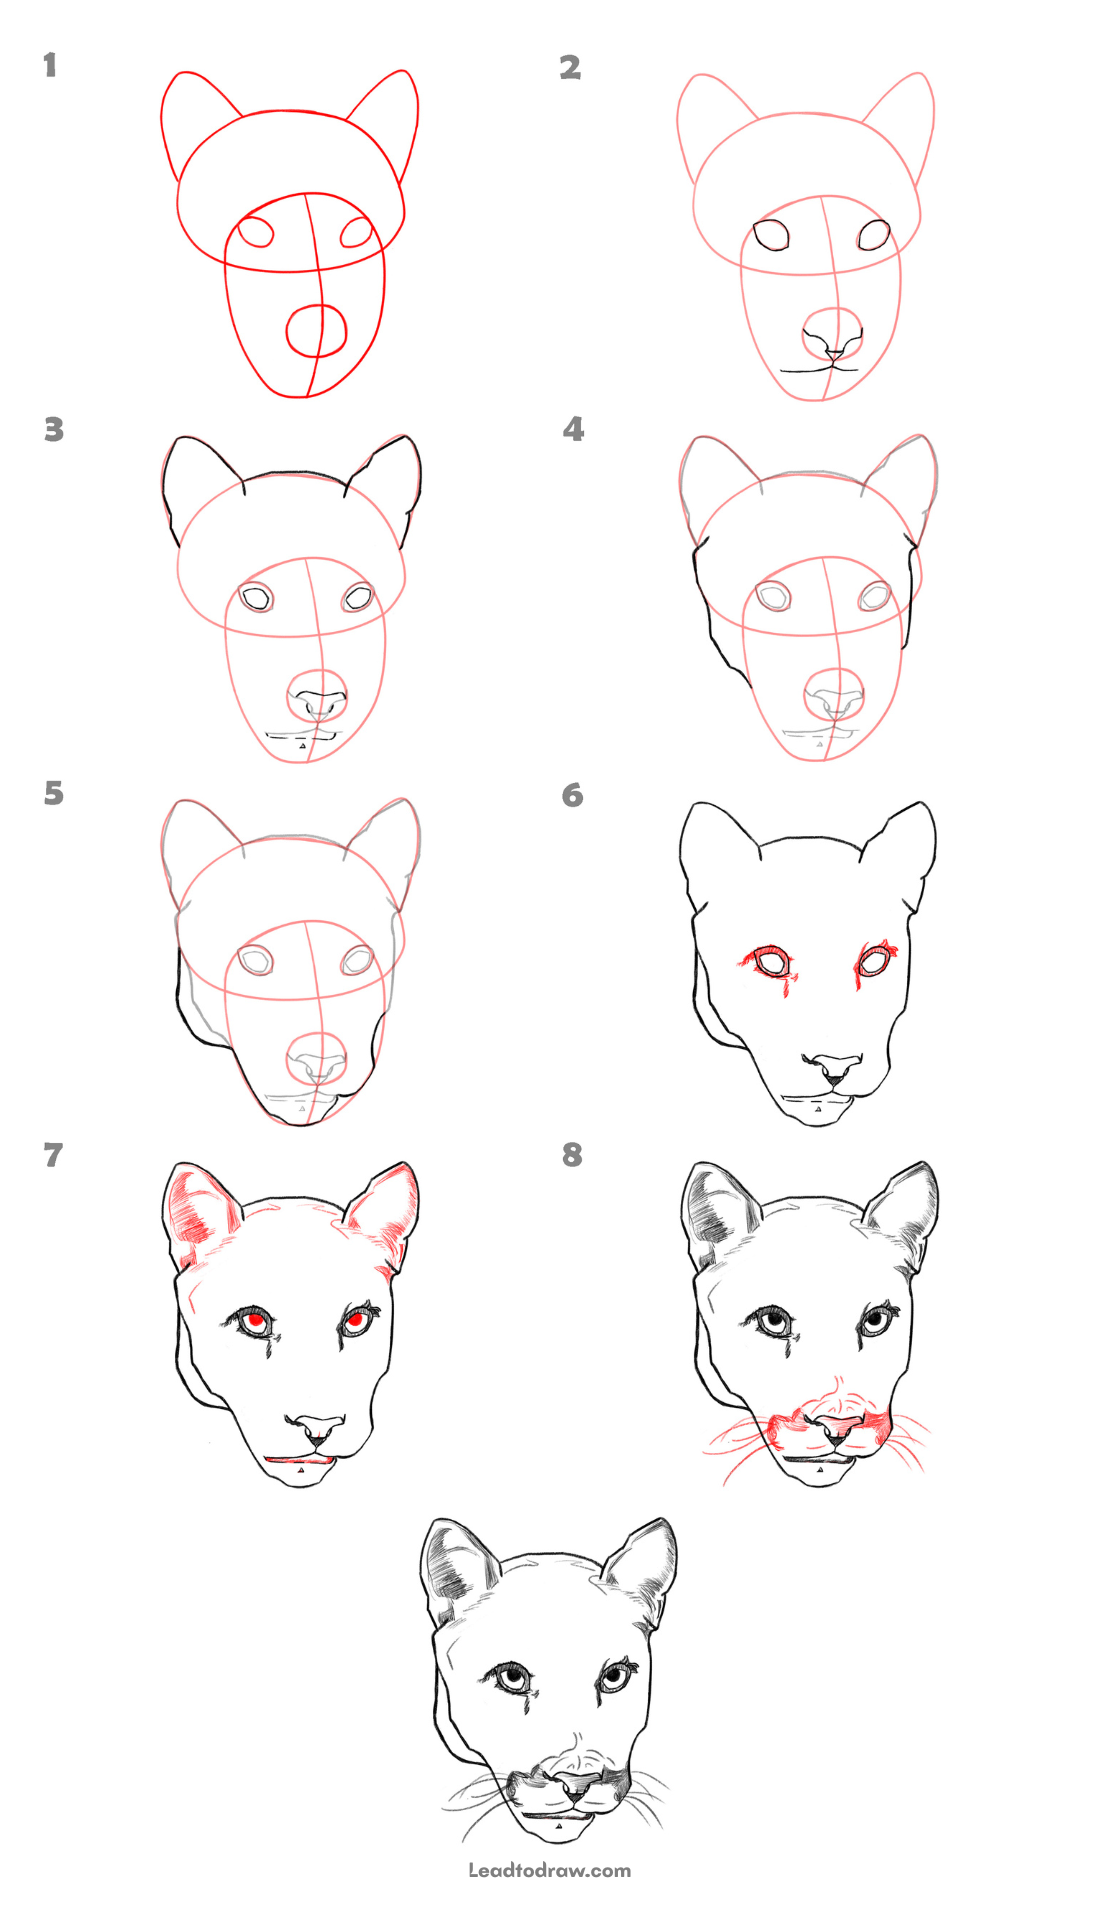
This tutorial shows how to draw a panther head step by step using simple lines and clear shapes. The drawing begins with simple shapes and slowly forms the ears, eyes, nose, and mouth. Each stage follows the image order so the head structure is easy to understand for you.
let’s begin
Step 1: Ear, Eye, and Nose Base
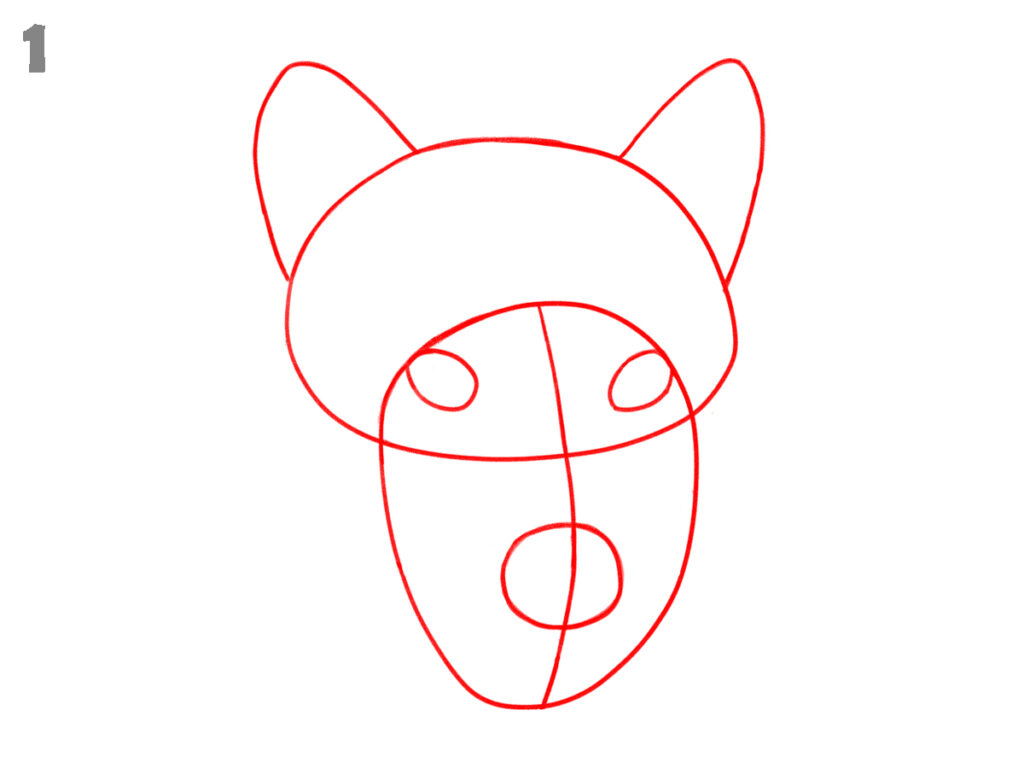
Start by drawing two pointed ear shapes at the top using soft curved lines. Below the ears, draw a wide oval shape to guide eye placement. Inside this area, sketch two small oval shapes for eyes. Add a round shape lower in the center to mark the nose position. Keep all lines light.
Step 2: Eye, Nose, and Mouth Shape

Inside the eye guideline, draw according to the above image for the outer base. Shape the nose using the round guide according to the image. Draw a line according to the image below the nose to show the mouth opening. Do not darken lines yet.
Step 3: Ear Outline and Eye Detail
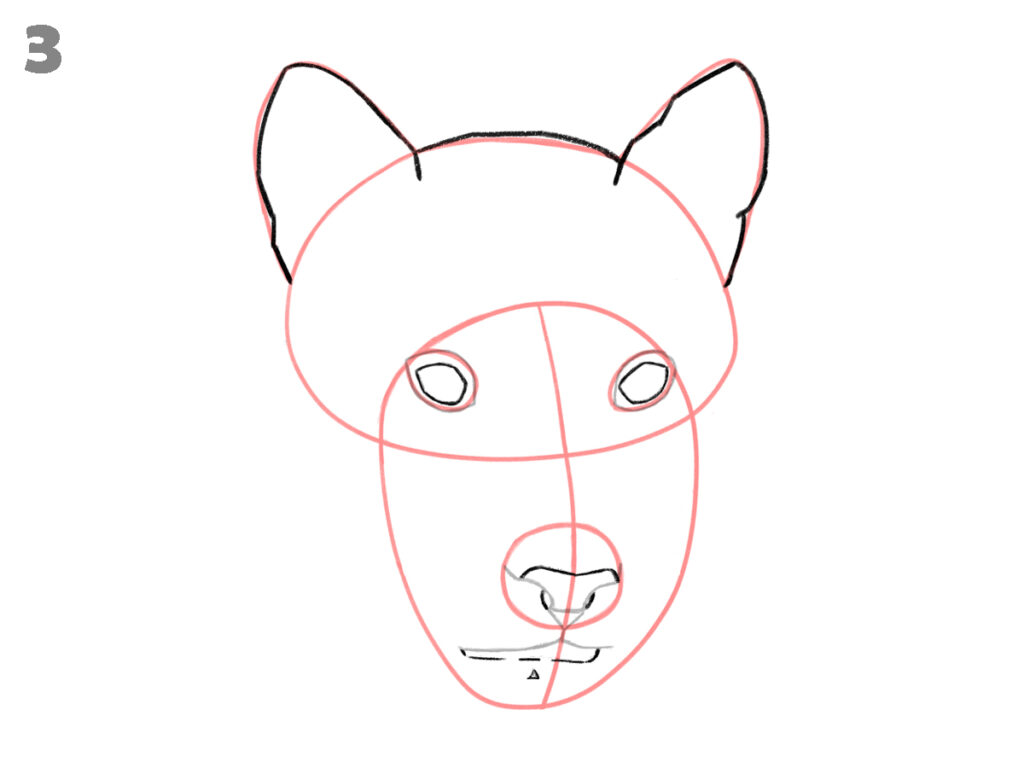
Draw clean black outlines over the ear shapes, keeping the tips slightly rounded. Draw a shape like in the image for the fit pupil of the panther, and draw the rest of nose and mouth line according to the image. Keep the inner eye area empty. The face outline is still not drawn at this stage.
Step 4: Side Face Outline
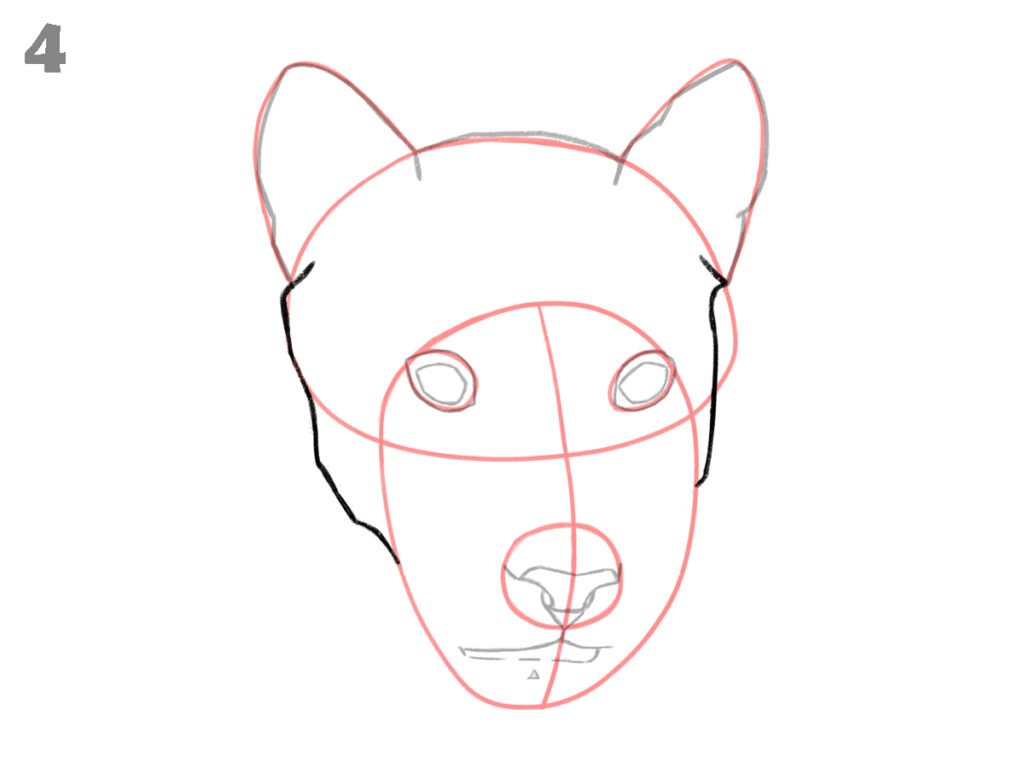
Start drawing the face outline in black from below each ear. Pull the lines downward along the cheeks using gentle curves. Narrow slightly near the mouth area. This step defines the main head shape while guide lines remain visible.
Step 5: Lower Jaw and Chin

Extend the face outline downward to form the lower jaw. Shape the chin with a soft curve and connect it back toward the mouth line. Keep the jaw balanced on both sides. The cougar head now looks complete in shape.
Step 6: Eye Fur Lines
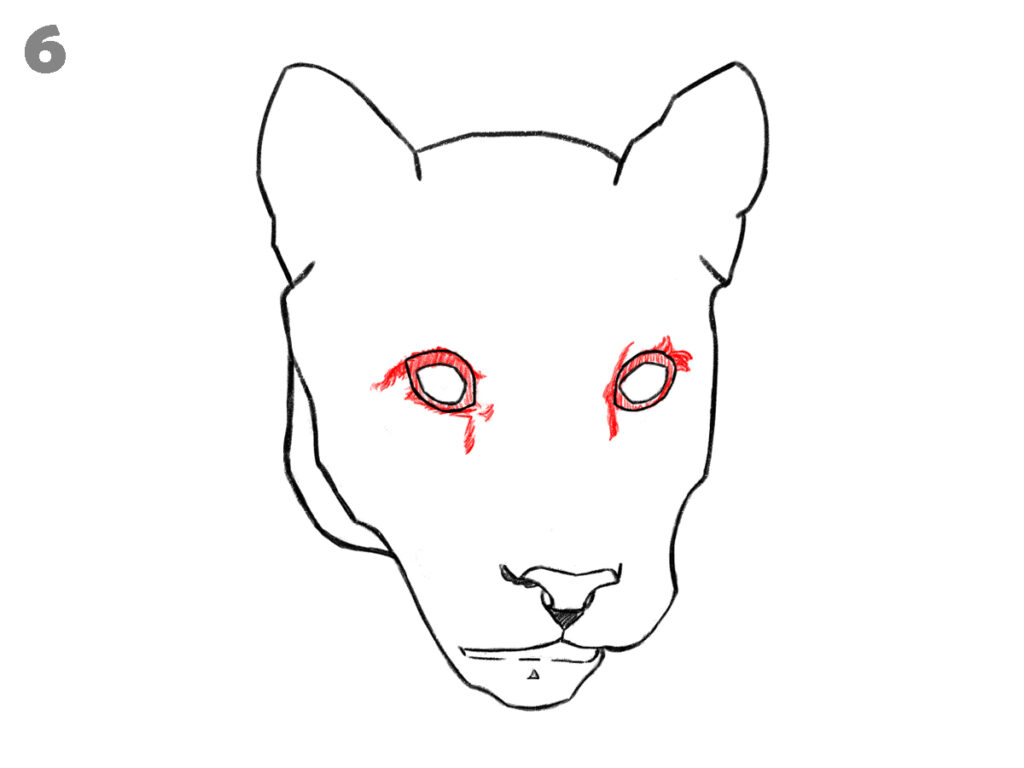
Add short, light strokes around the eye outlines to show fur direction, following the curve above and below each eye. Since the face shape is now fully drawn, remove the main head guide shape from the first step. Do not draw eyeballs or add facial marks.
Step 7: Inner Ear, Mouth Line, and Eyeballs
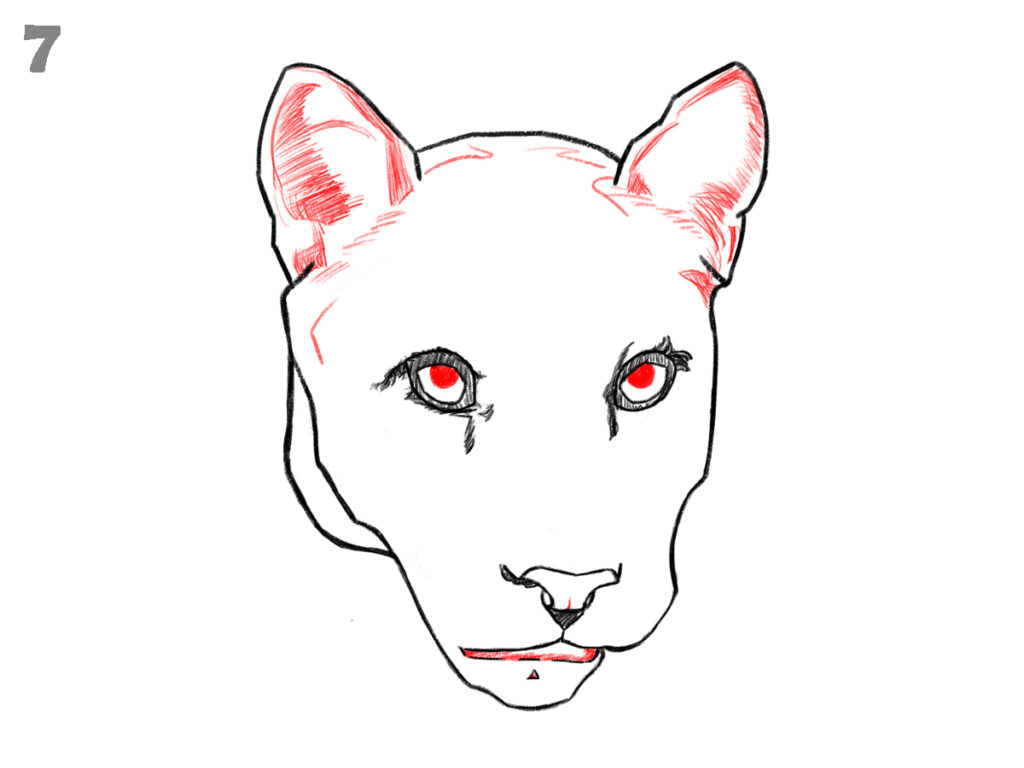
Draw curved inner ear lines inside both ears, following their natural shape. Add a short mouth line inside the mouth area, placed just below the nose opening. Draw the eyeballs slightly angled, not centered, matching the eye direction shown.
Step 8: Whisker Base and Nose Detail
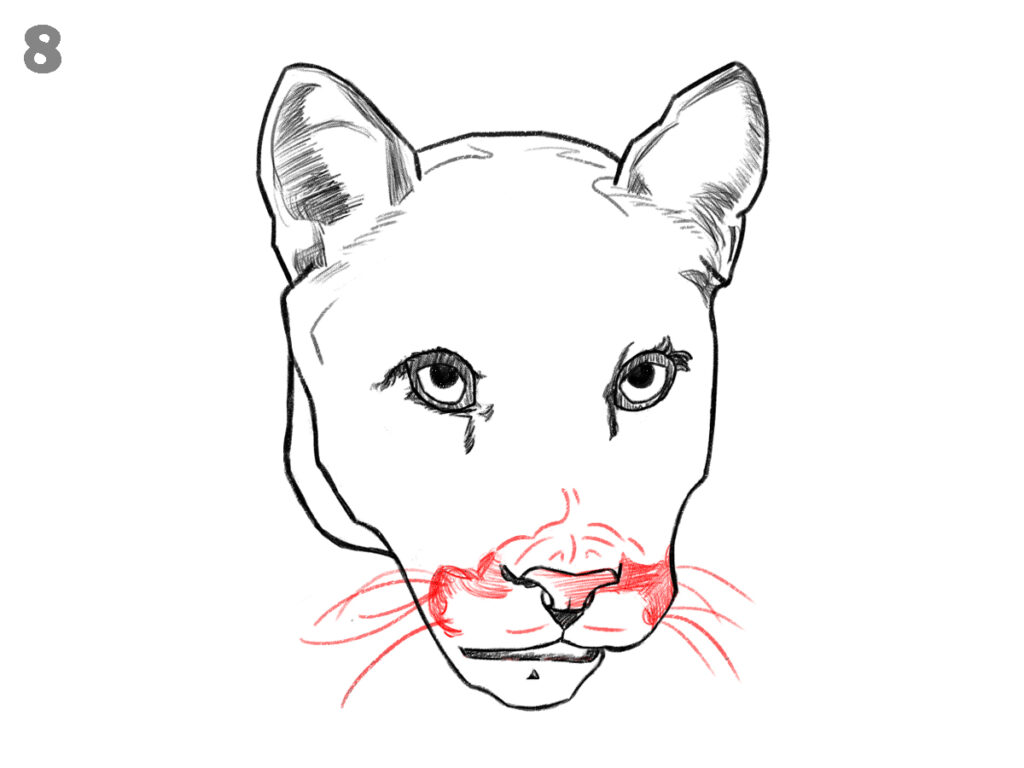
Add small curved lines around the nose area to form the whisker base. Draw whisker dots and extend thin whisker lines outward on both sides. The nose bridge is refined with light strokes. The face gains more clarity without adding heavy shading.
Step 9: Final Outline Check
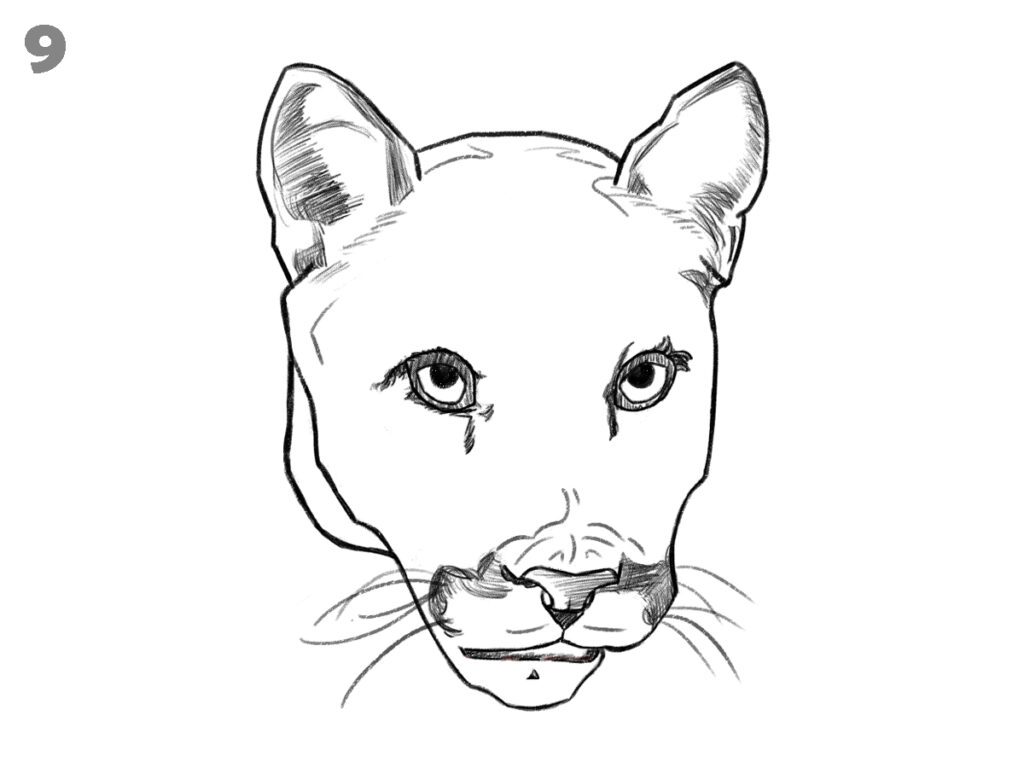
Check the complete cougar head and keep only the final clear lines. Smooth the outer head shape, ear edges, eye lines, nose form, mouth line, and whiskers. Adjust any uneven strokes so all visible lines look clean, balanced, and consistent, matching the finished drawing shown in the image.
For more animal drawing tutorials, explore the guides below.
- how to draw a tiger in an effective way
- How to draw a dog step by step easily
- Easy Way To Draw A Seahorse Step By Step
Conclusion
This How to Draw a Panther tutorial completes the head drawing through clear visual steps. Starting from basic shapes, the face develops into a finished outline with proper ears, eyes, nose, and mouth. Following the image order keeps the drawing neat and accurate, helping the panther head appear well-formed without adding extra lines.