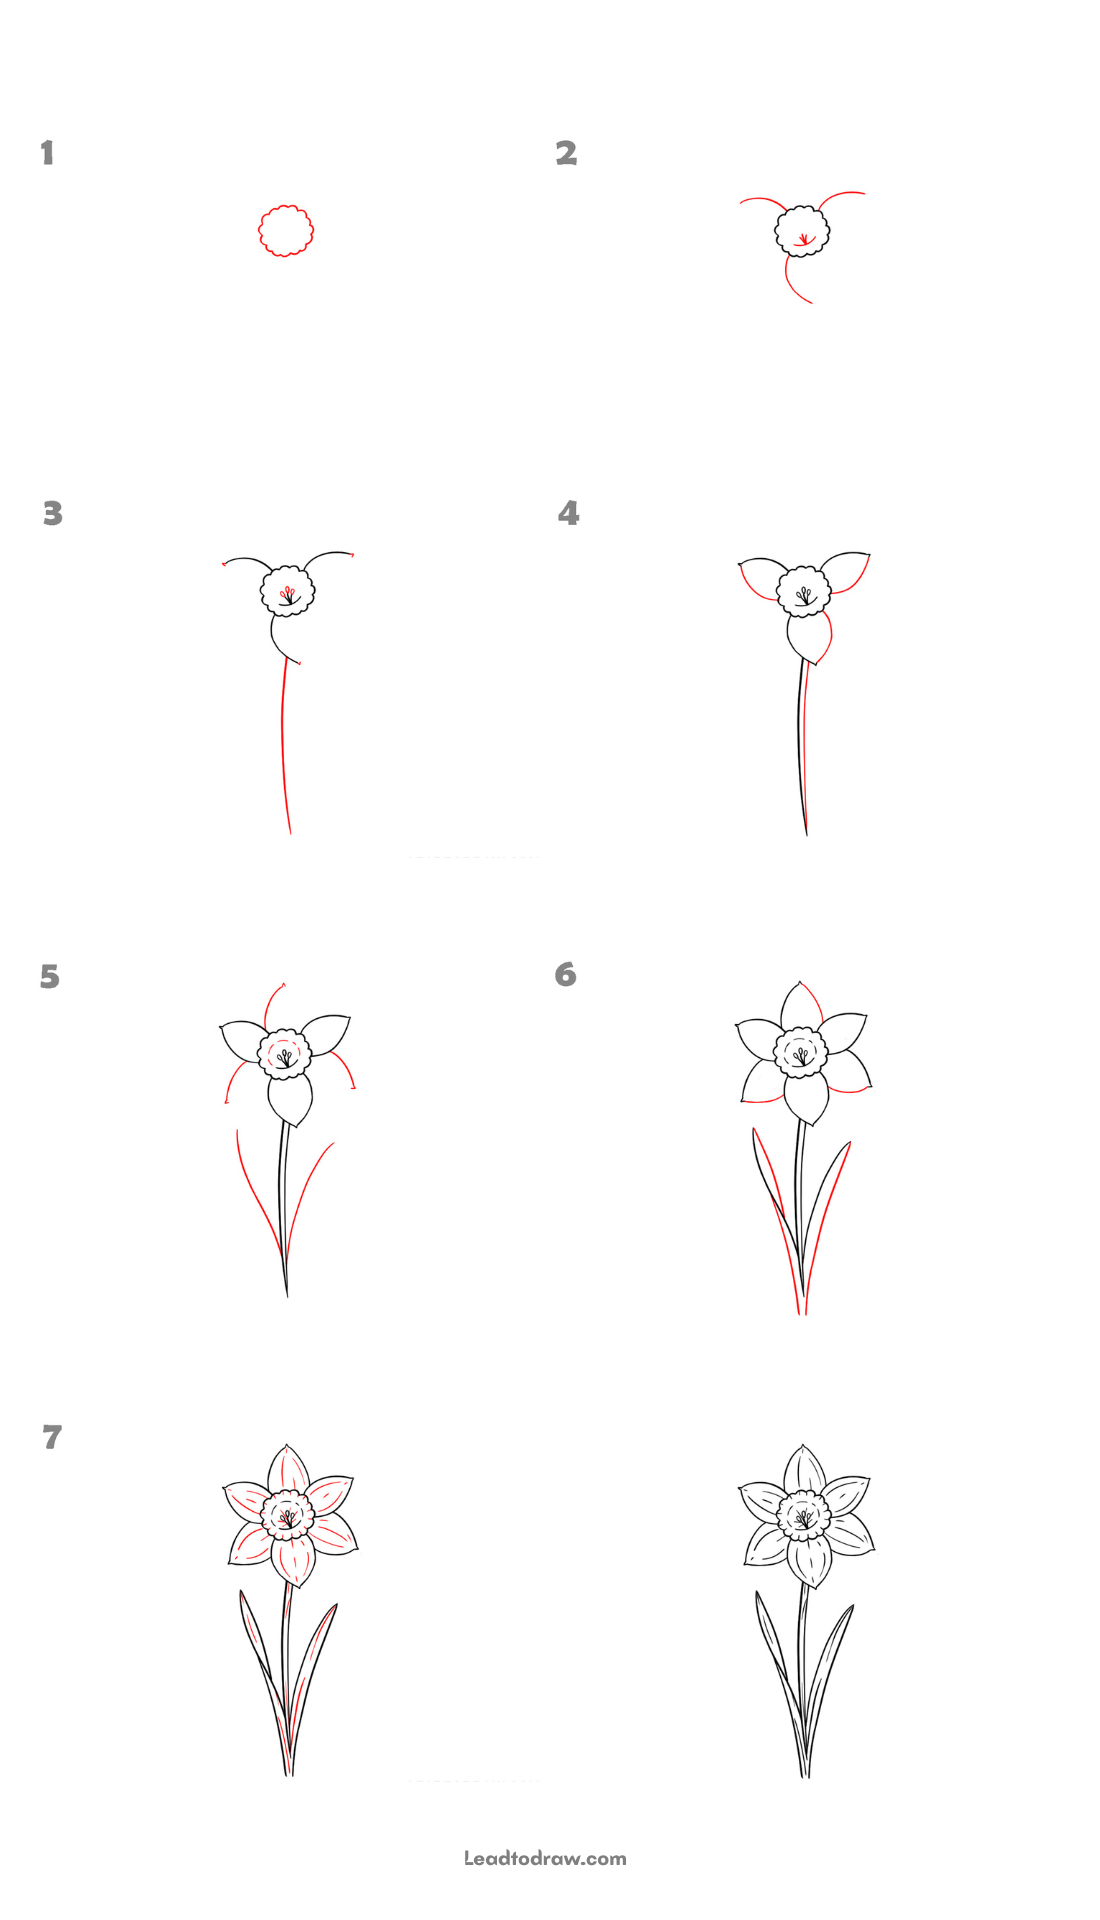
Learn how to draw a daffodil easy with this simple step-by-step tutorial. In each picture, the newly added lines are shown in red only to make the drawing order easy to follow. Start from the flower centre, then add petals, stem, and leaves until the drawing is ready.
lets begin
Step 1: Draw the Flower Centre

Draw a small round shape with soft scalloped edges to make the centre of the daffodil. Keep the size small because the petals, stem, and leaves will be added around it in the next steps. Make the curved edge even all around to create a neat flower cup before moving ahead.
Step 2: Add the Inner Detail and First Petals
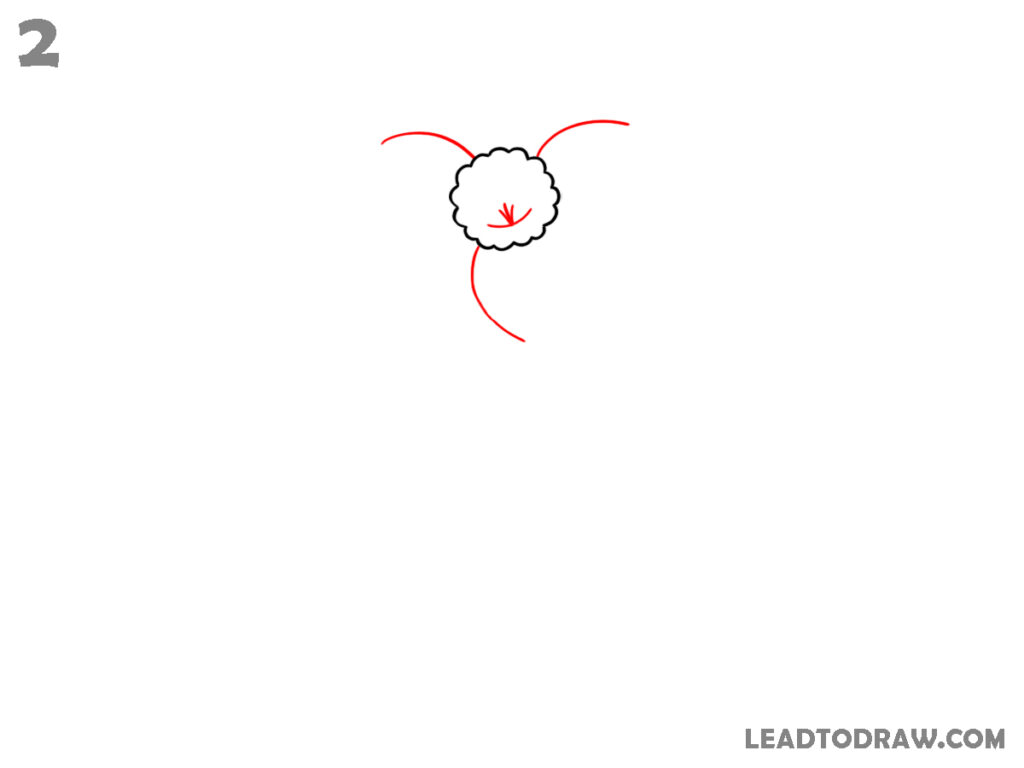
Draw a small flower-like shape with short curved lines inside the centre. Next, add three long curved guide lines around the outside. Place one curve on the left, one on the right, and one below the centre. These curves mark the position for the first three petals.
Step 3: Draw the Flower Base and Stem
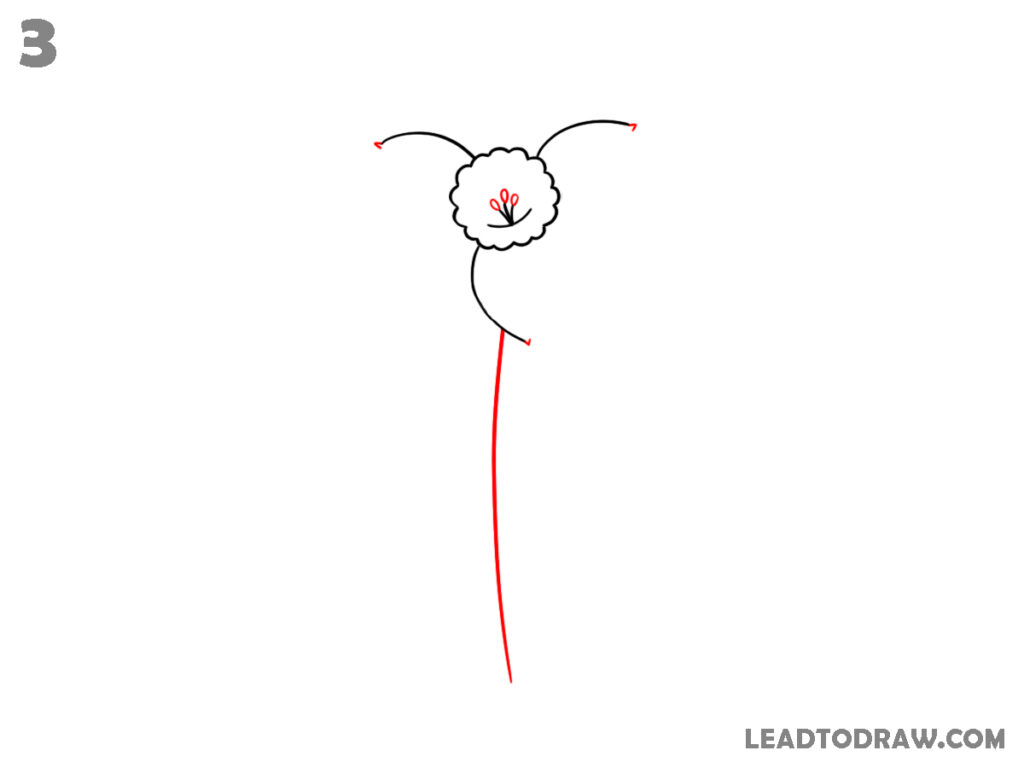
Turn the lower curved guide into a pointed petal below the flower centre. From the bottom tip of this petal, draw two long, slightly curved lines downward to form the thin stem. Keep the stem narrow and gently curved while leaving enough space on both sides for the remaining petals.
Step 4: Complete Three Petals
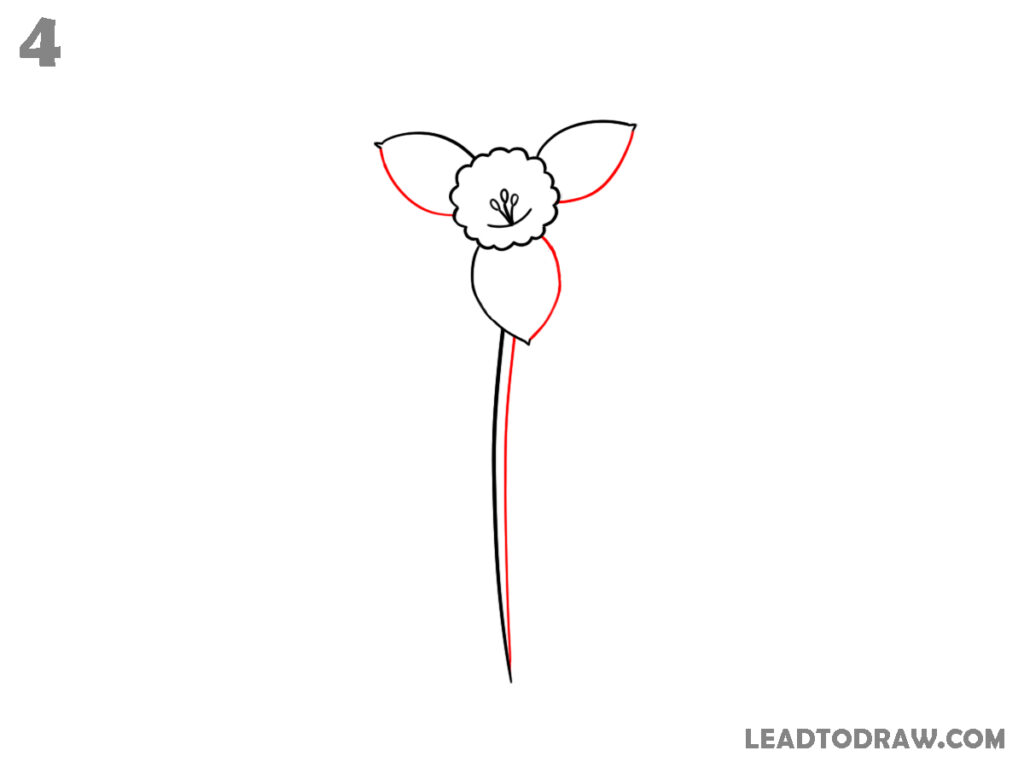
Use the two upper curved guides to draw two pointed petals, one on each side of the flower centre. Then draw another pointed petal on the lower right side beside the bottom petal. Keep all petal tips pointed and connect each one neatly to the flower centre.
Step 5: Finish the Flower Shape
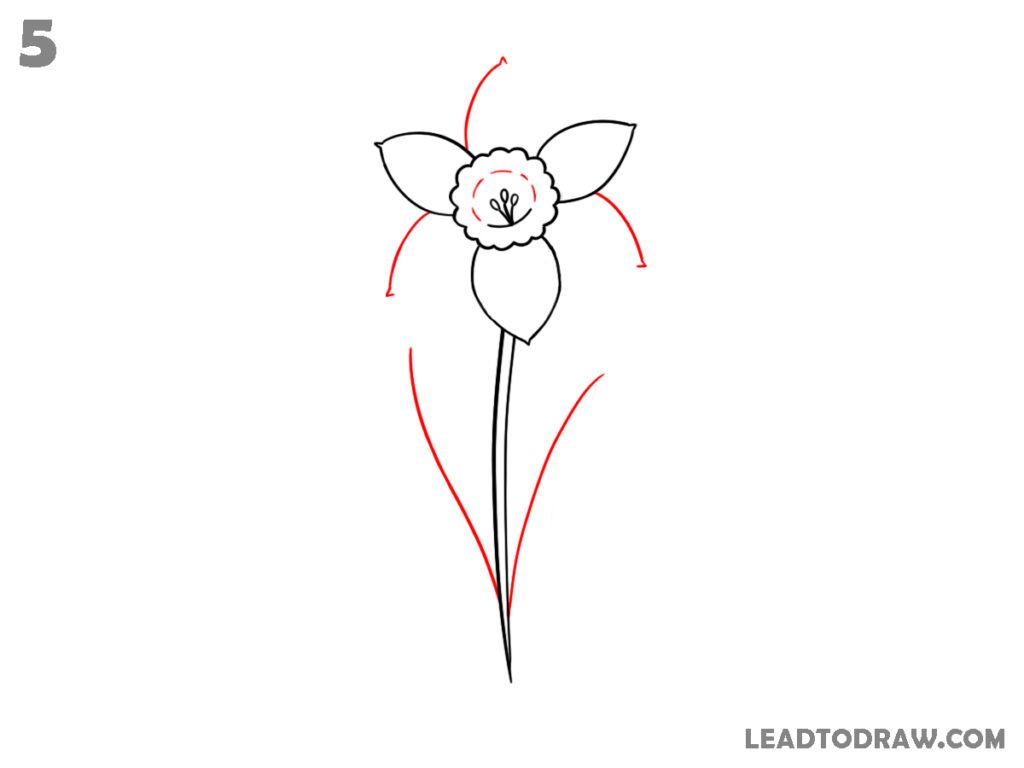
Add the last two pointed petals to complete the daffodil flower. One petal goes at the top and the other on the lower left side. After that, draw two long, narrow leaves rising from the bottom on both sides of the stem with smooth pointed tips.
Step 6: Add the Final Leaf Shapes
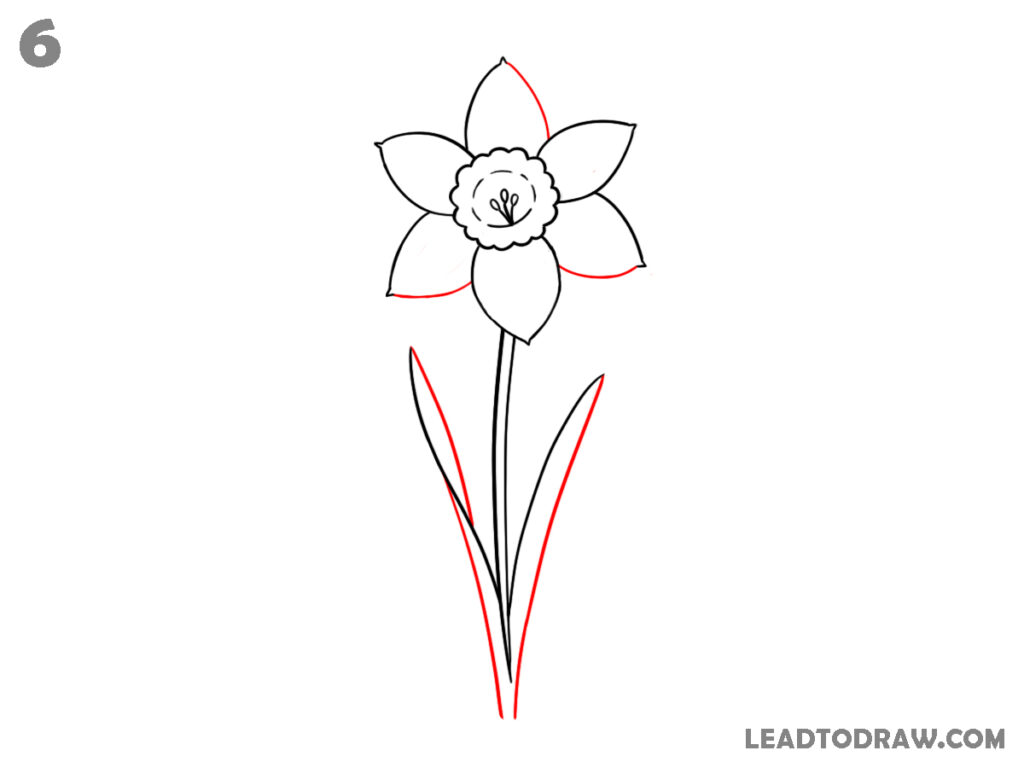
Complete both leaves by drawing the second side of each leaf with long curved lines that meet at pointed tips. The leaves should rise beside the stem and stay narrow from bottom to top. Finish connecting every leaf neatly where it joins near the stem base.
Step 7: Draw the Petal Veins
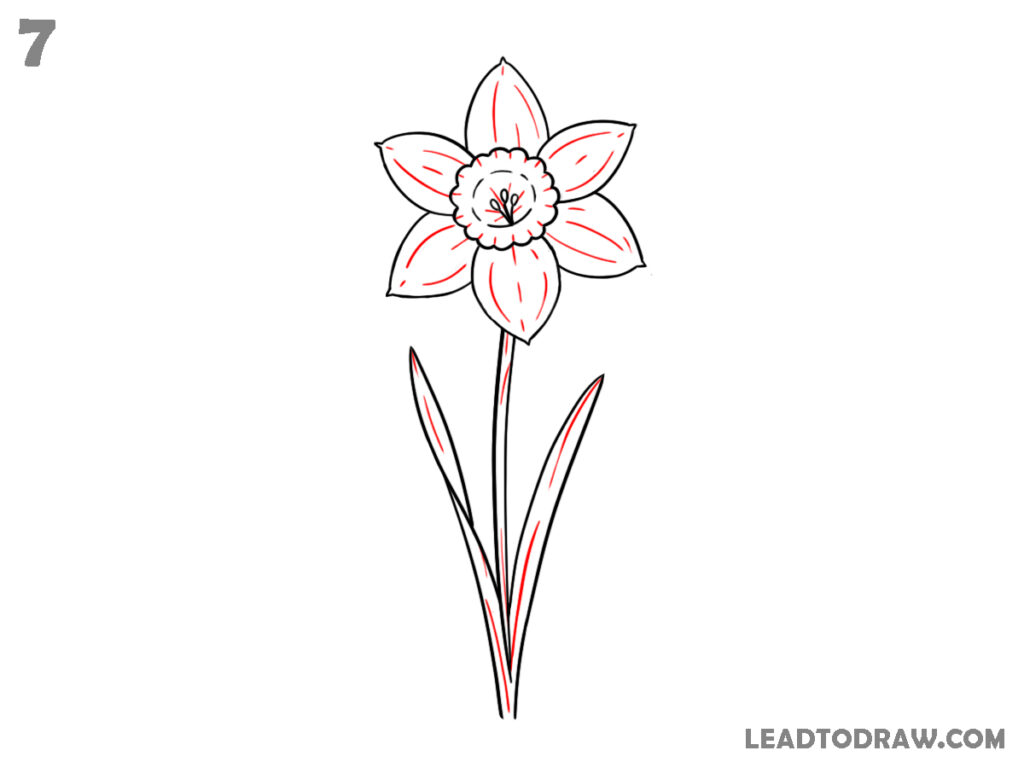
Add several thin curved lines inside every petal to show simple vein details. Draw a few short curved lines inside each leaf, following its length. Add small curved details inside the flower centre to finish the middle section.
Step 8: Check and Finish
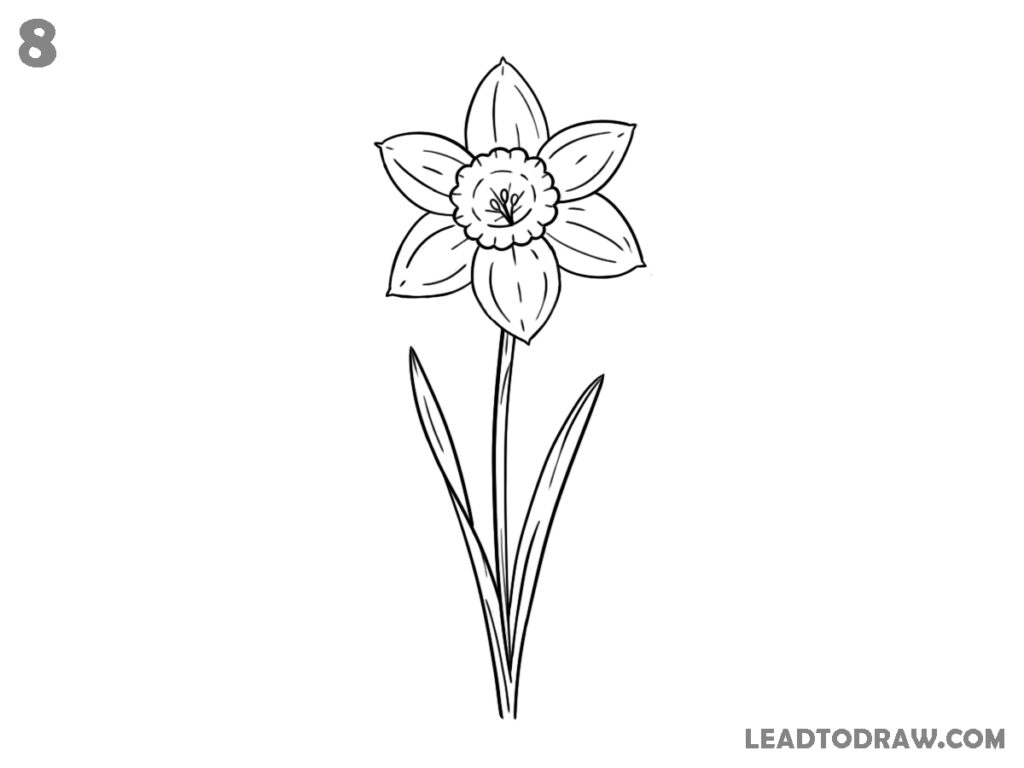
Check the full daffodil drawing carefully. Correct any uneven lines if needed. Erase unwanted pencil marks and darken the final outline. Finish with clean, smooth lines matching the completed flower.
For more similar drawing tutorials, explore the guides below.
- How to draw a tulip easy step by step
- How to draw hibiscus flower step by step easily
- How to Draw a Mailbox in 8 Easy Steps
Conclusion
Now the full daffodil drawing is finished using simple shapes and easy drawing steps. Practice the same method again to improve line control and neatness. Follow this guide whenever you want to learn how to draw a daffodil easy with a simple drawing process.