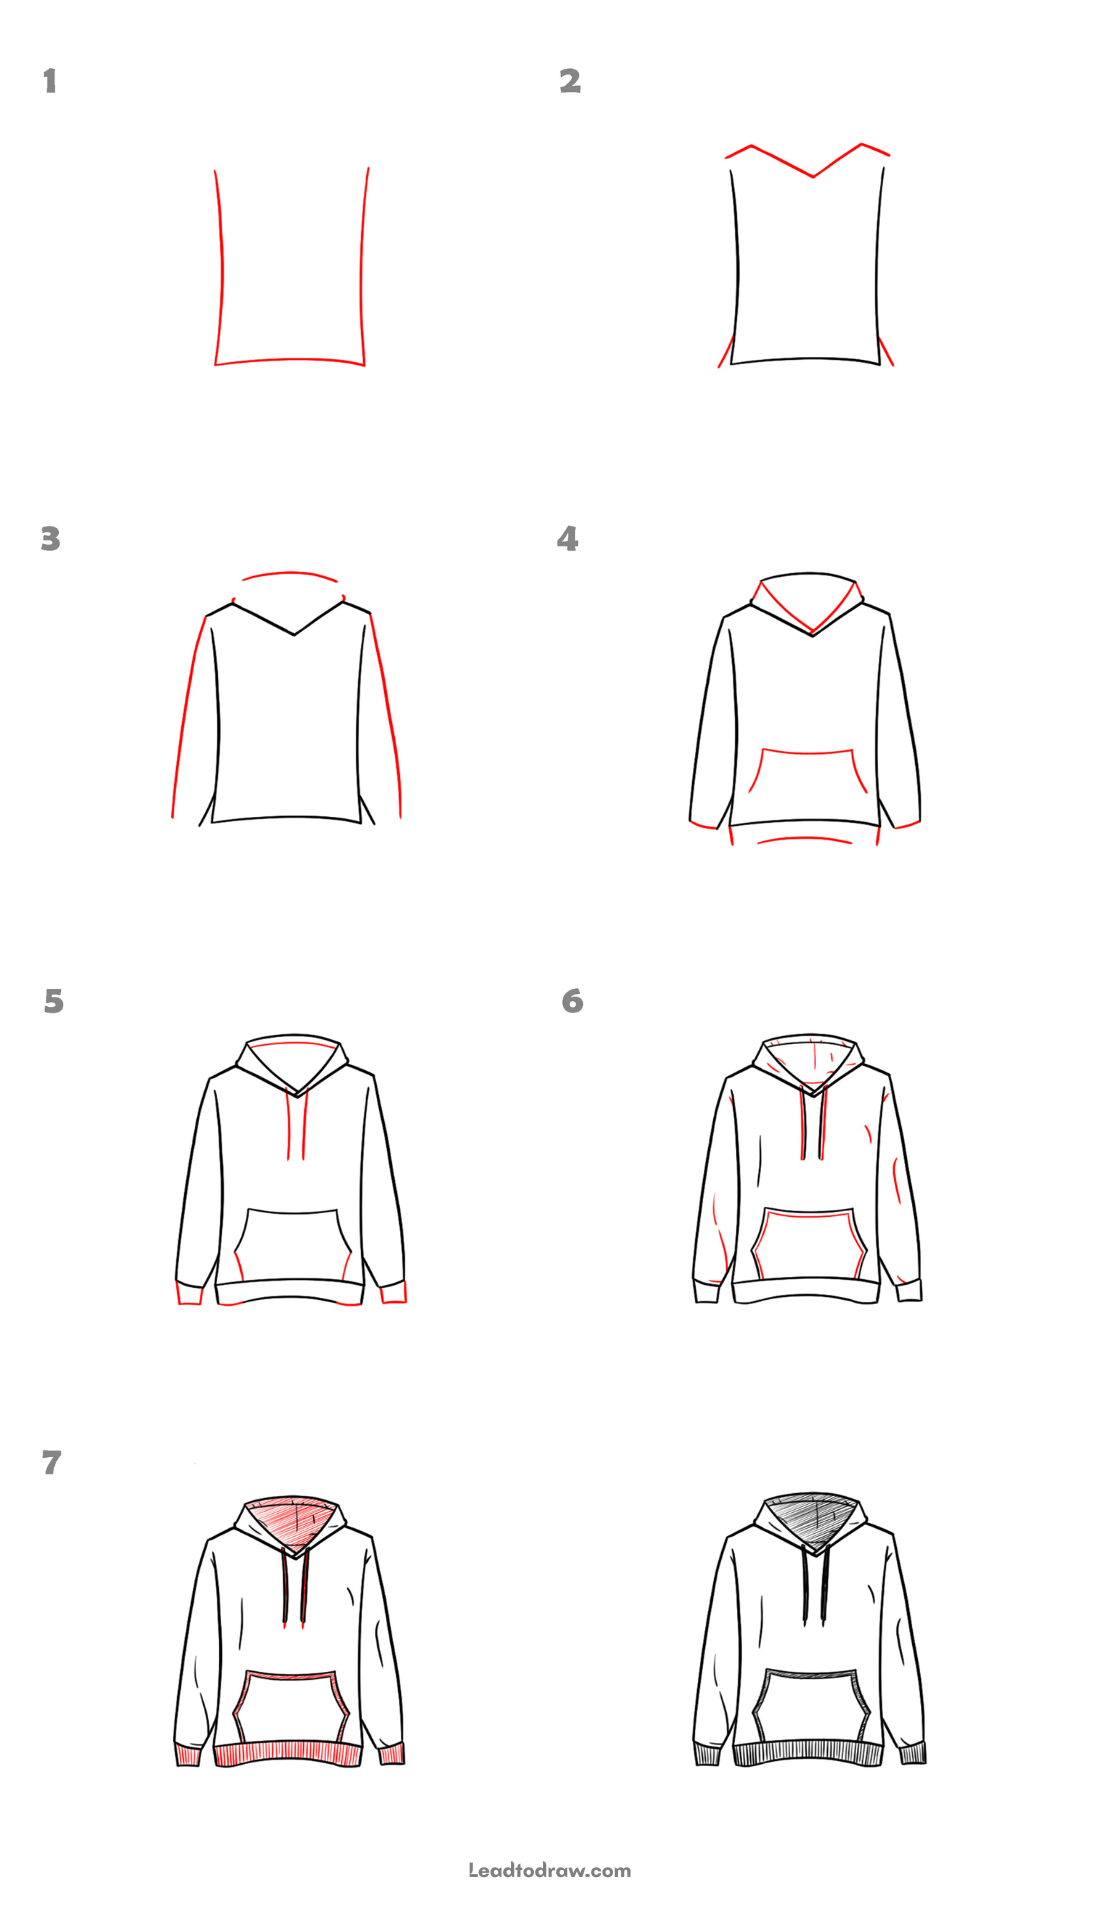
Learn how to draw a hoodie with simple lines by following the steps shown in the images below. Each step adds small parts of the clothing, like the hood, sleeves, pocket, and waistband. Move slowly and draw the shapes in the same order for a clean hoodie sketch on paper.
Lets begins
Step 1: Draw the Hoodie Body Shape
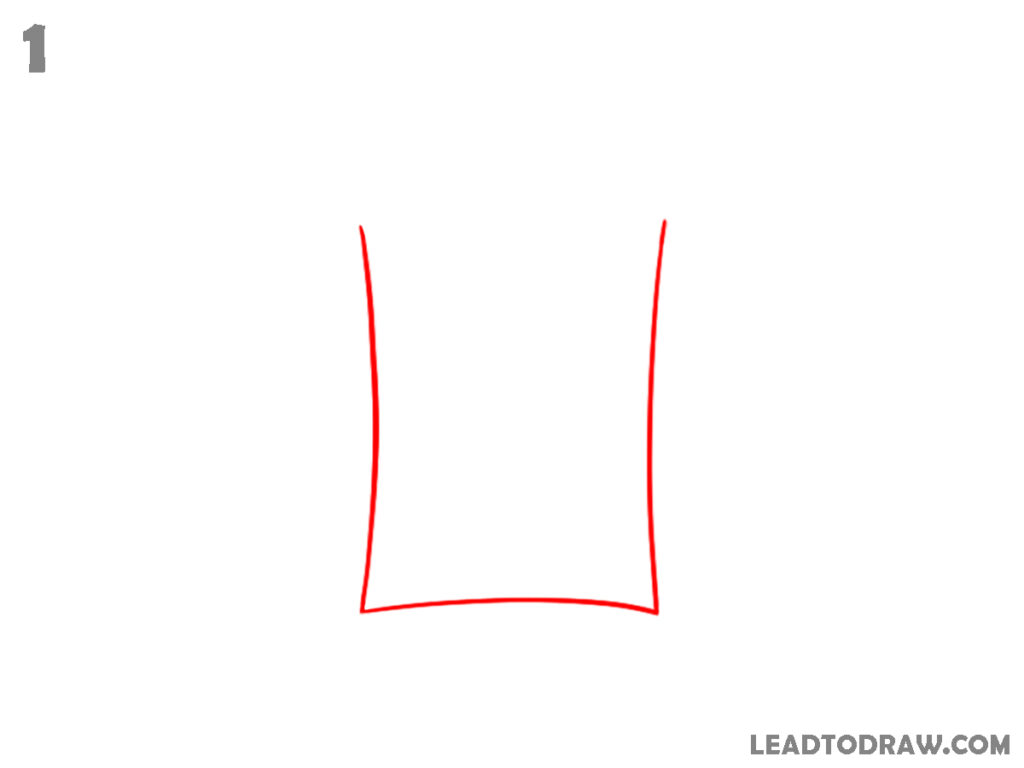
Start with the main body shape of the hoodie by drawing two slightly curved vertical lines for the sides and connecting them at the bottom using a soft curved line. Leave the top open in the hood area while keeping both side lines slightly curved inward toward the lower edge of the hoodie.
Step 2: Add the Neck Opening
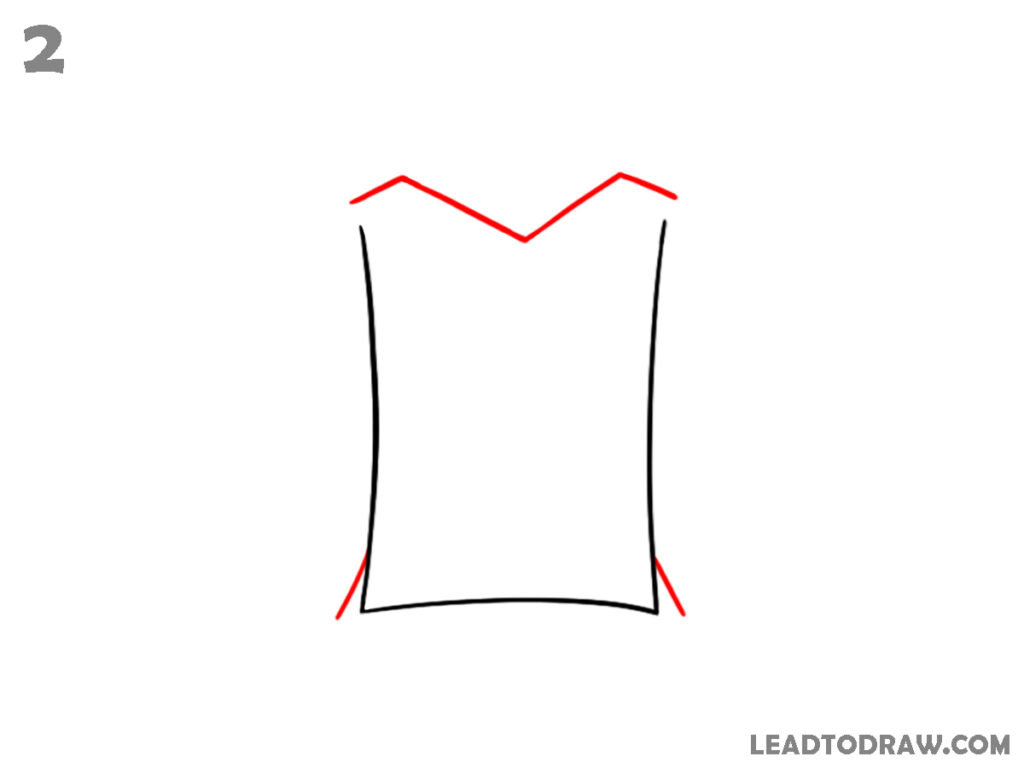
In this step, add the upper neck opening and the small corner edges of the hoodie body. Draw two short angled lines at the top edges meeting in the center to form a V-shaped neckline. Also, add small outward angled lines near both bottom corners of the body as shown in the image.
Step 3: Draw Shoulders and Sleeves
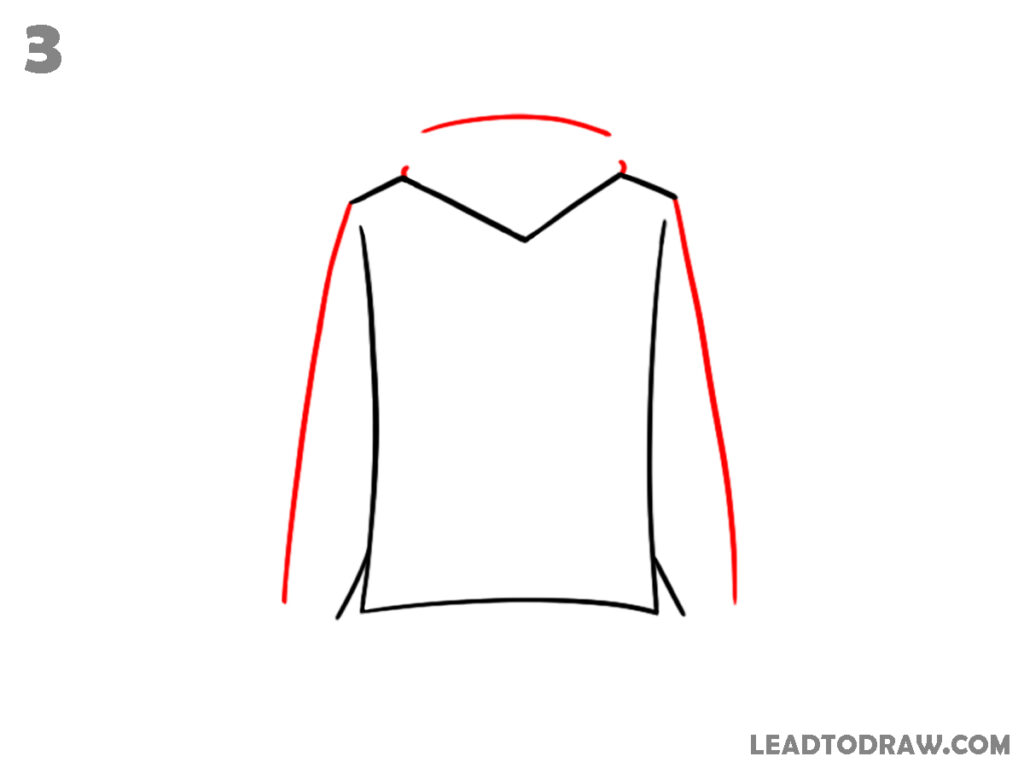
First, mark the shoulder points at the top ends of the body shape and connect them with a gentle curved line across the upper back area. From each shoulder extend long, slightly curved lines downward to form the sleeves of the hoodie until they reach near the bottom level of the body shape.
Step 4: Draw the Hood and Pocket Opening
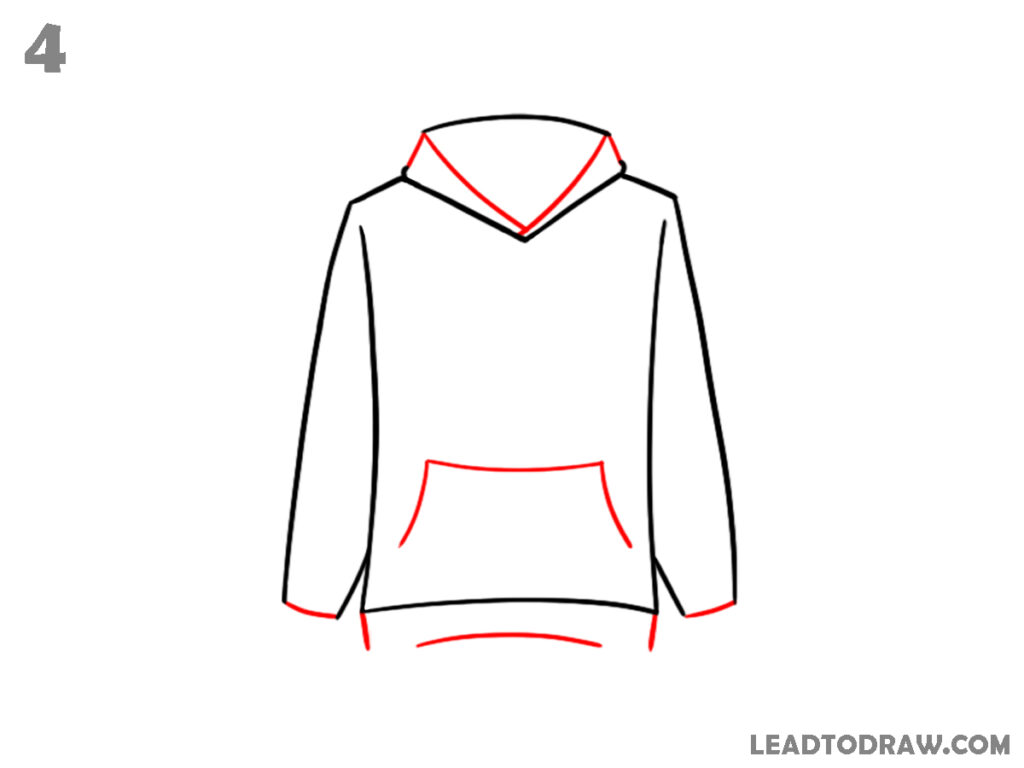
Now draw the outer hood shape around the neckline, creating a rounded curve above the shoulders, and connect it back to the collar area. Add the front pocket opening on the body using a wide curved line with two short side curves, and also draw a curved lower hem line across the hoodie bottom.
Step 5: Add Drawstrings, Cuffs, and Waistband

Add the hood inner edge by drawing a curved line inside the hood opening, following the outer shape. Draw two straight hanging drawstrings from the neckline area. Form the front pocket using angled side lines and a flat bottom line. Also, add ribbed cuffs on both sleeves and create a thick waistband along the bottom edge.
Step 6: Draw Clothing Fold Details
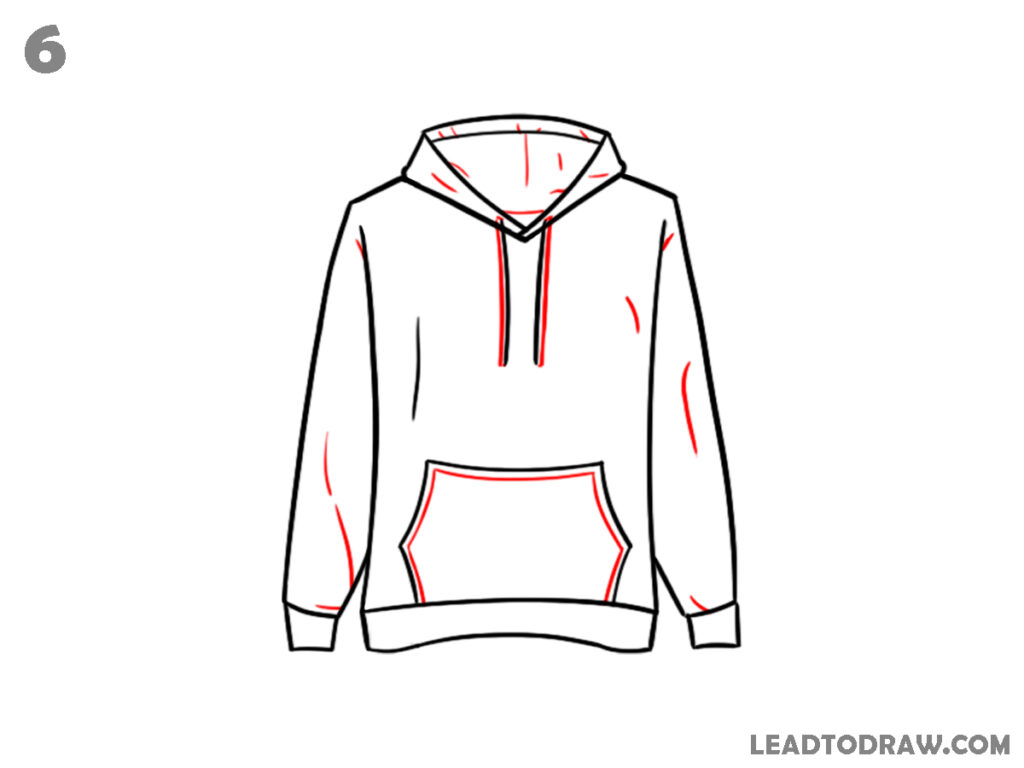
Begin adding clothing details across the hoodie. Draw short curved fold lines on the sleeves and near the sides of the body. Add small seam lines around the pocket edge and inside the hood area. Include a few short lines on the hood top and sleeve areas to show fabric bends and light creases on the cloth.
Step 7: Add Light Shading
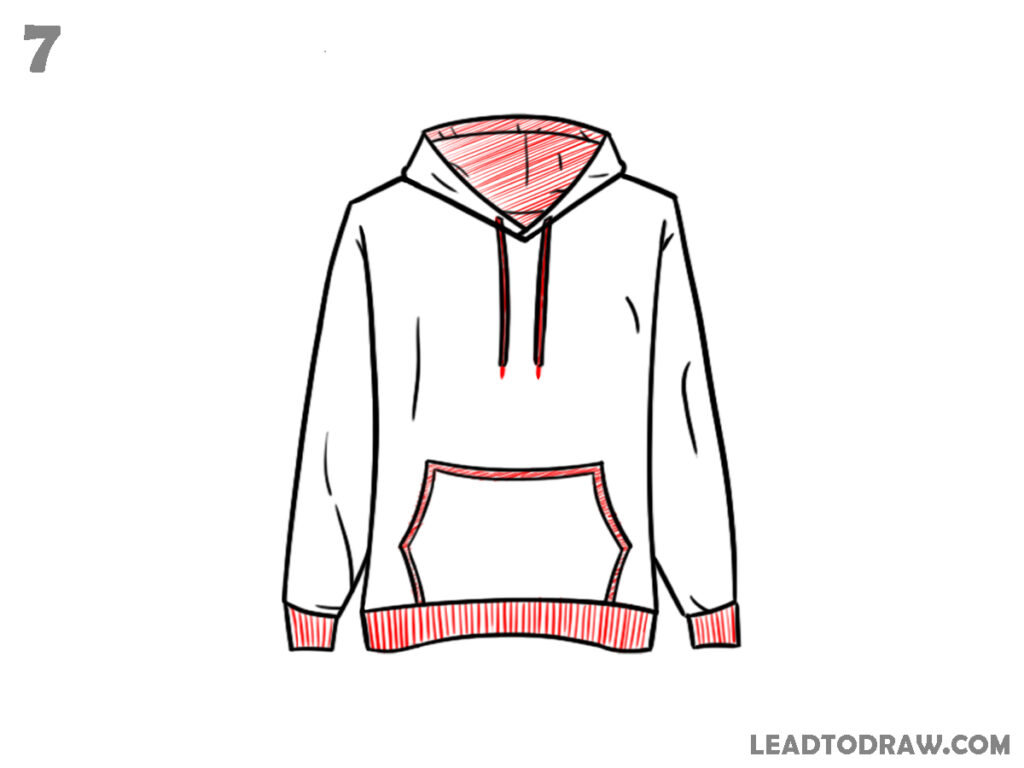
Start shading the inner hood area using close parallel lines. Shade the waistband and sleeve cuffs with short vertical strokes. Add light line shading along the pocket border and small areas of the sleeves. Keep the hoodie body mostly clear while placing a few extra lines to show soft folds in the fabric surface.
Step 8: Check and Clean the Drawing
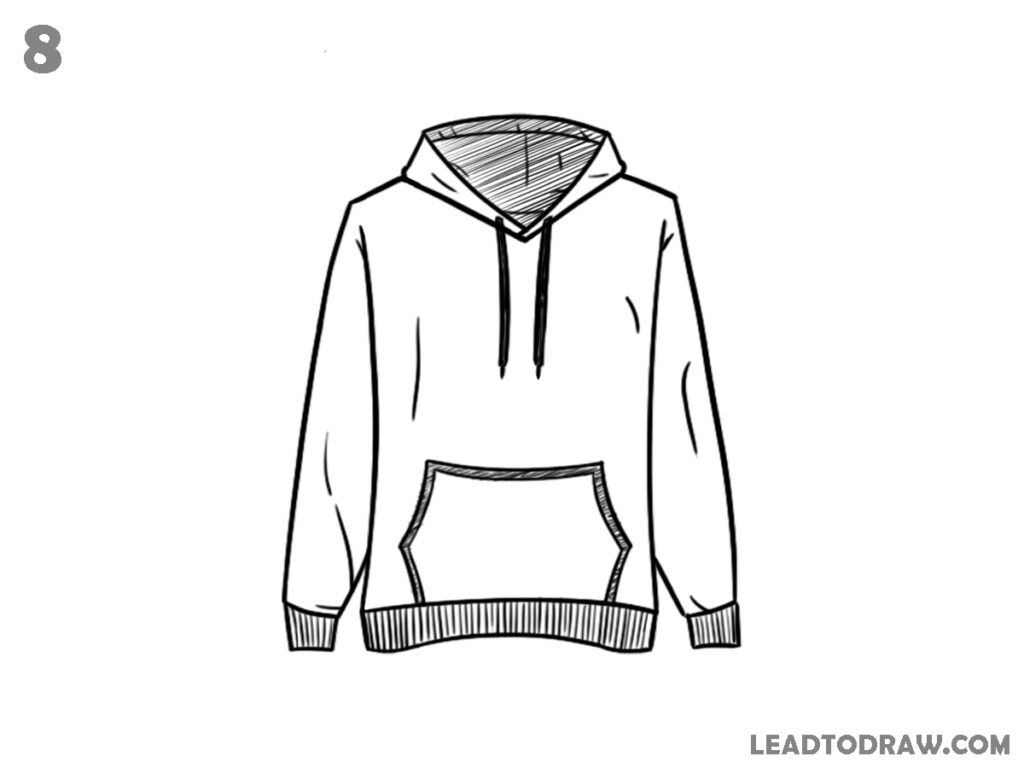
Look over the full hoodie drawing and compare each part with the previous steps in the image. Correct uneven lines on the hood, sleeves, pocket and waistband. Darken the final outline of the hoodie and erase any unwanted marks if visible. Keep the drawstrings seams, folds, and pocket edges neat and balanced across the drawing area.
For more similar drawing tutorials, explore the guides below.
- How to Draw a Dumbbell in 7 Easy Steps
- how to draw a handbag in easy way
- how to draw boots step by step easily
Conclusion
You have now finished the full hoodie drawing by following each step in order. Check the hood shape, sleeves, pocket and waistband once more and adjust lines where needed. Keep the outline neat and erase extra marks if visible. This simple practice helps you understand clothing forms and improves control while drawing hoodie shapes on paper