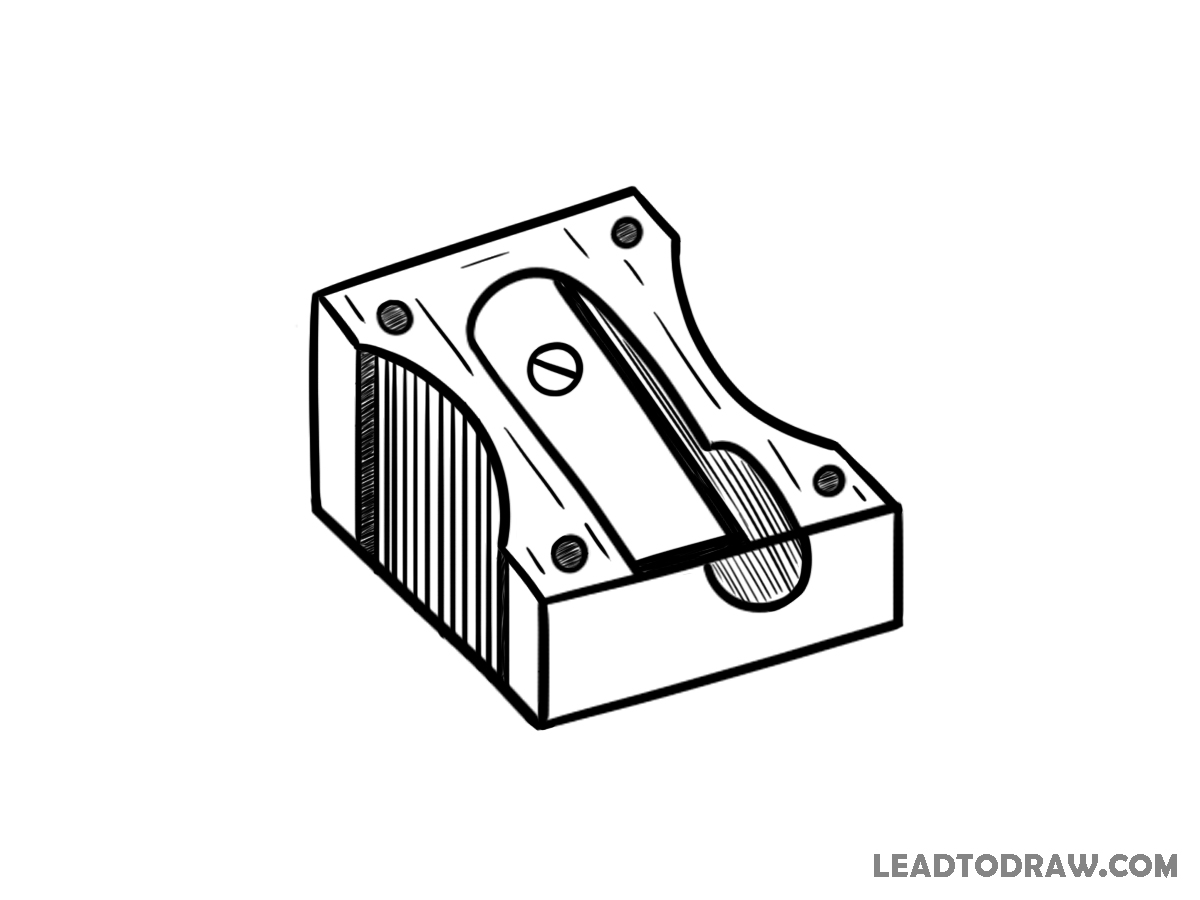
Learn how to draw a pencil sharpener using simple steps from the given images. New lines are shown clearly for each step to guide drawing. Follow each part carefully and draw the shape, curves, holes, and shading in correct order. Keep lines neat and adjust slowly while moving forward.
Lets begin
Step 1: Draw Base Shape
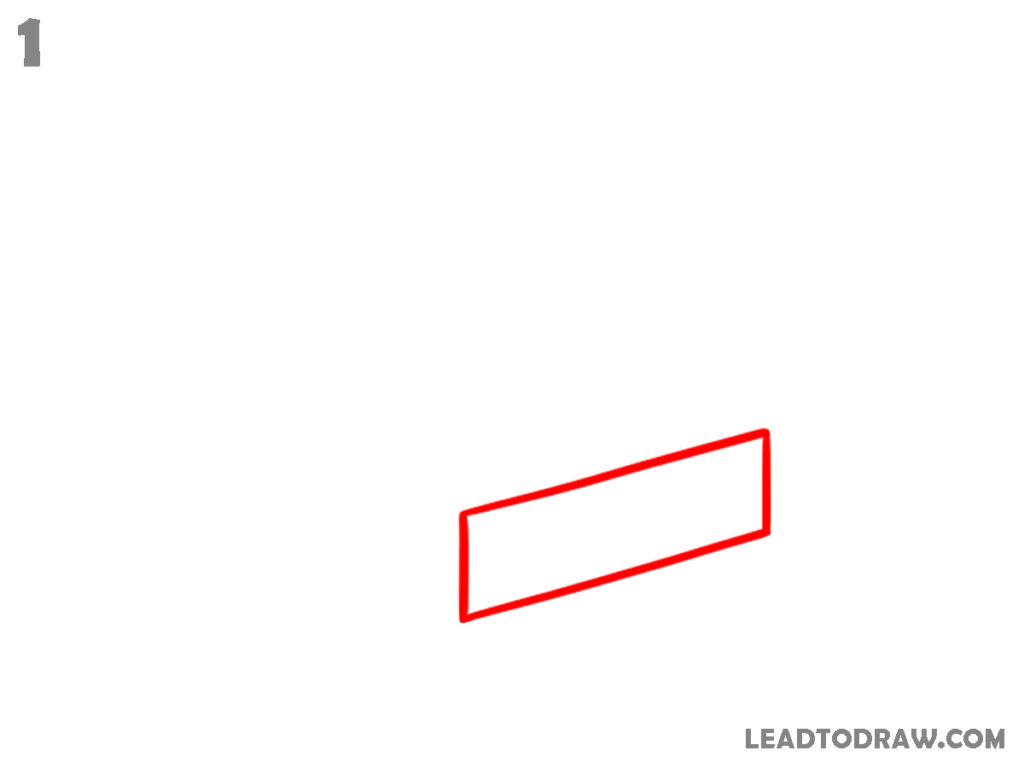
Start by drawing a slanted rectangular box shape. Keep the front edge slightly lower and the back edge slightly higher to show a tilted look. Connect all four sides neatly and maintain straight lines. This forms the main outer body of the sharpener, so keep proportions even and edges clean.
Step 2: Add Top Curve and Slot
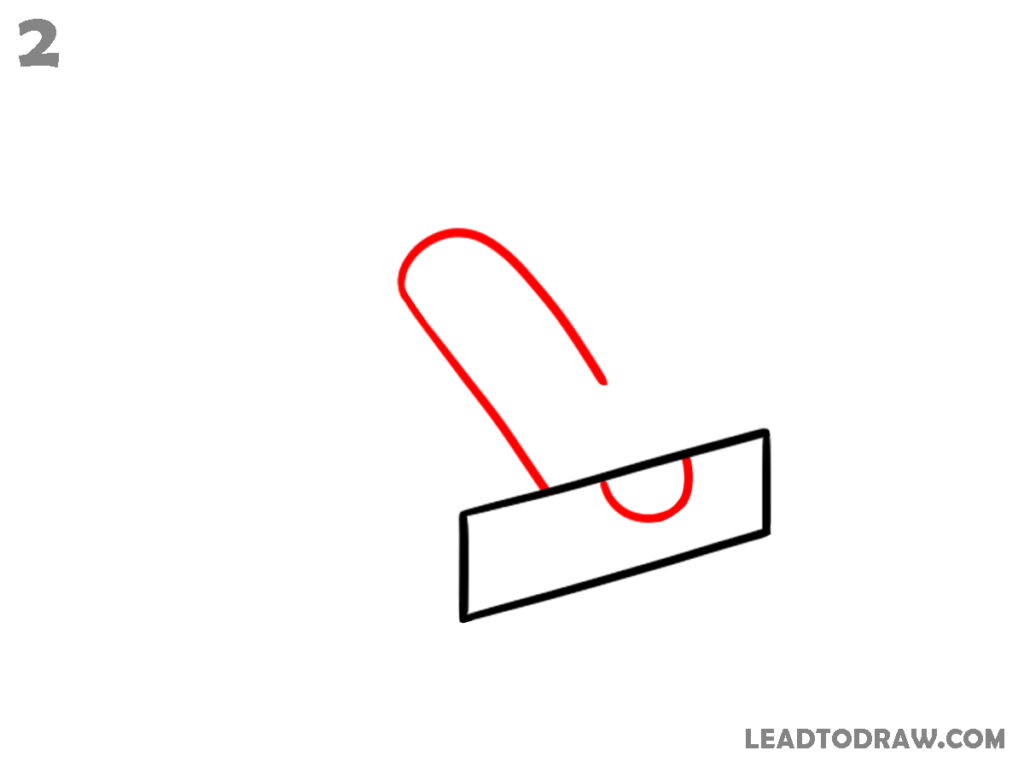
Draw a long curved line on the top surface starting from the back and bending forward. Inside the front face, draw a small half-circle shape at the center bottom. Also outline the top plane of the block slightly to show depth. Keep curves smooth and aligned with the rectangular base shape.
Step 3: Build Side Structure

Extend the left and right sides upward and backwards to form a 3D block. Connect the edges properly to create thickness. Keep the top surface flat and match the curve already drawn. Ensure the front face remains visible and aligned. The structure now looks like a solid sharpener body.
Step 4: Shape Side Curves
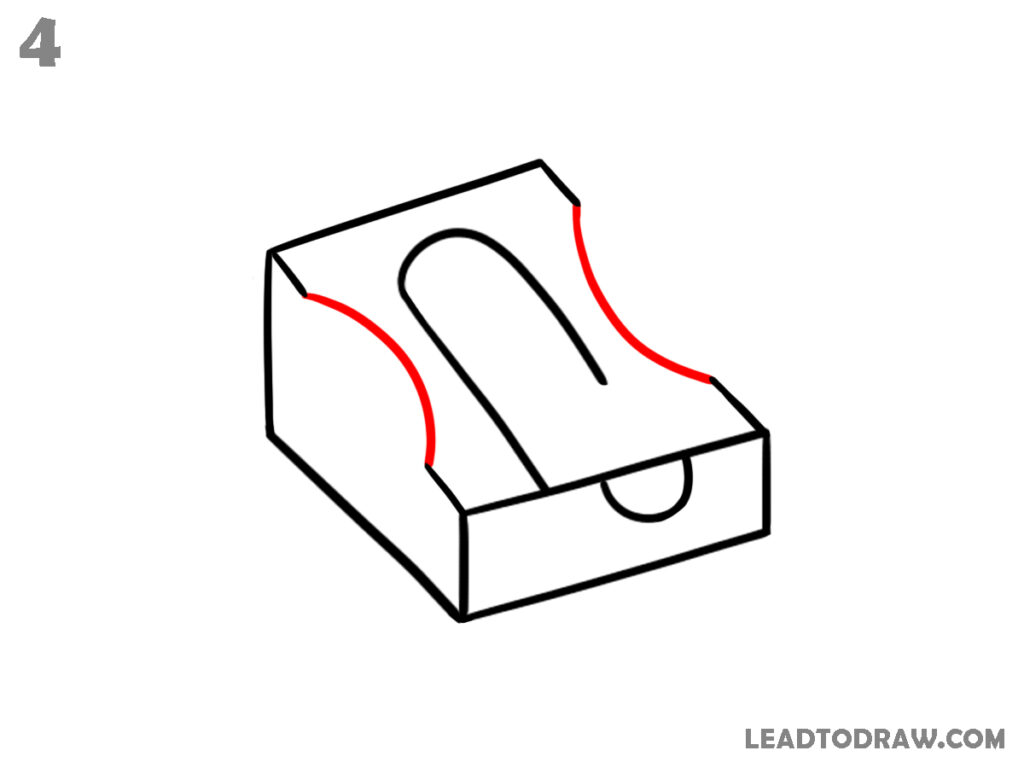
Draw curved cuts on both sides of the sharpener body. These curves start from the top and smoothly flow downward toward the front. Keep both sides similar in shape. The top curved slot remains in the center. Adjust the lines so they blend naturally with the block edges.
Step 5: Add Holes and Inner Details
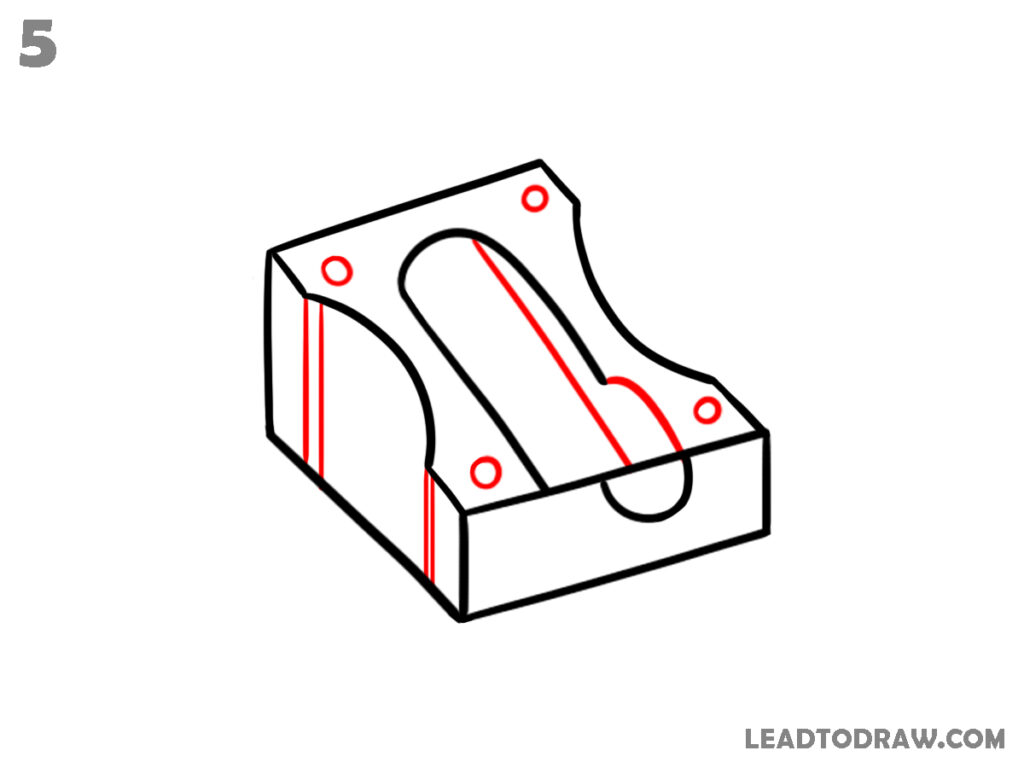
Draw small circular holes on the top plate, placing them near the corners and sides. Add a long inner strip following the center curved slot. Include vertical lines on the left side face to show surface detail. Keep all circles neat and evenly spaced. Maintain alignment with the body edges.
Step 6: Begin Side Shading
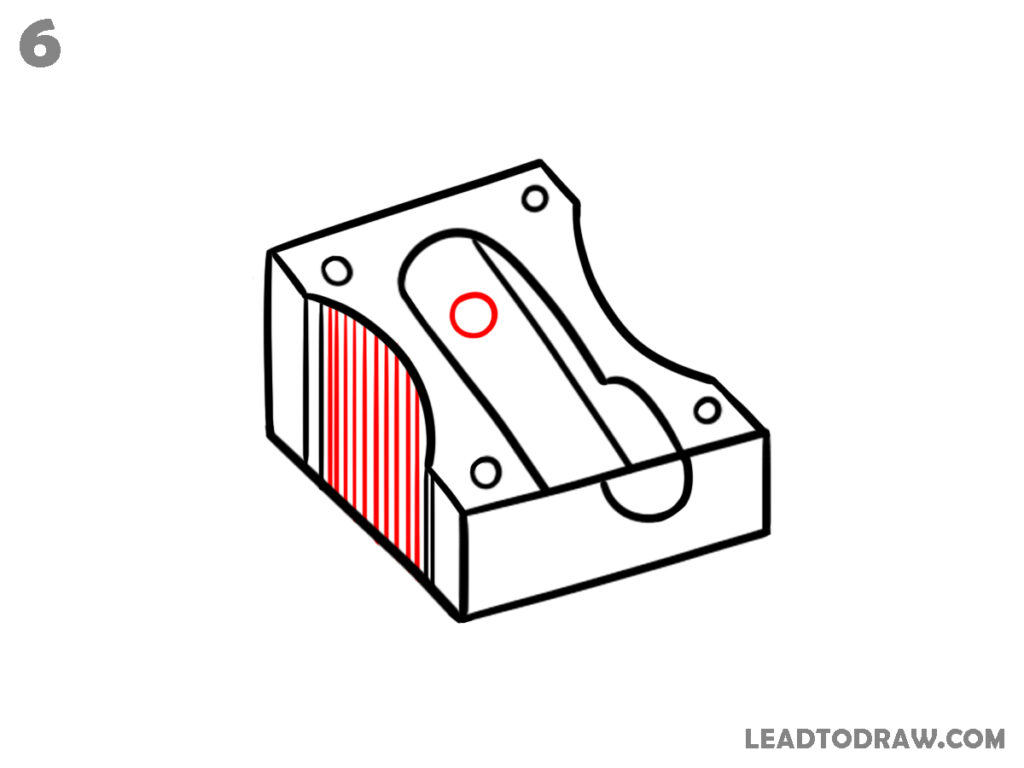
Fill the left side surface with closely spaced vertical lines to create shading. Keep lines parallel and evenly placed. Add a small circle inside the central strip. Maintain all earlier shapes clearly. Do not overlap lines outside the surface area. Keep shading consistent and controlled across the side.
Step 7: Sharpen Blade Edge
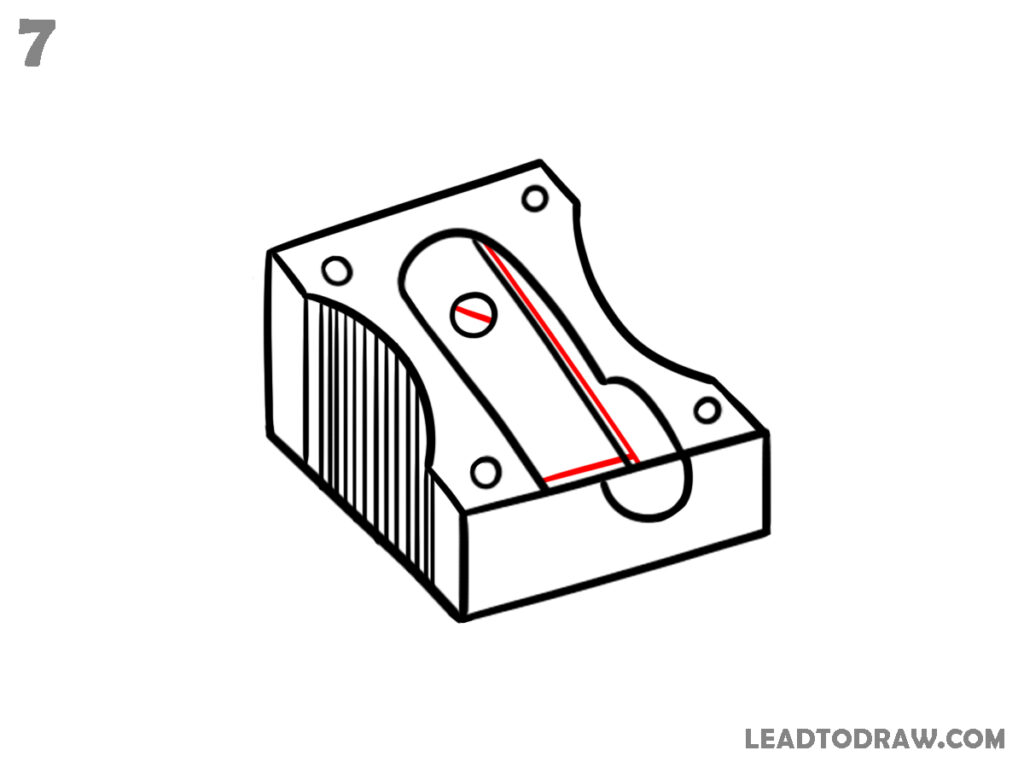
Draw a thin, sharp line along one side of the central blade strip, following its full curved length. Keep this line clean and slightly darker than the rest to show a sharp edge. Do not change the other side. Maintain the screw circle in the center and keep the strip aligned inside the slot properly.
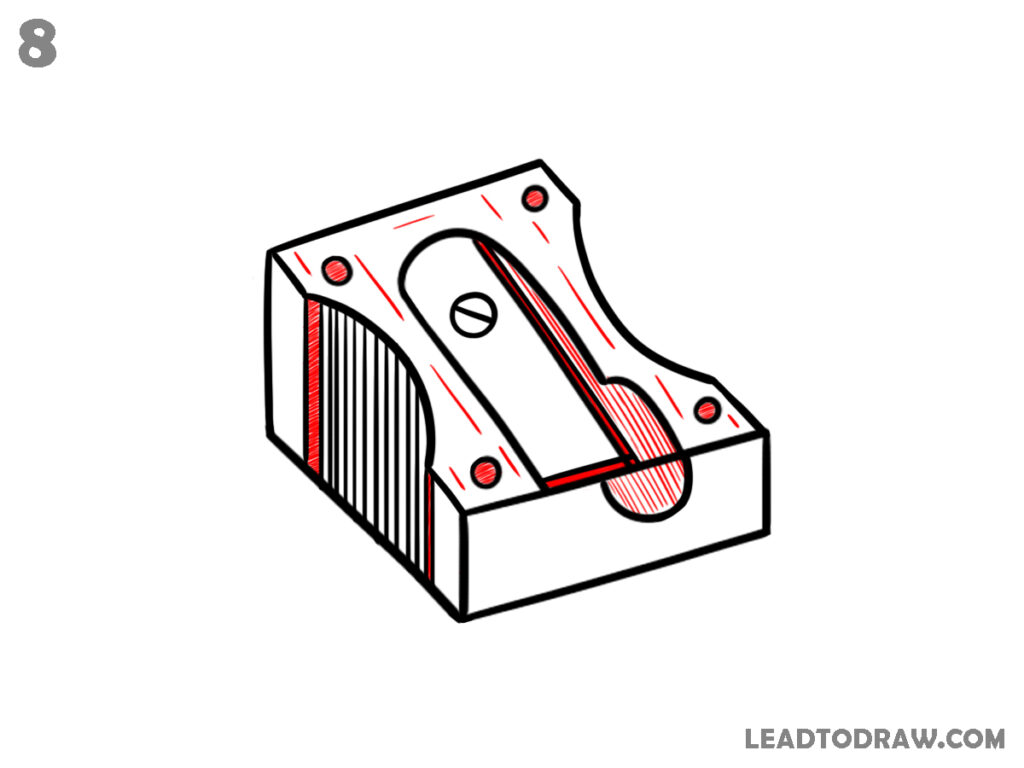
Step 8: Add Final Surface Details
Add light shading on the front curved opening and near the holes. Refine the side shading by adjusting spacing where needed. Slightly darken the edges of the block for depth. Keep all lines clean and remove extra marks. Ensure curves, holes, and edges are sharp and clearly visible.

Step 9: Check and Clean Drawing
Check all lines and shapes carefully. Correct uneven edges, adjust curves, and clean unwanted marks. Darken final outlines where needed. Ensure shading stays inside surfaces. Keep holes, slots, and edges clear. Erase extra lines and smooth the drawing so the pencil sharpener looks neat and complete.
For more similar drawing tutorials, explore the guides below.
- How to draw a handbag in easy way
- How to draw a clock step by step effortlessly
- How to Draw a Rubik’s Cube in an Easy Way
Conclusion
This guide shows how to draw a pencil sharpener step by step using simple shapes and lines. By following each image carefully, you can build the full structure with correct curves and details. Keep checking your drawing at every stage and make small corrections. Practice again to improve control and line accuracy.