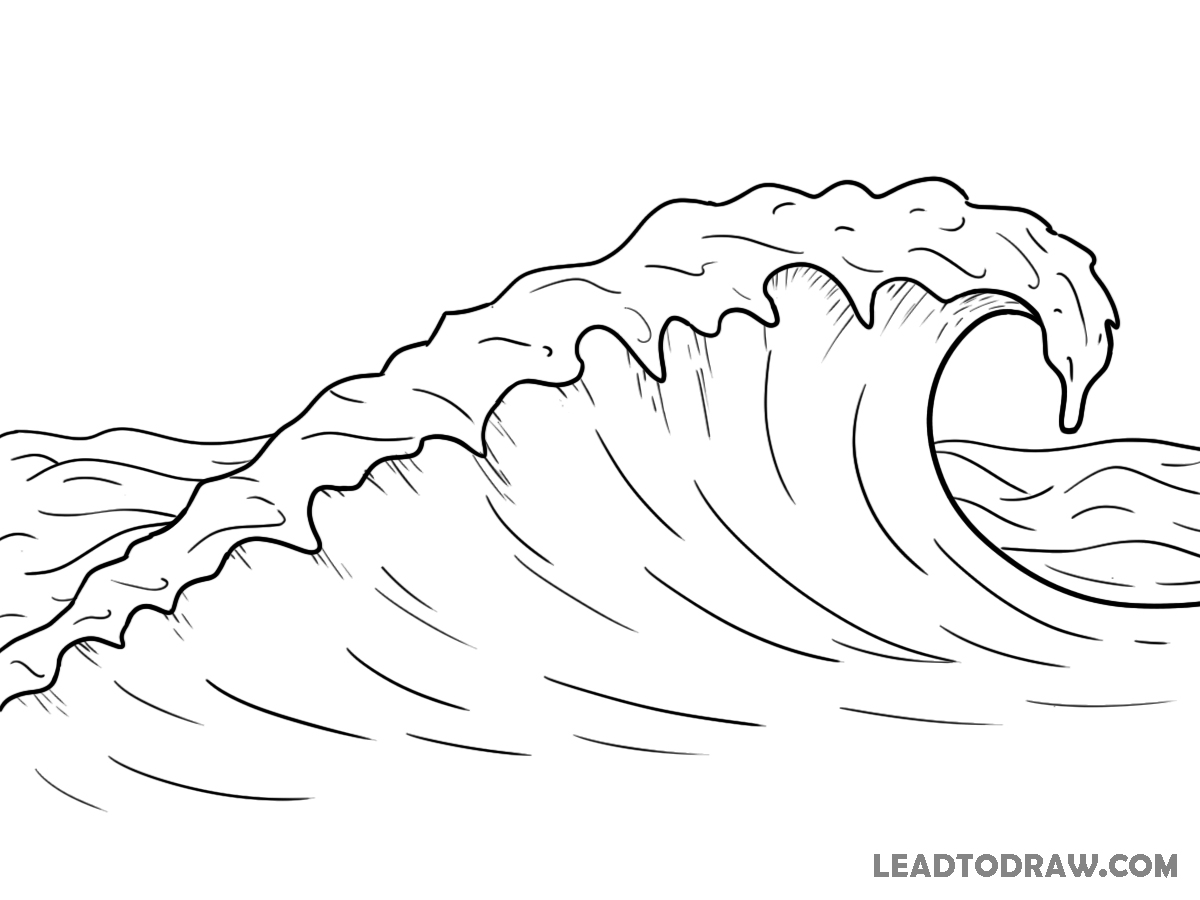
Learn how to draw waves in water using simple curved lines, foam shapes, and flowing water marks. In this tutorial, the new lines are shown in red, while previous lines stay black for easy understanding. Follow each drawing step carefully according to the images and remove guide lines where they are no longer visible.
Let’s start
Step 1 – Draw the Main Wave Shape
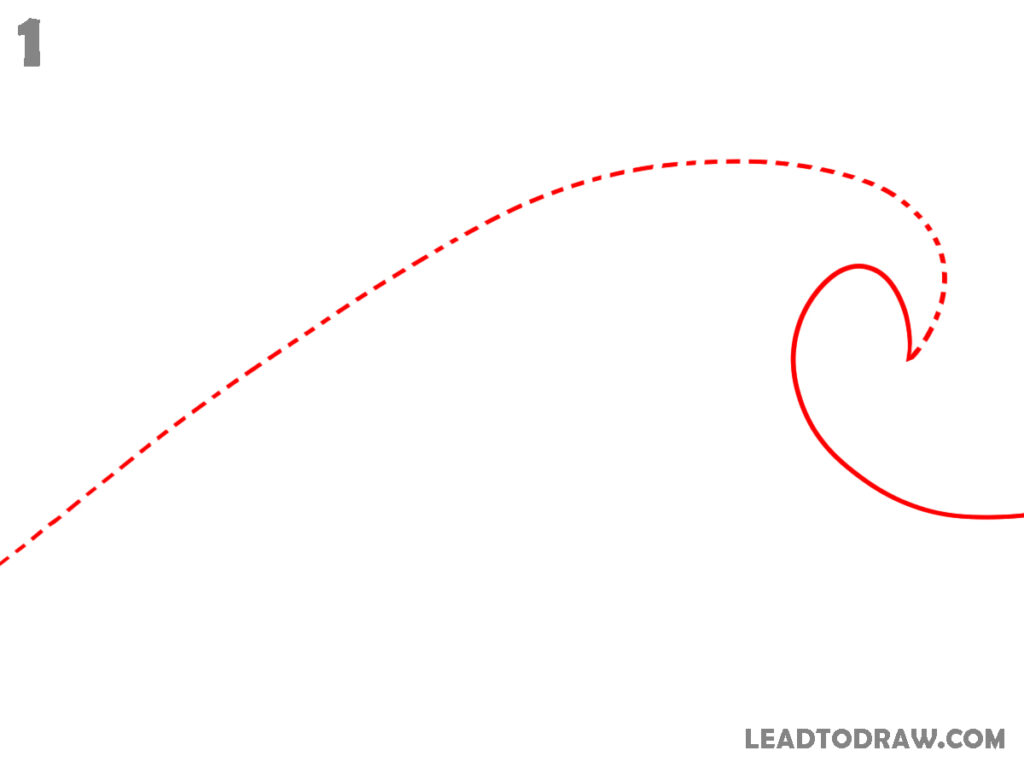
Start by drawing a long upward curved line from the lower left side toward the upper right area. Near the end, curve the line downward into a wave curl shape. Continue the curve inside and extend a short line outward on the right side. Keep the upper curve smooth and leave the lower area open, like the image.
Step 2 – Add One Guide Curve
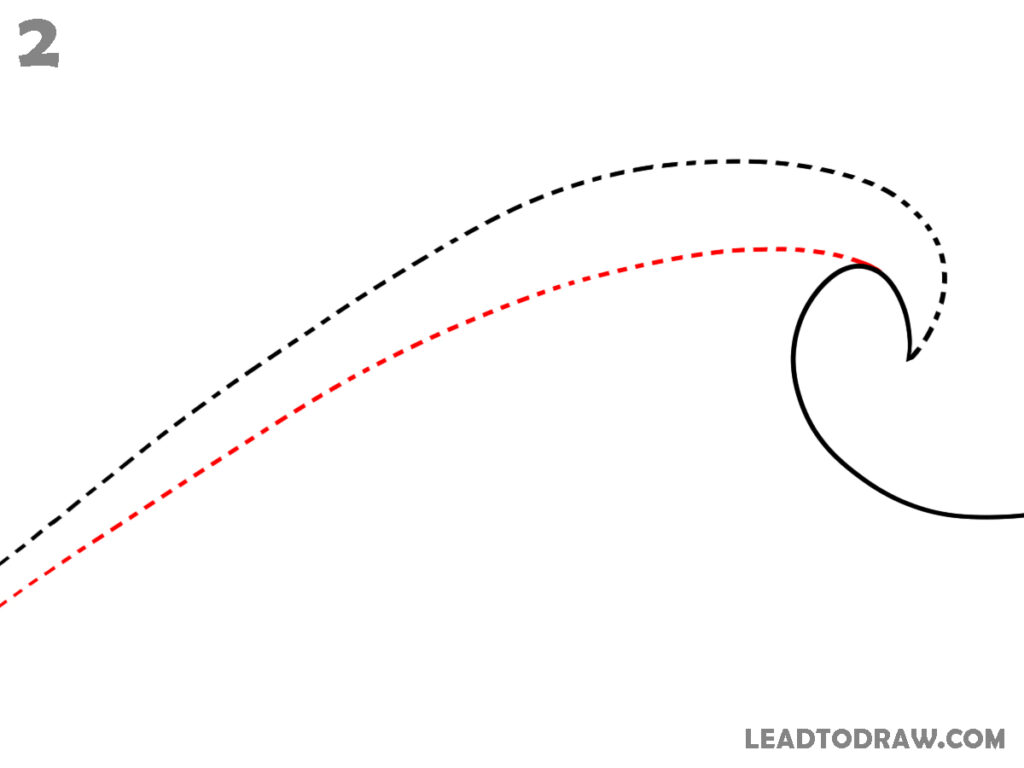
Draw one dotted curved guide line above the first wave shape, starting from the left side and moving toward the front curl area. Keep the curve smooth and follow the same flow direction as the main wave line below it. Leave the original wave outline visible and do not add extra foam or water details in this step.
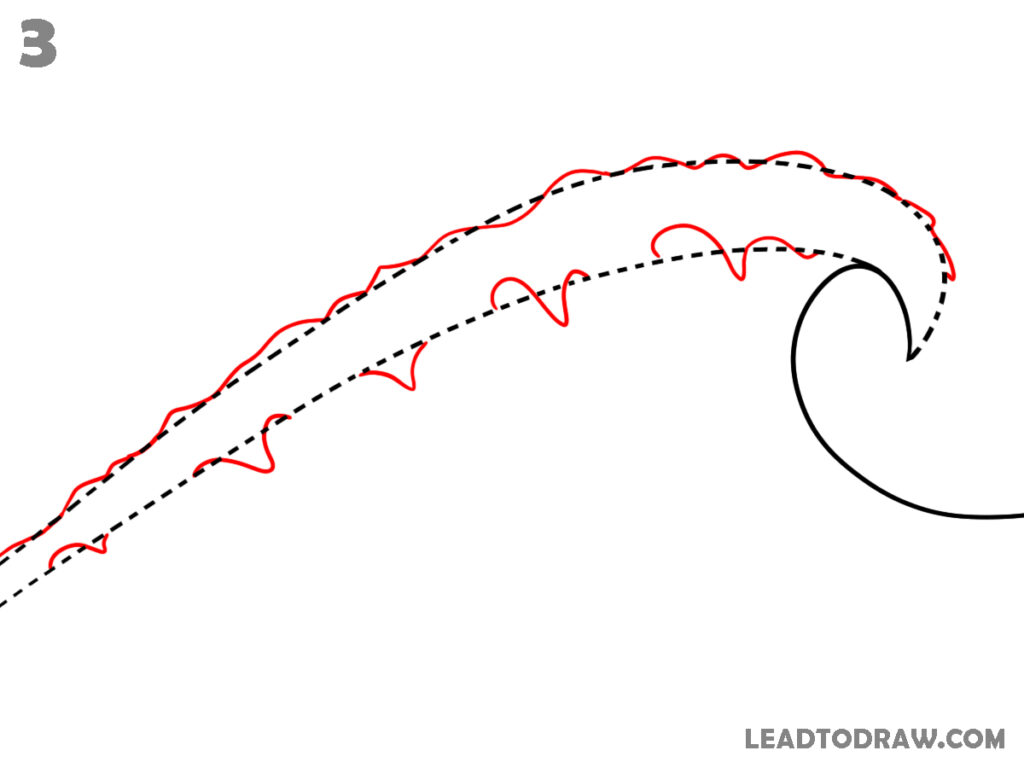
Step 3 – Draw the Foam Edges
Add rough foam edges along the upper dotted curve using small uneven bumps from left to right. Draw pointed dripping foam shapes along the lower dotted curve under the wave. Continue adding small wave-like edges near the front curl area. Keep the earlier wave outline visible while building the foam pattern over both guideline curves.
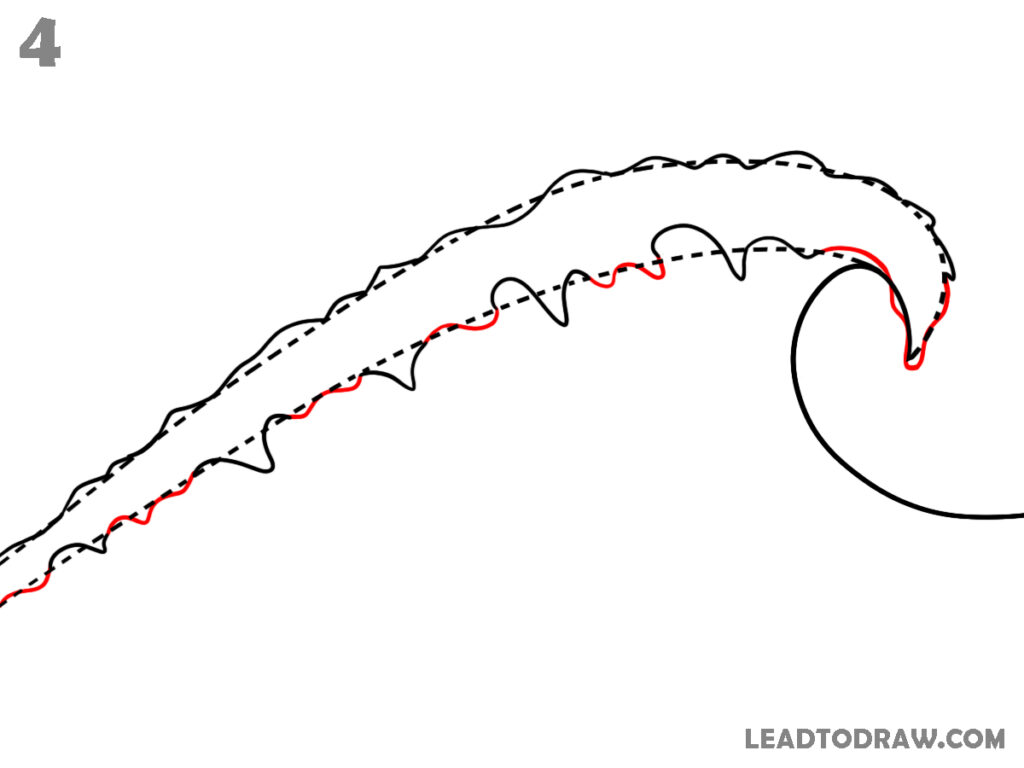
Step 4 – Continue the Foam Details
Draw more uneven foam lines over the top edge and continue the pointed foam marks below the wave body. Add extra curved bumps near the front curl and lower wave edge. Extend the rough foam texture carefully along the full wave shape. After, remove the guideline.
Step 5 – Add Water Surface and Inner Marks
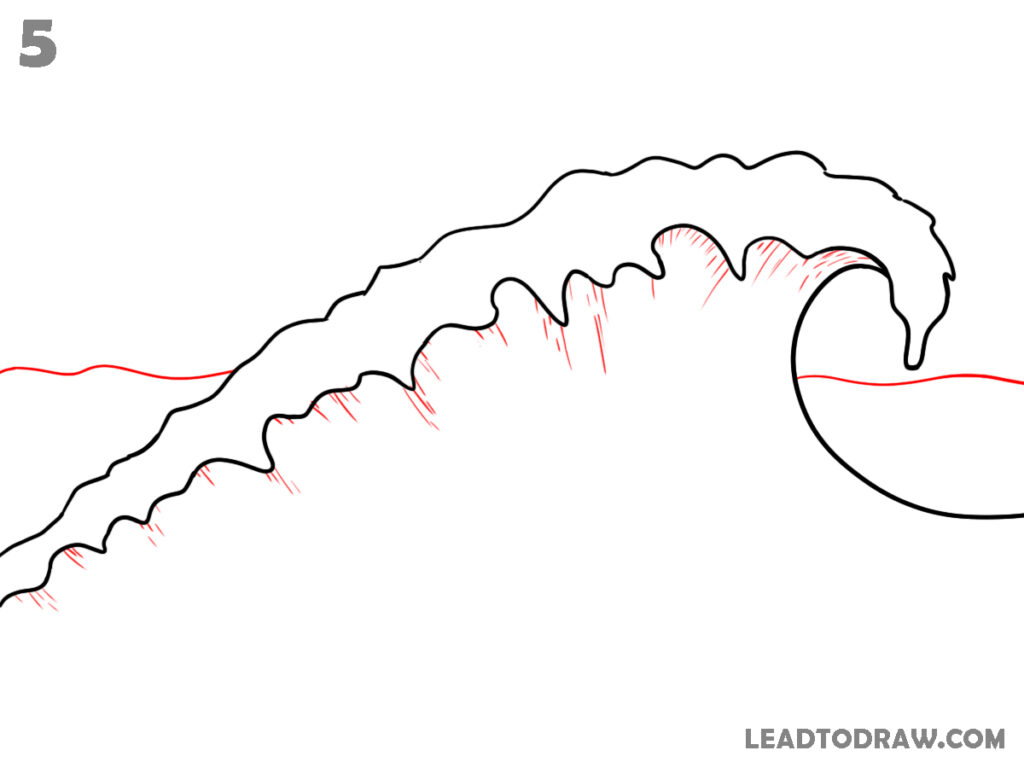
Draw a straight water surface line behind the wave from left to right. Add short, thin, curved texture lines inside the wave under the foam area. Place several small downward strokes near the front curl and lower wave section. Keep the outer wave shape dark and visible while the inside lines remain light and narrow.
Step 6 – Draw Flowing Water Lines
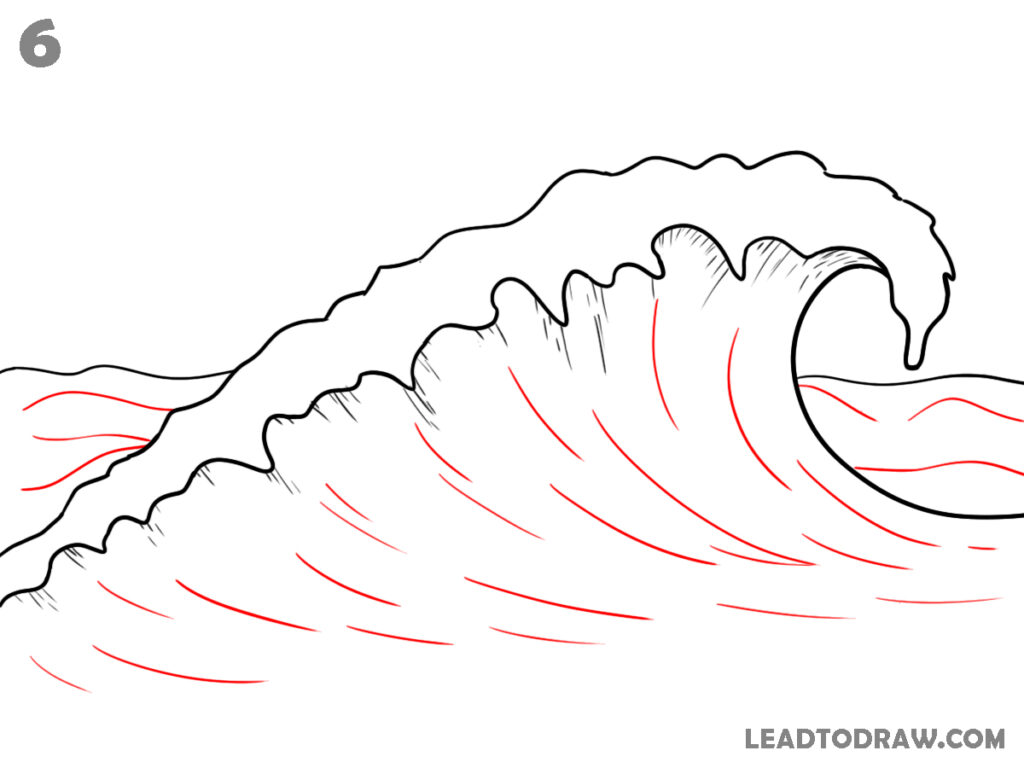
Add long curved, flowing lines inside the wave body from the lower left area toward the curl section. Draw extra water movement lines outside the wave near the surface area on both sides. Continue adding small inner texture marks below the foam. Keep the lines following the curved direction of the wave shape shown in the image.
Step 7 – Add Foam Texture on the Top
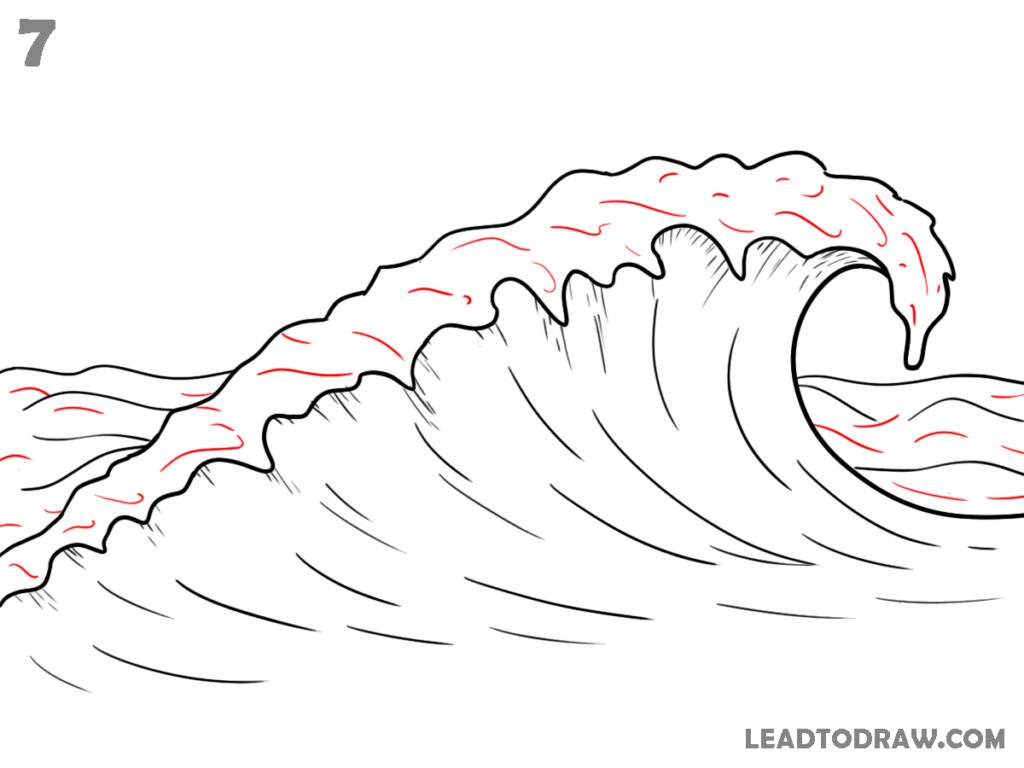
Draw small curved texture marks over the upper foam section from the left side to the front curl area. Add more thin water lines behind and below the wave body. Continue filling the surface with short curved strokes while keeping enough open spaces between them. Maintain the same flow direction across the full drawing.
Step 8 – Check and Clean the Drawing
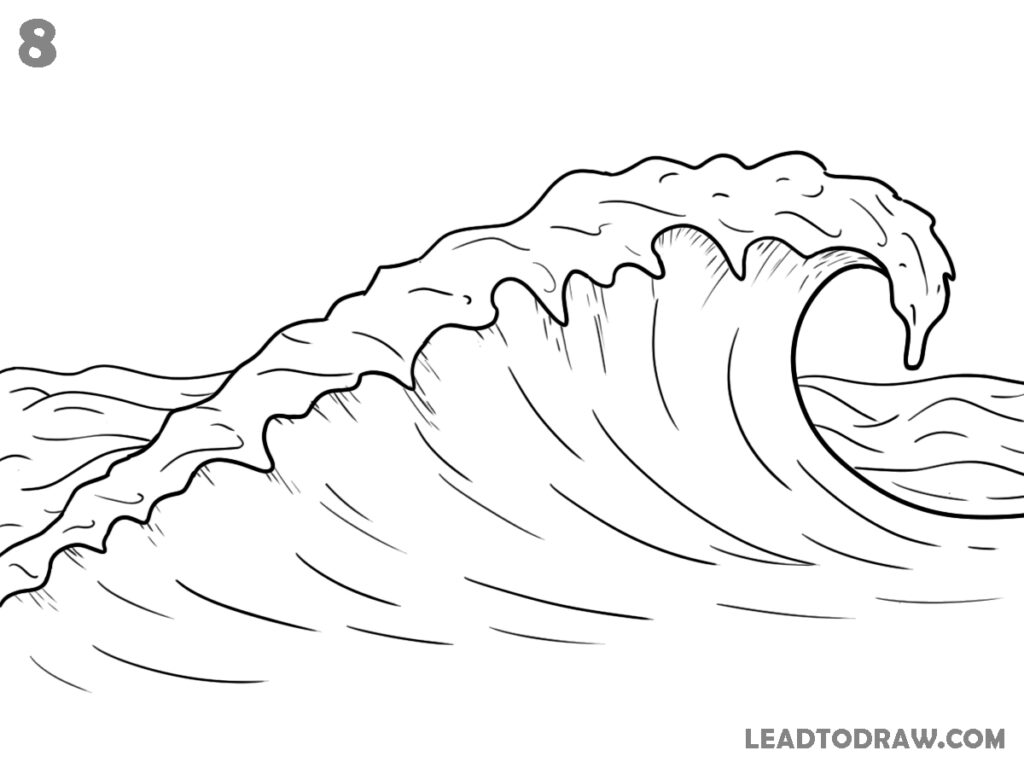
Check the full wave drawing and darken the final outer lines where needed. Remove any remaining guideline marks that are still visible. Clean extra sketch lines around the foam, curl, and water surface areas. Keep the flowing water lines neat and follow the same curve direction shown throughout the completed wave drawing.
Conclusion
This how to draw waves in water tutorial shows each part using curved lines, foam edges, and flowing water marks. Follow every image carefully and draw slowly from one step to another. Remove guide lines where needed and keep the final wave shape clean. Practice the same method again to improve smooth hand movement daily.