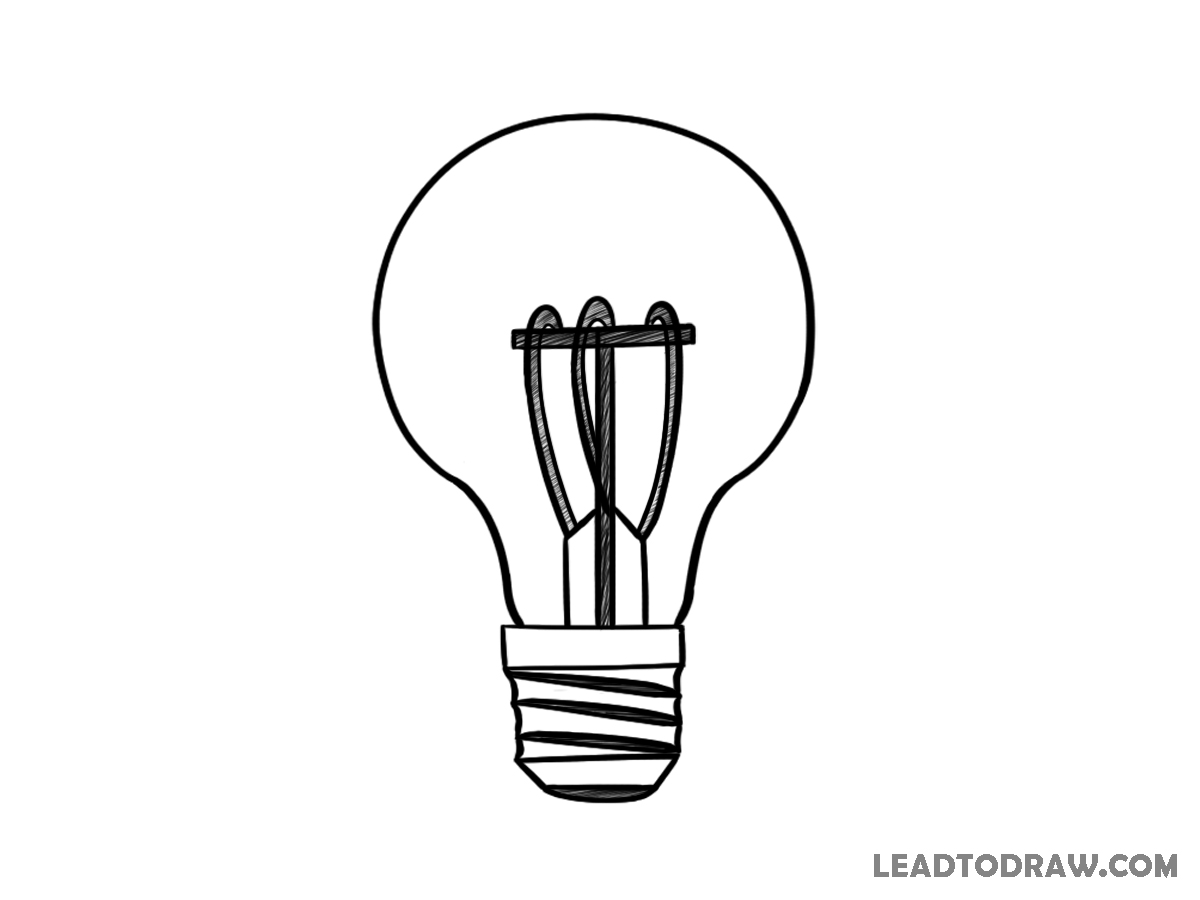
Learn how to draw a light bulb step by step using simple shapes and clear lines. Follow each image carefully and draw in the same order. New parts are shown to guide you better. Keep your lines neat and adjust slowly as you move forward in each step.
Lets Start
Step 1: Draw top curve and the base shape
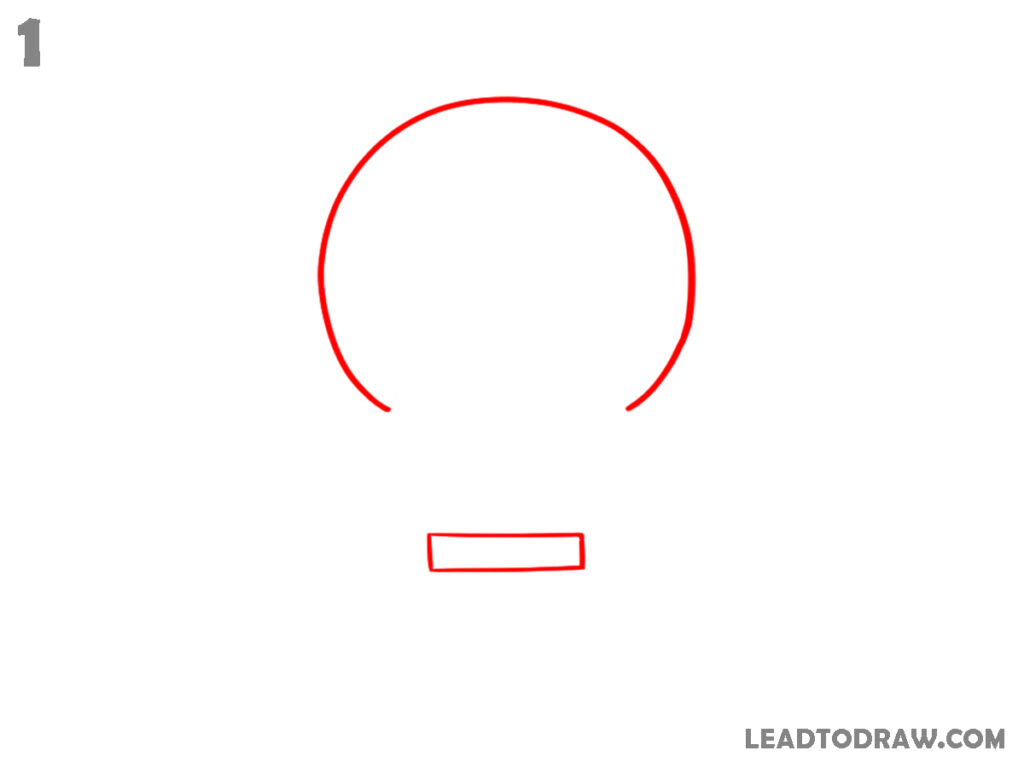
Start by drawing a curved line forming the top round part of the bulb. Leave the bottom open. Below it, draw a small horizontal rectangle shape for the base section. Keep both shapes aligned in the center. Do not connect them yet. Maintain smooth curves and straight edges as shown.
Step 2: Connect the bulb and add base lines
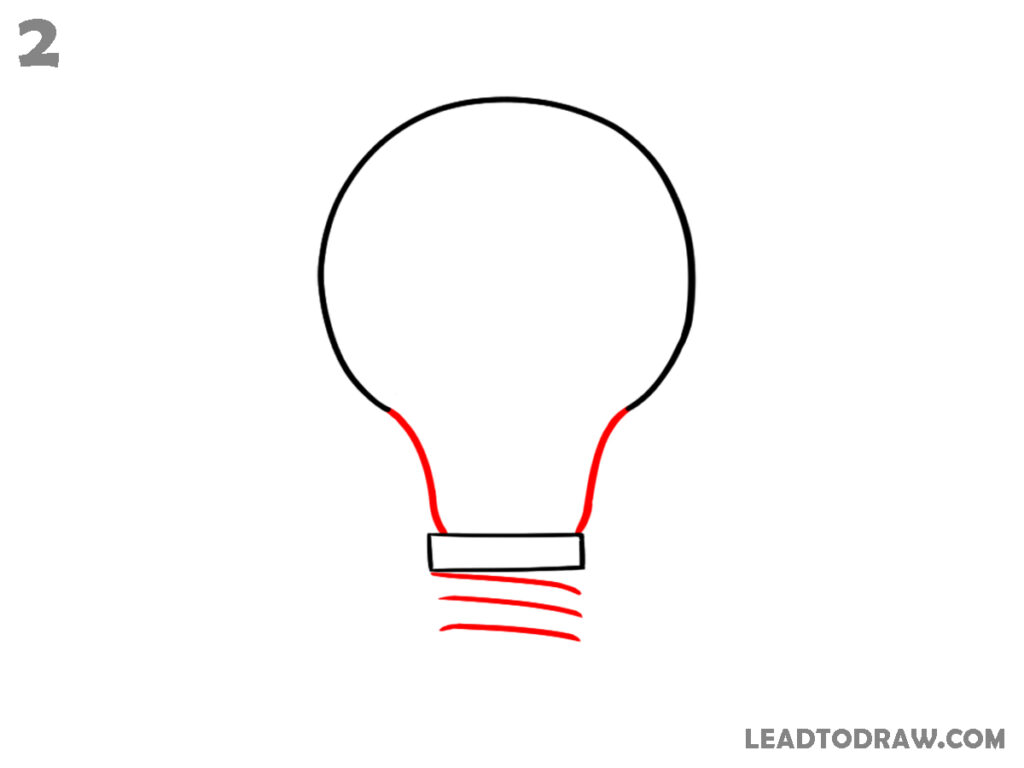
Extend two slightly curved lines downward from both ends of the top curve to connect with the rectangle below. This completes the outer bulb shape. Under the rectangle, draw short curved lines to show the threaded base. Keep the spacing even and follow the direction shown in the image.
Step 3: Draw inner support line and the top bar
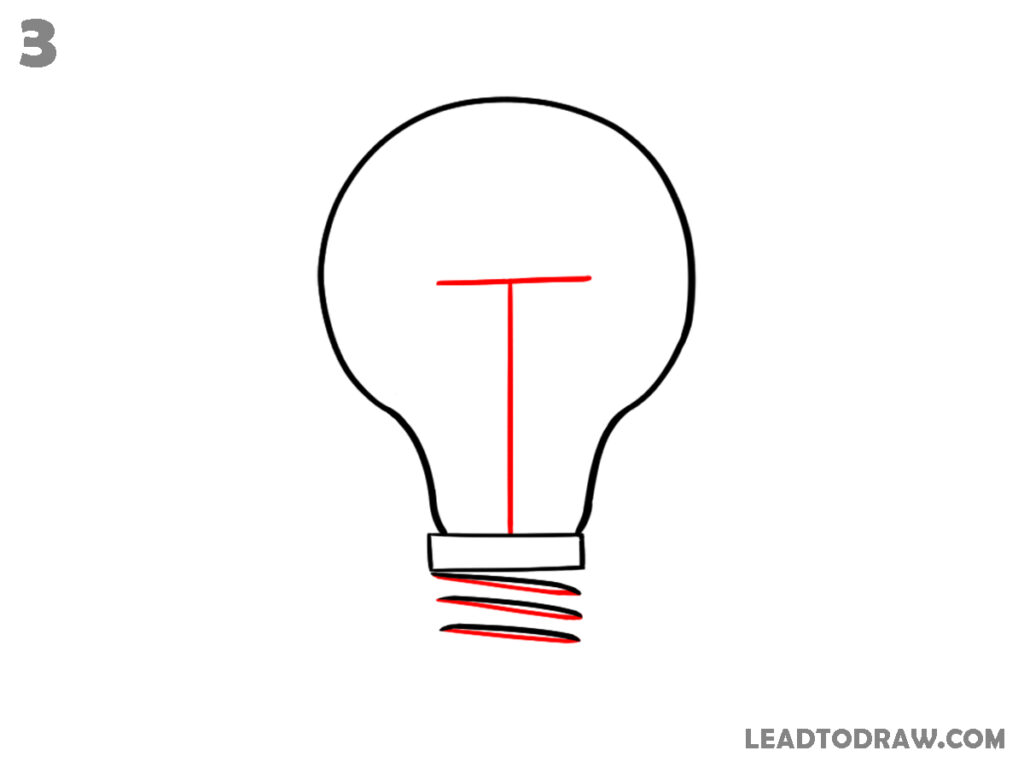
Inside the bulb, draw a vertical straight line starting from the base area and going upward. Near the top inside the bulb, draw a horizontal line connecting across. This creates a T-like shape inside. Keep the lines centered and straight. Do not extend beyond the bulb outline.
Step 4: Refine inner structure lines

Draw a second vertical line close to the first one to make the inner support thicker. Adjust the top horizontal line slightly to align better with the new vertical lines. Keep everything inside the bulb shape. Maintain equal spacing and follow the placement as seen in the image carefully.
Step 5: Add lower inner supports and bottom shape
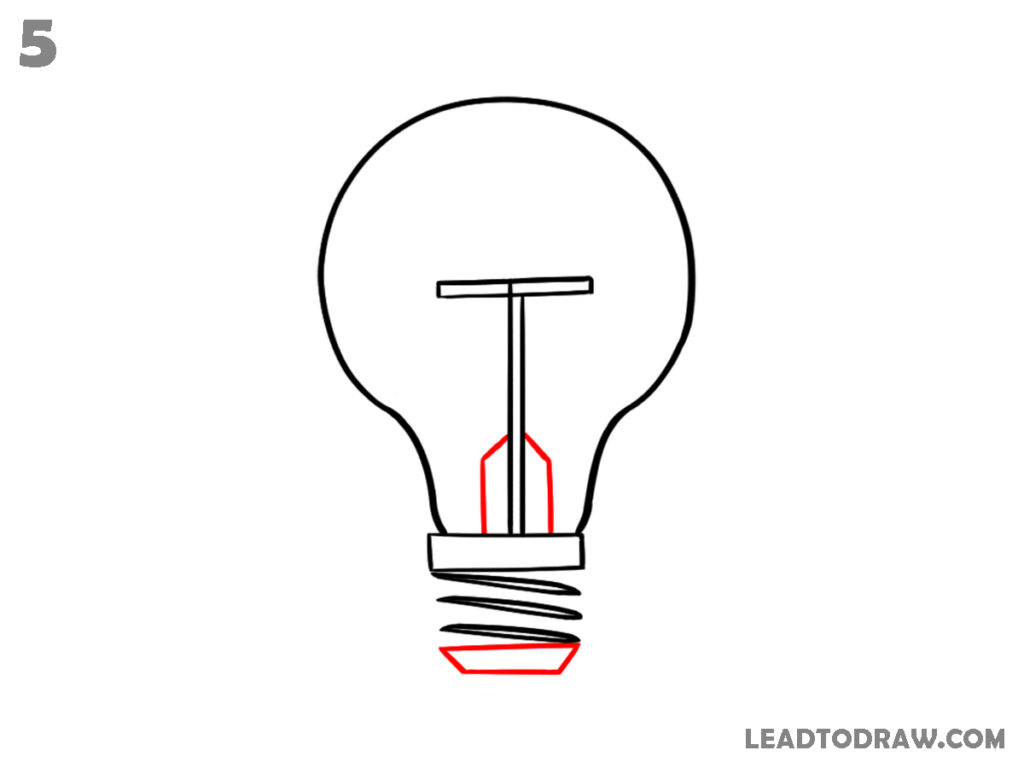
From the base area, draw two curved lines going upward slightly inside the bulb, connecting toward the vertical support. Below the threaded base, draw a small curved shape under it. Keep all lines neat and aligned.
Step 6: Draw filament loops inside the bulb
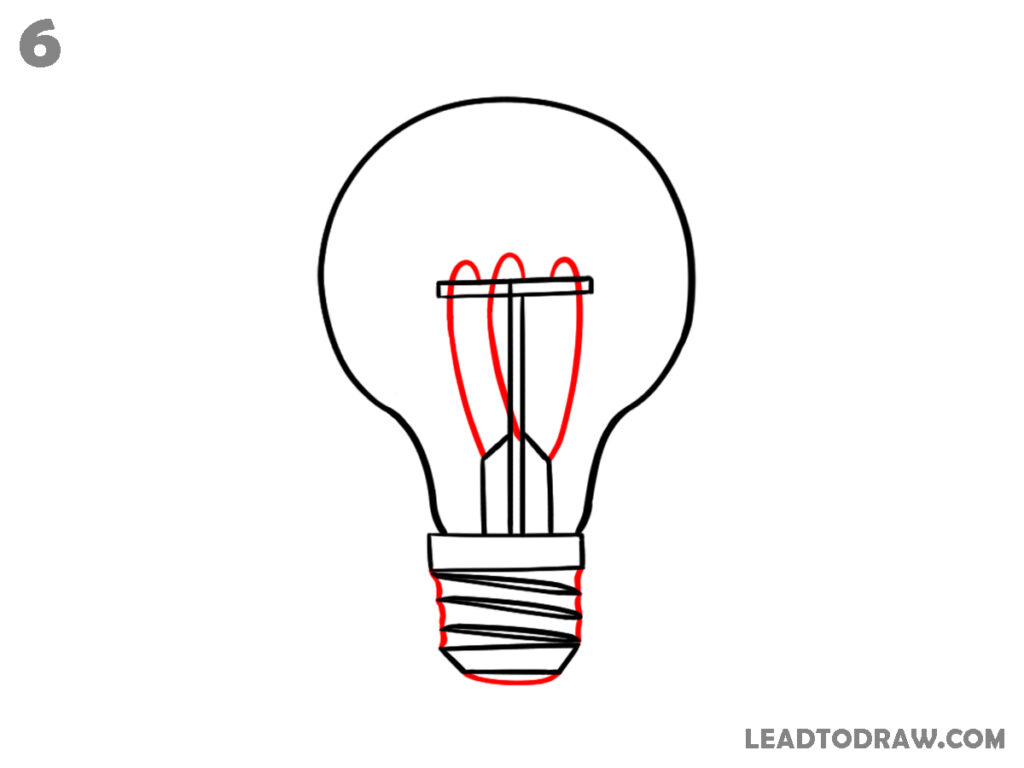
Inside the bulb, draw curved loop shapes on both sides of the vertical support lines. These loops connect near the top horizontal bar. Add more vertical inner lines connecting the base to top. Also, refine the threaded base by adding more curved lines.
Step 7: Refine filament and connections
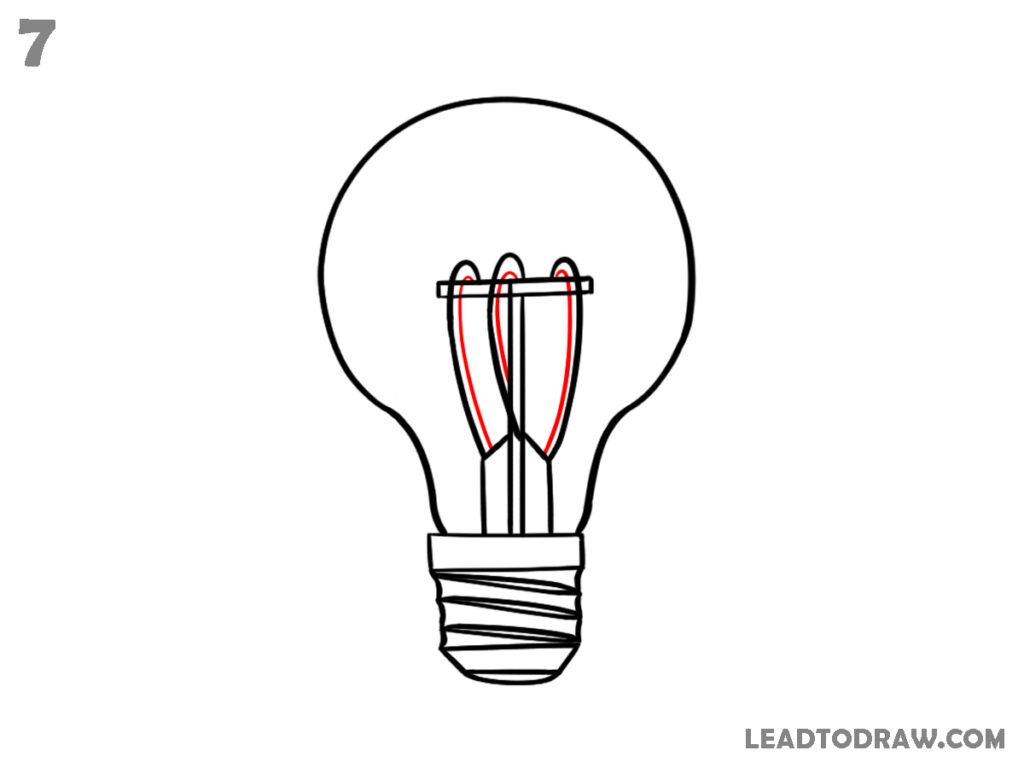
Add more detail to the filament loops by refining their curves and making connections clearer between top bar and vertical supports. Adjust lines to match the structure shown. Keep the inner parts clean and balanced. Ensure all lines stay inside the bulb outline and follow the exact placement.
Step 8: Finalise inner lines and base details
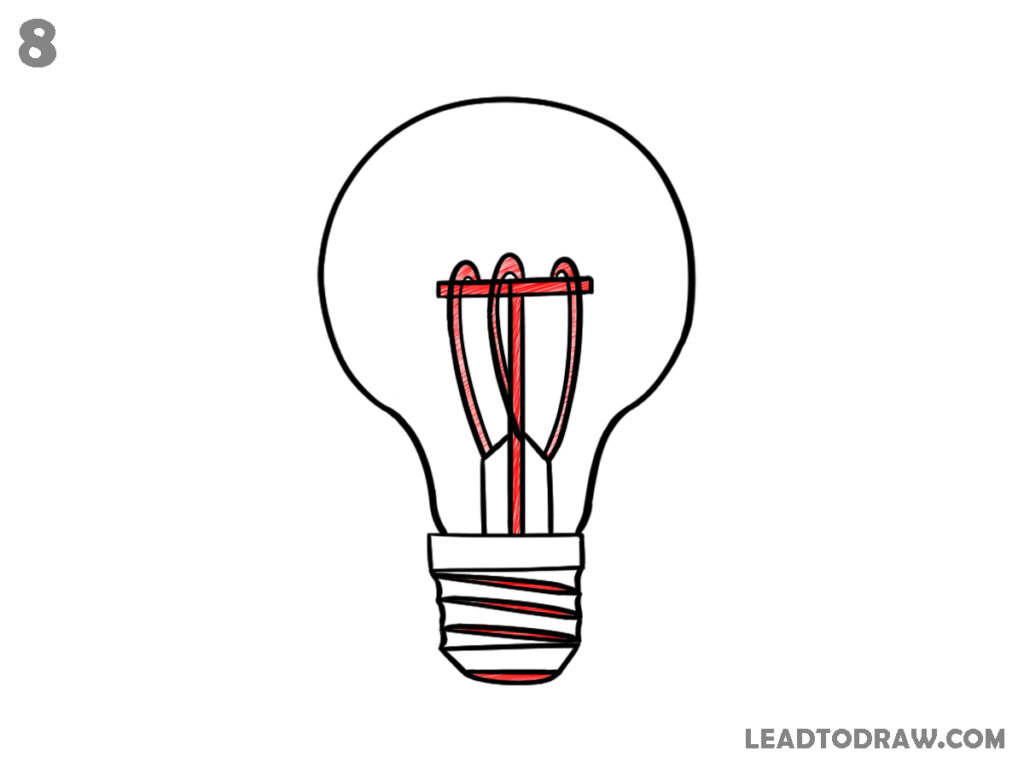
Darken and refine all inner lines, including loops, supports, and connections. Add final curved lines on the threaded base to complete the pattern. Ensure all lines are clean and consistent. Follow the image carefully and adjust the thickness where needed. Keep everything aligned properly within the bulb.
Step 9: Check and clean the drawing
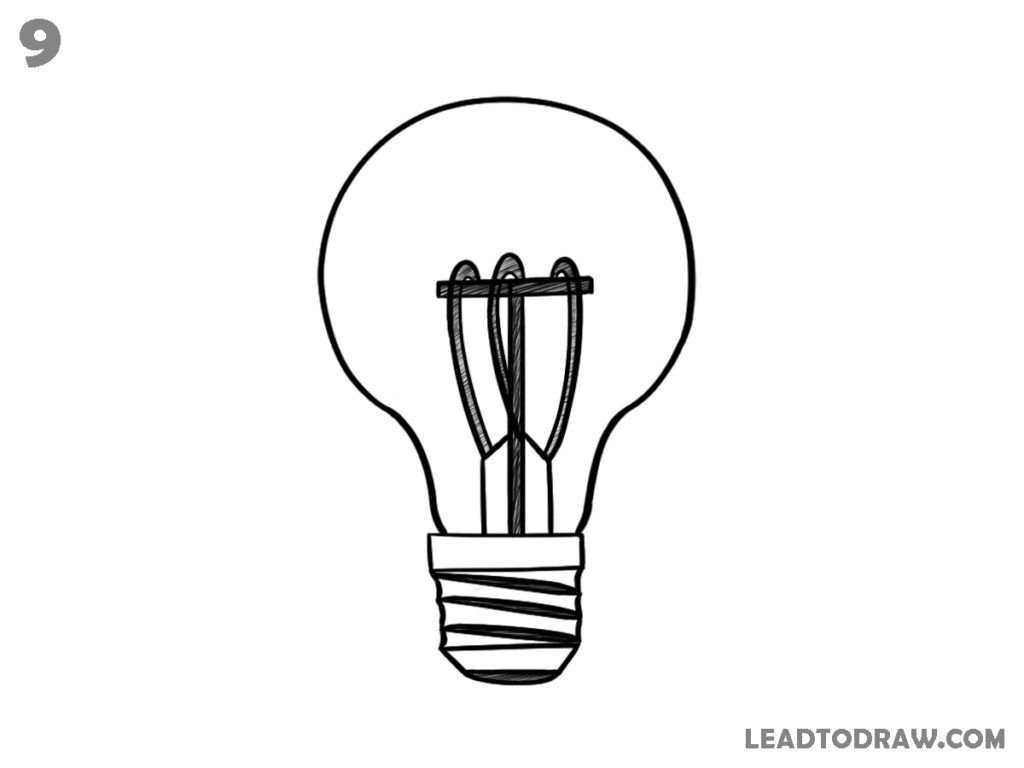
Check all parts of the drawing carefully. Remove extra or unwanted lines. Adjust any uneven curves or misaligned lines. Make all outlines and inner lines clear and smooth. Ensure the bulb shape, inner filament, and base are properly finished as shown. Keep the drawing neat and complete.
For more similar drawing tutorials, explore the guides below.
- How to Draw a Dumbbell in 7 Easy Steps
- How to draw a clock step by step effortlessly
- How to Draw a Rubik’s Cube in an Easy Way
Conclusion
Now you have completed how to draw a light bulb using simple steps and clear lines. Practice the same method again to improve your control. Focus on shape and line placement each time. With regular drawing, you can make it neater and more accurate without difficulty.