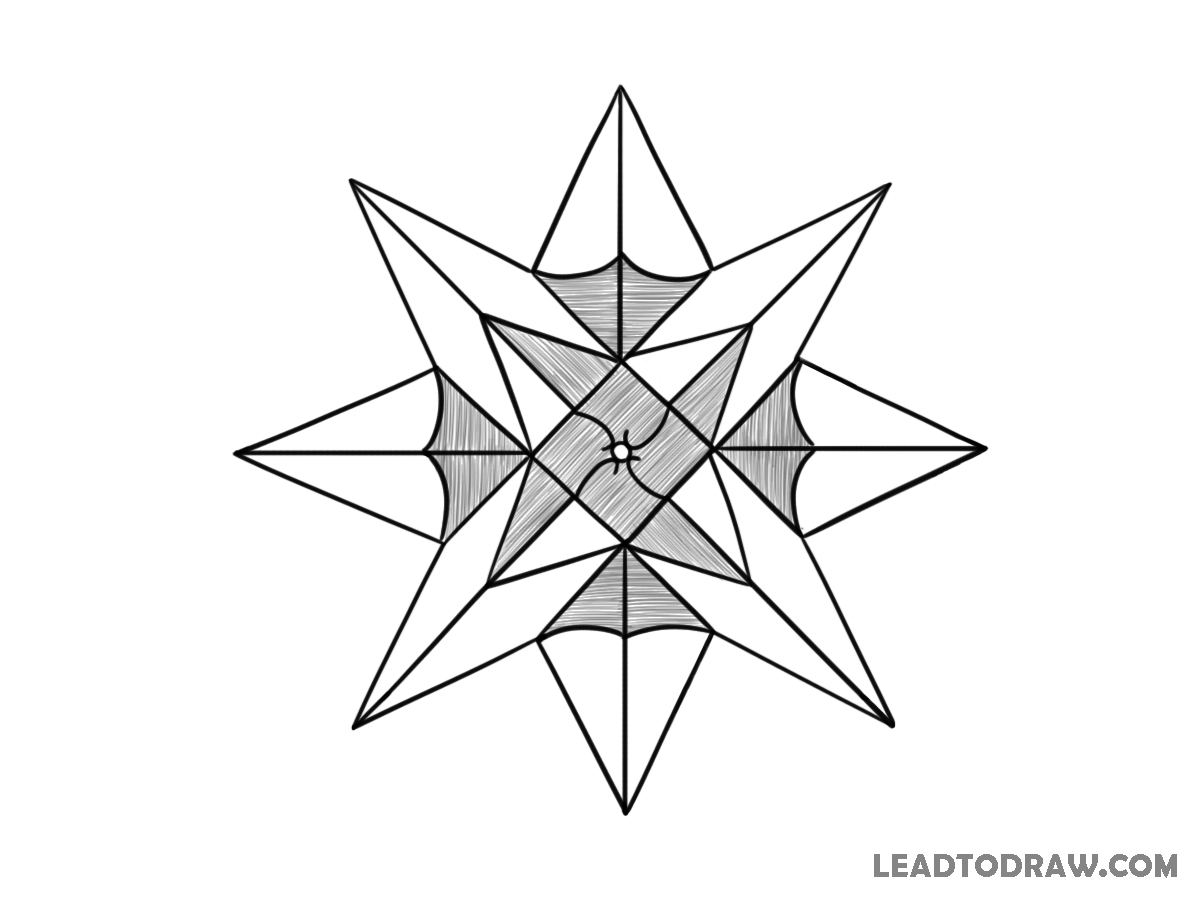
Learn how to draw a perfect star using simple line shapes and clean pencil strokes. In this tutorial, new parts are shown in red only for easy understanding, while older lines stay black. Follow each image carefully and draw the same shapes in order to create the final star design step by step.
Lets start
Step 1: Draw the Center Diamond
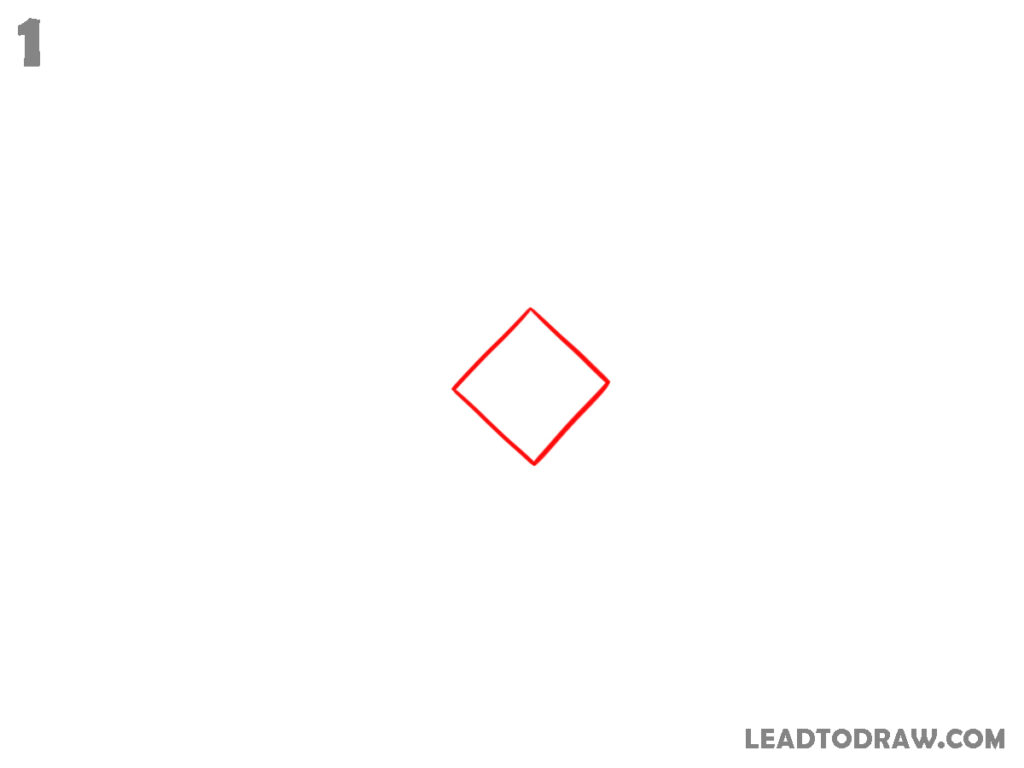
Start by drawing one small diamond shape at the center of the page. Keep all four sides equal and connect the corners neatly. Tilt the shape slightly so it stands on one corner instead of sitting flat. Leave enough empty space around it because more pointed star parts will be added outside this middle shape later.
Step 2: Add Diagonal Extension Lines
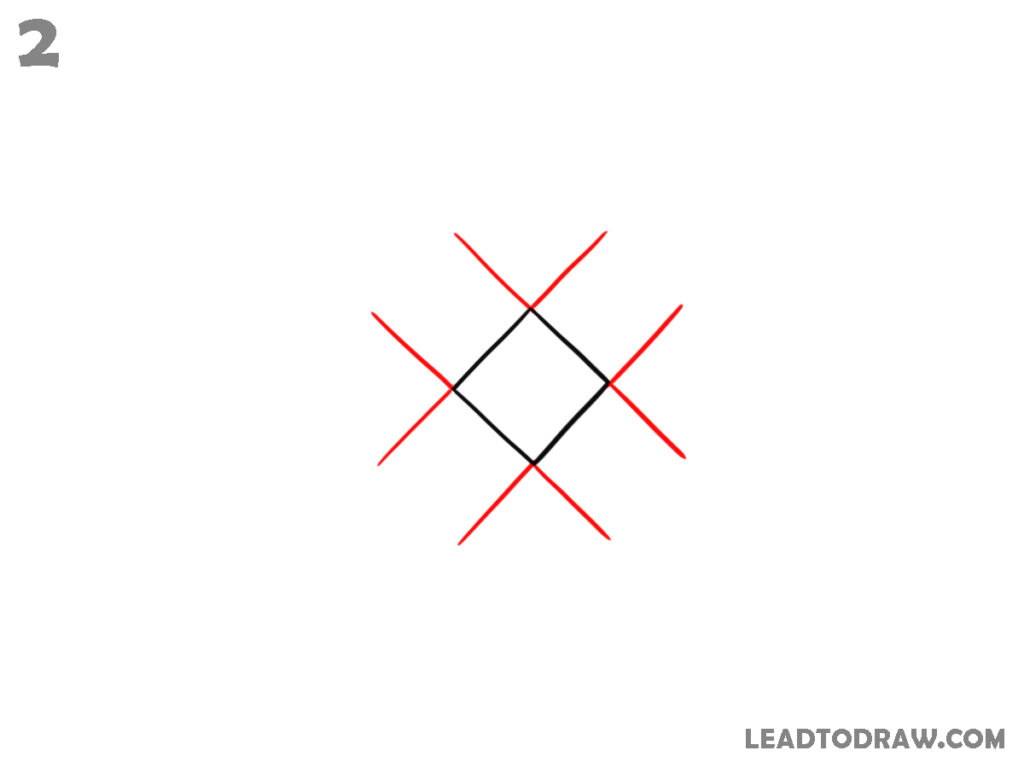
Draw short slanted lines from each corner area around the diamond shape. Add one line moving outward from every side direction to create four crossed diagonal parts around the center. Keep the spacing equal between all lines.
Step 3: Draw Vertical and Horizontal Lines
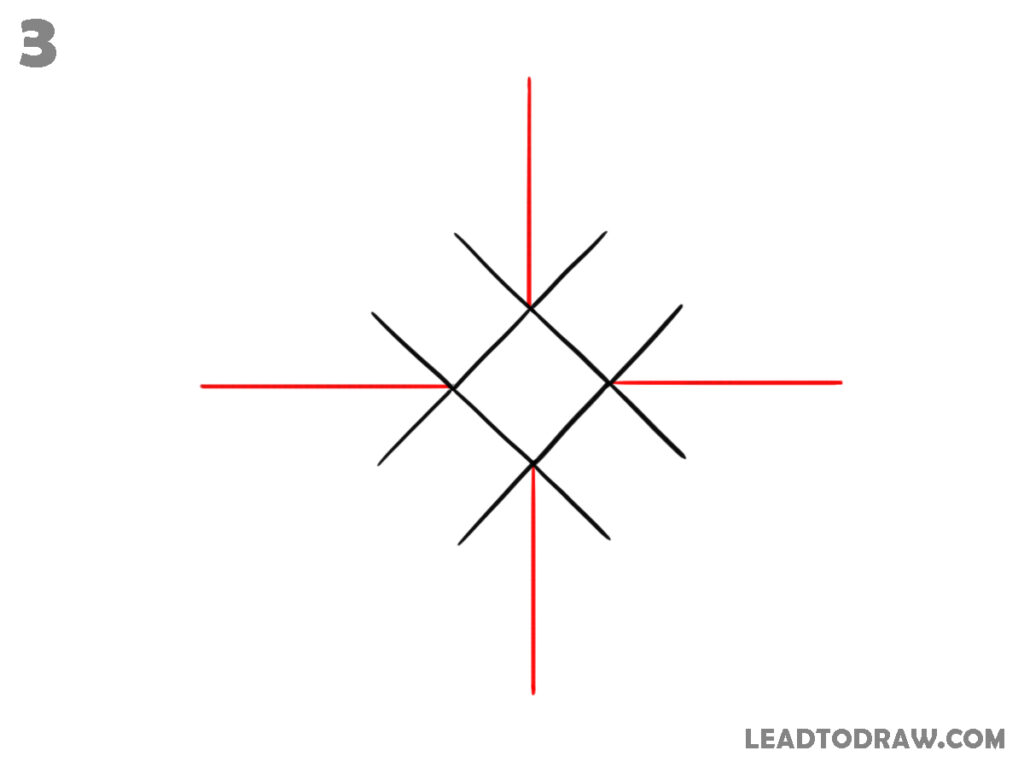
Add one straight vertical line passing through the upper and lower points around the center shape. Then draw one straight horizontal line passing through the left and right sides. Each lines should be eaqual each other.
Step 4: Create Four Outer Diamond Points
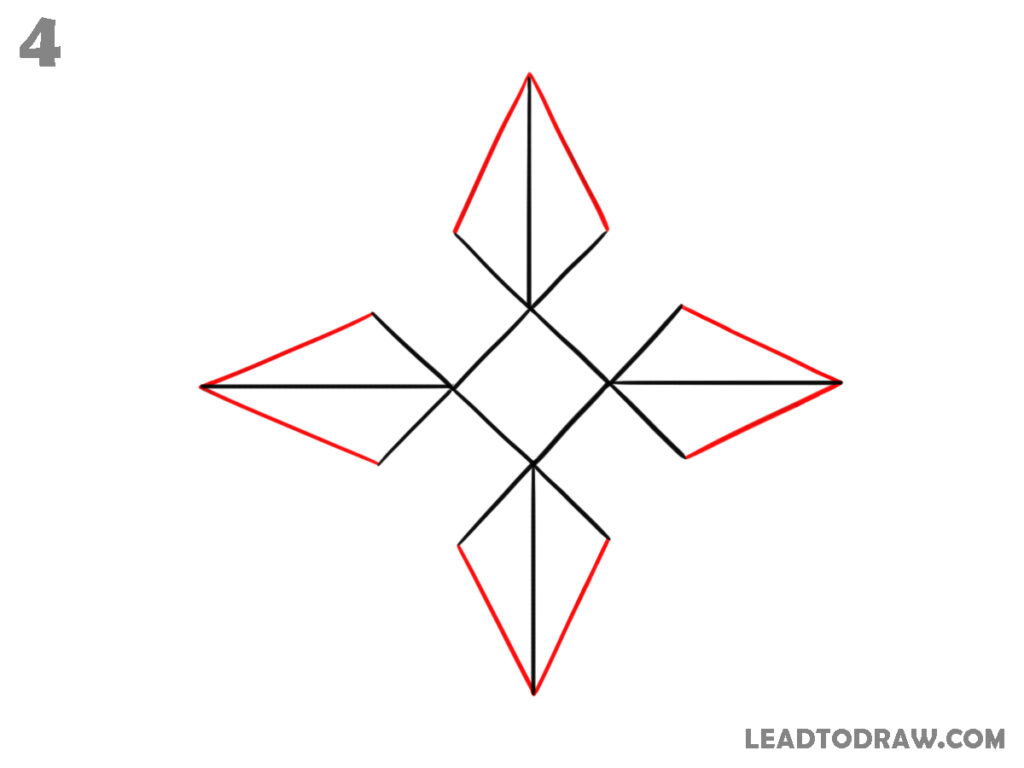
Draw pointed diamond shapes on the top, bottom, left, and right sides connected to the middle diamond. Each outer shape should stretch outward from the center using the guide directions already drawn. Keep the top and bottom shapes vertical while the side shapes remain horizontal. Connect every point carefully.
Step 5: Add Diagonal Guide Extensions
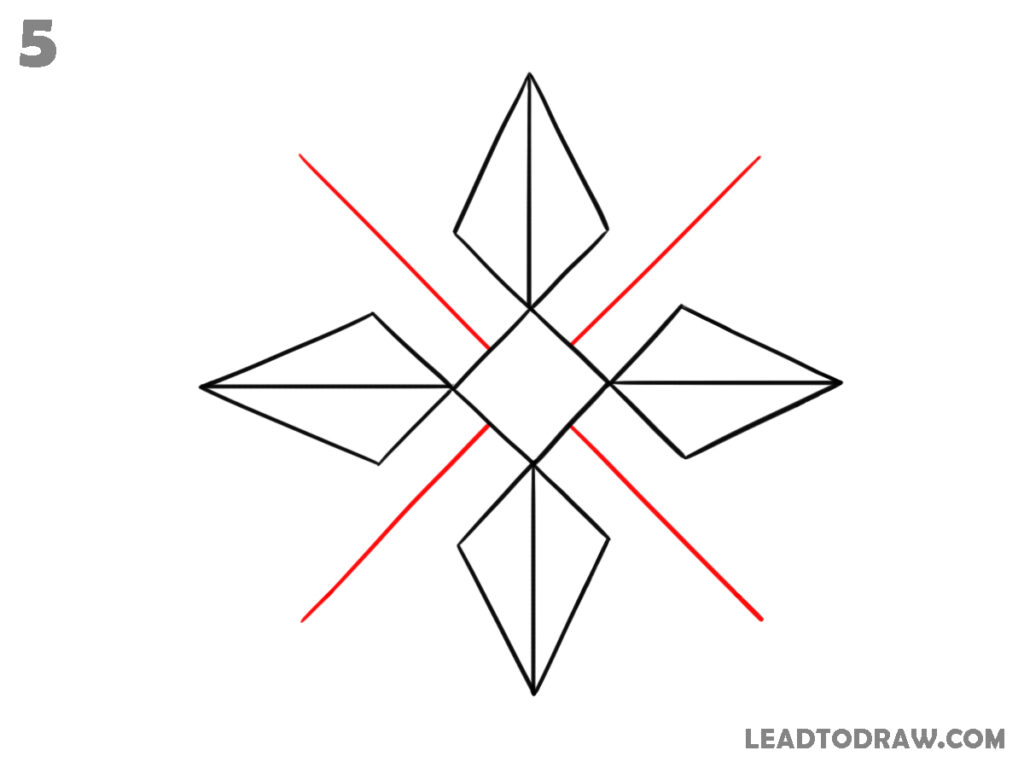
Draw long diagonal lines between the four outer diamond shapes. Start near the center diamond corners and extend the lines outward in slanted directions. These lines cross through the empty corner spaces between the top, bottom, left, and right points.
Step 6: Add new Star Points
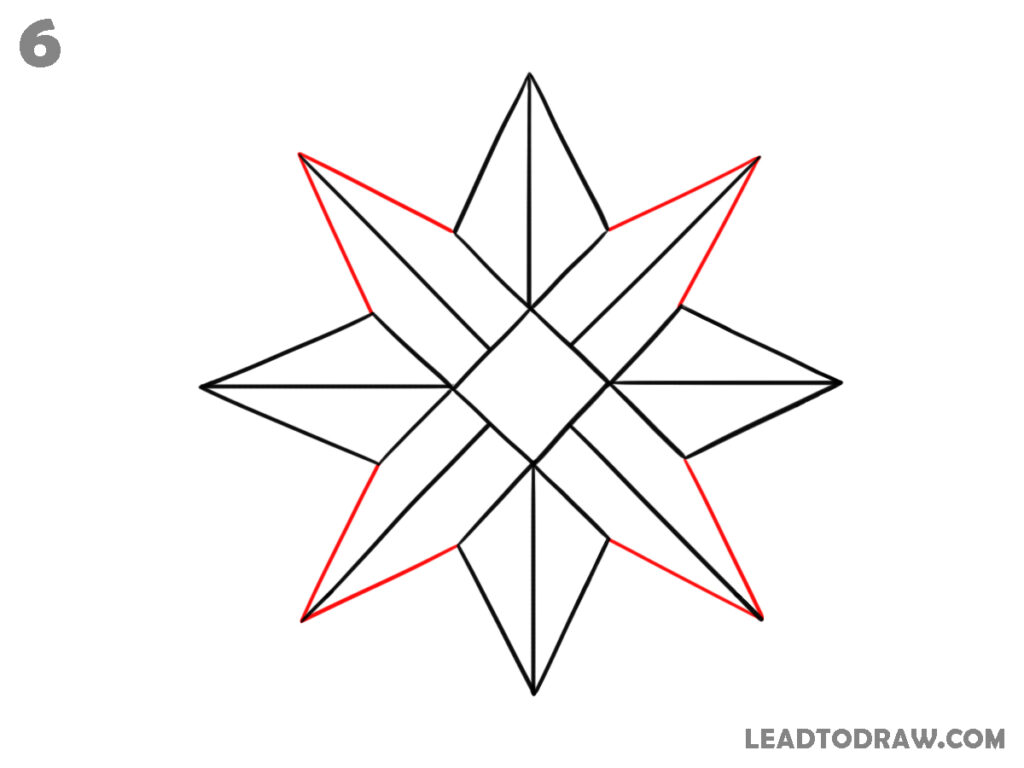
Use the diagonal guide lines to create four new sharp star points between the existing outer diamonds. Draw long pointed triangular shapes reaching outward from the center area. Connect each triangle carefully with the nearby shapes already drawn. The design now forms a eight-point star pattern with pointed sections arranged around the middle diamond.
Step 7: Add the Inner Star Shape
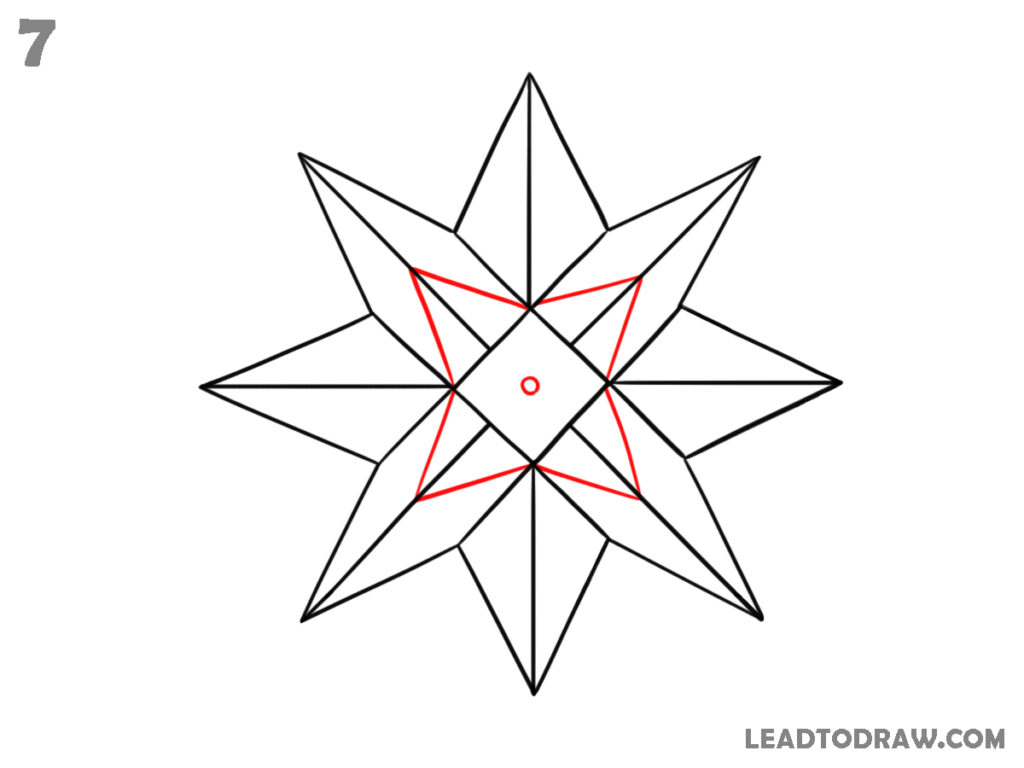
Inside the middle area, draw another smaller star shape using slanted connected lines. Begin near the center and join the corners carefully to form a rotated star pattern. Add a small circle in the exact middle of the drawing. Keep all outer star points visible while the new inner shape overlaps neatly inside the center area.
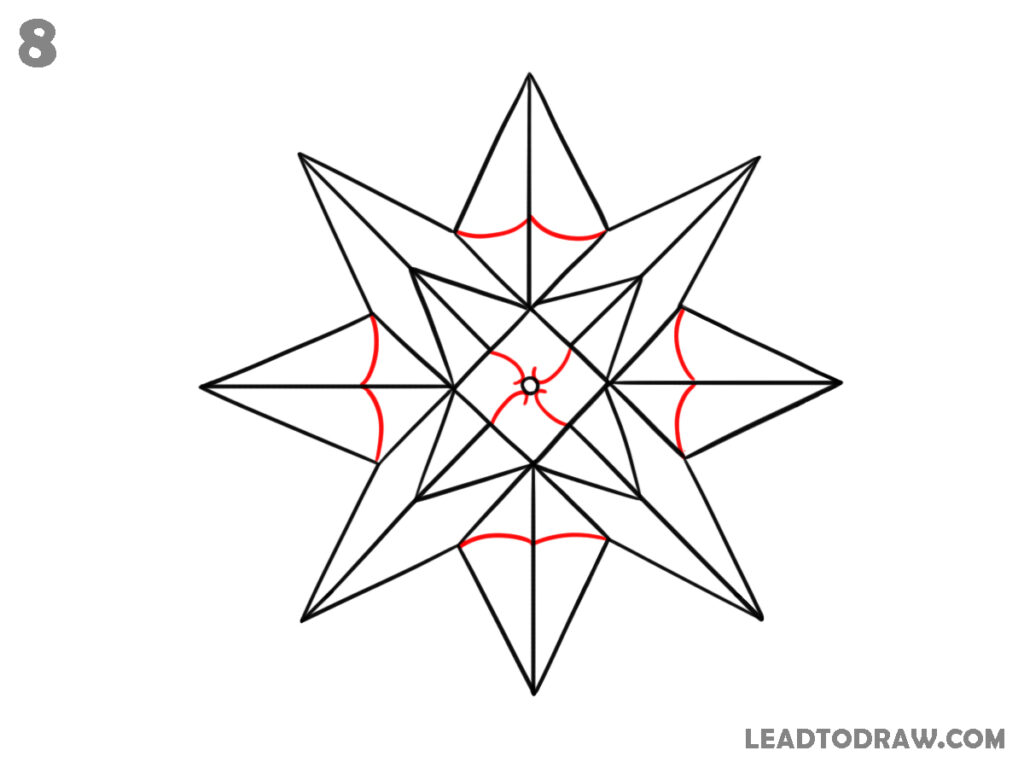
Step 8: Draw Curved Inner Sections
Add curved lines inside the four rounded side spaces between the outer star points. Draw smooth inward curves on the top, bottom, left, and right sections. Then add small curved details near the center circle according to the image.
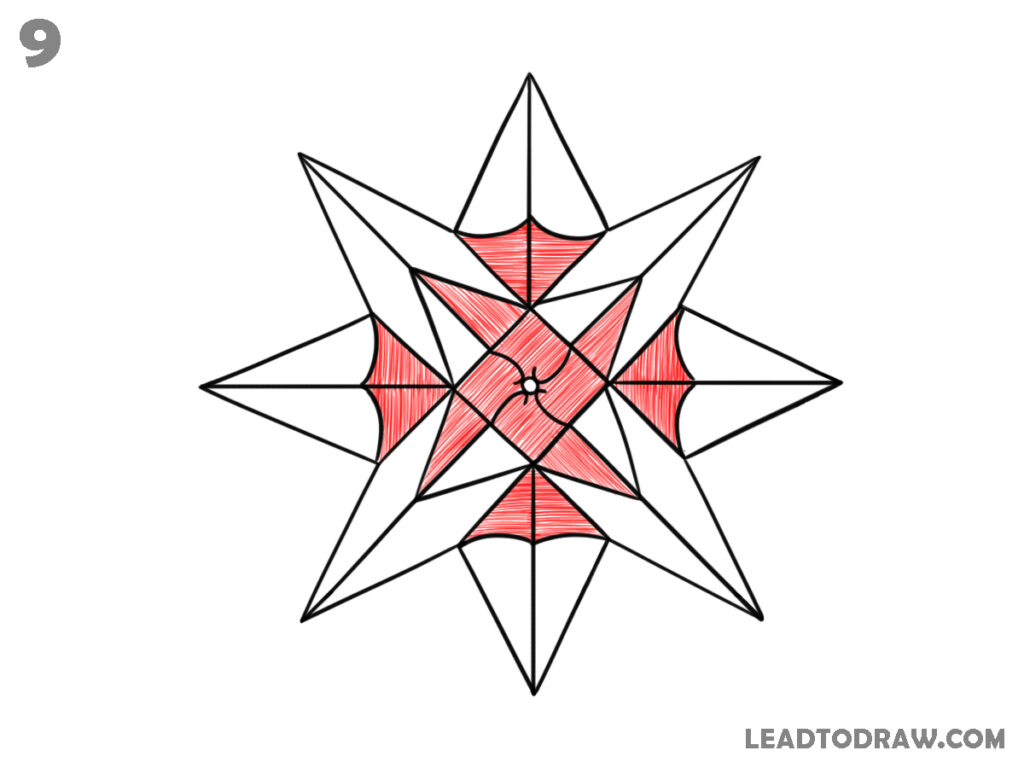
Step 9: Add Shading Inside the Star
Shade the inner star sections using close straight pencil strokes. Fill the top, bottom, left, and right curved areas with matching line shading. Continue adding shading inside the central star parts around the small circle. Keep the outer pointed star sections unshaded. Follow the same area as shown in the image while filling each area.
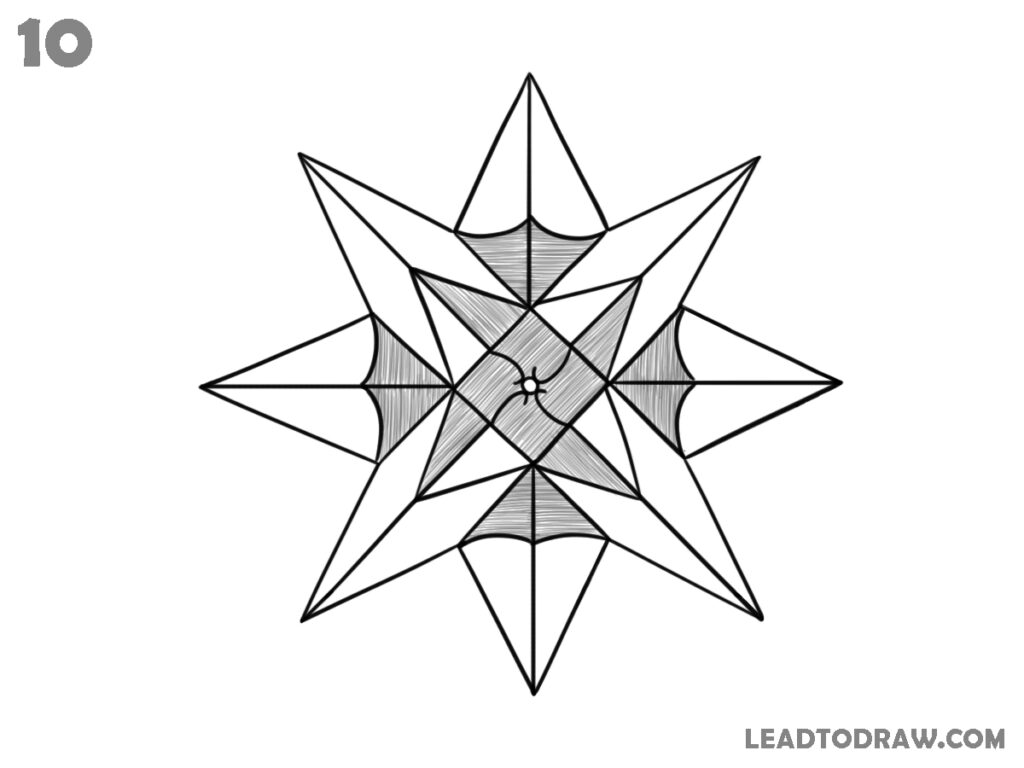
Step 10: Check and Clean the Drawing
Check all star points, inner shapes, curved sections, and shaded parts carefully. Darken any light pencil lines that match the final image above. Keep the center circle, shaded sections, and all pointed star edges neat while finishing the complete perfect star drawing. Make small corrections where needed so every shape connects properly and matches the final design shown.
For more similar drawing tutorials, explore the guides below.
- How to draw a water bottle in an easy way
- How to draw waves in water easily in 7 steps
- How to draw a butterfly easy with 9 steps
Conclusion
Now the perfect star drawing is complete using simple lines, pointed shapes, curves, and light shading. Follow the same order slowly while drawing each section on paper. Practice the star again to improve line control and shape placement. This method can also help while creating other geometric art designs using similar pointed patterns and inner details.