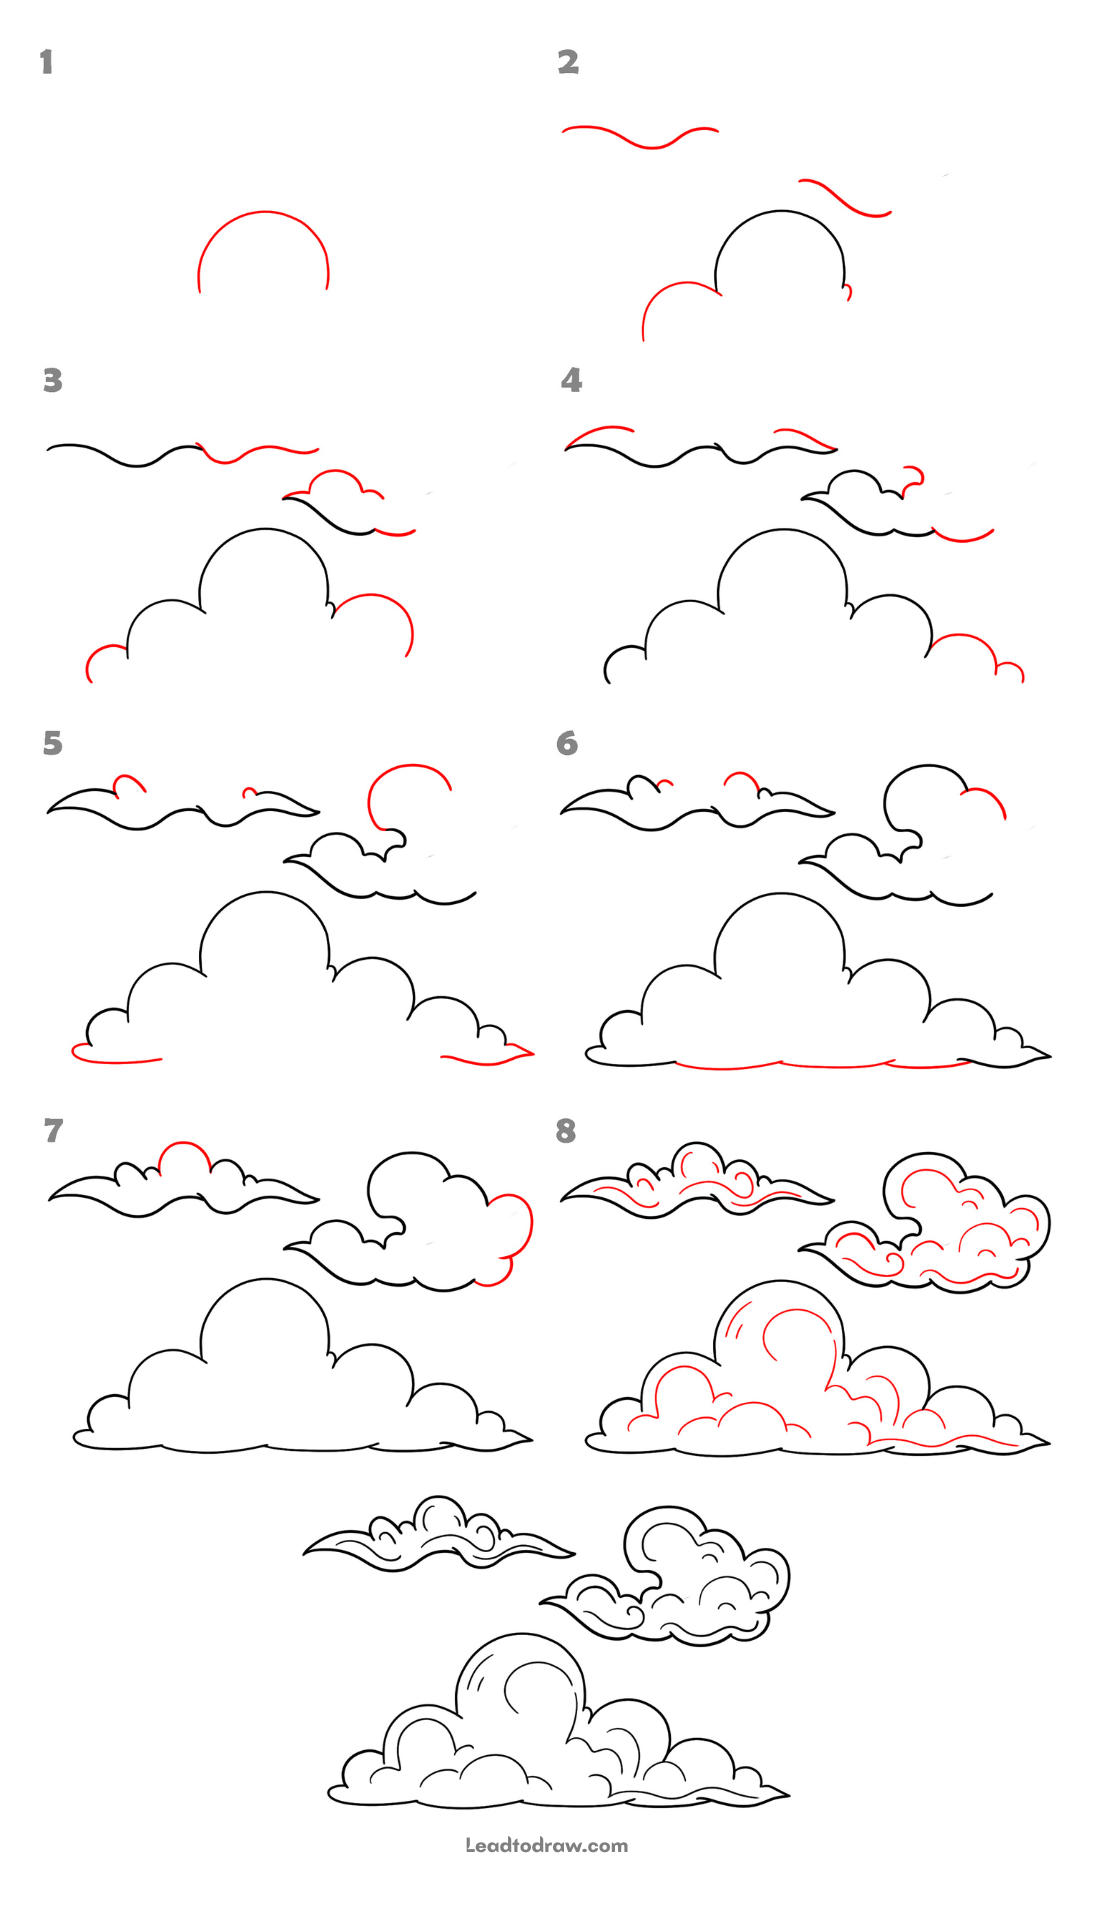
Learn how to draw clouds with this simple step-by-step tutorial. In each image, the newly added lines are shown in red only to help you follow the drawing order. Follow each step carefully to create different cloud shapes using smooth, easy curved lines.
Lets Start
Step 1: Draw the First Curved Shape
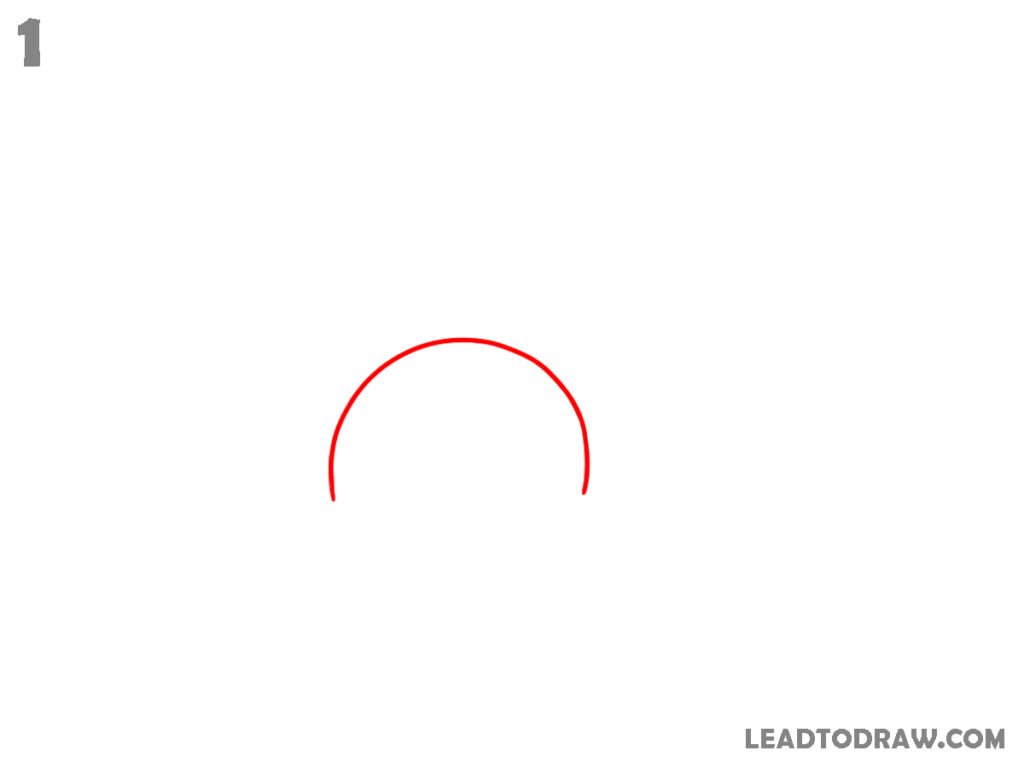
Start by drawing one large upside-down curved line near the centre of the page. Leave both ends open without joining them together. The curve should look smooth and rounded, forming the top part of a large cloud. Keep enough empty space around it because more cloud shapes will be added later.
Step 2: Add More Cloud Curves
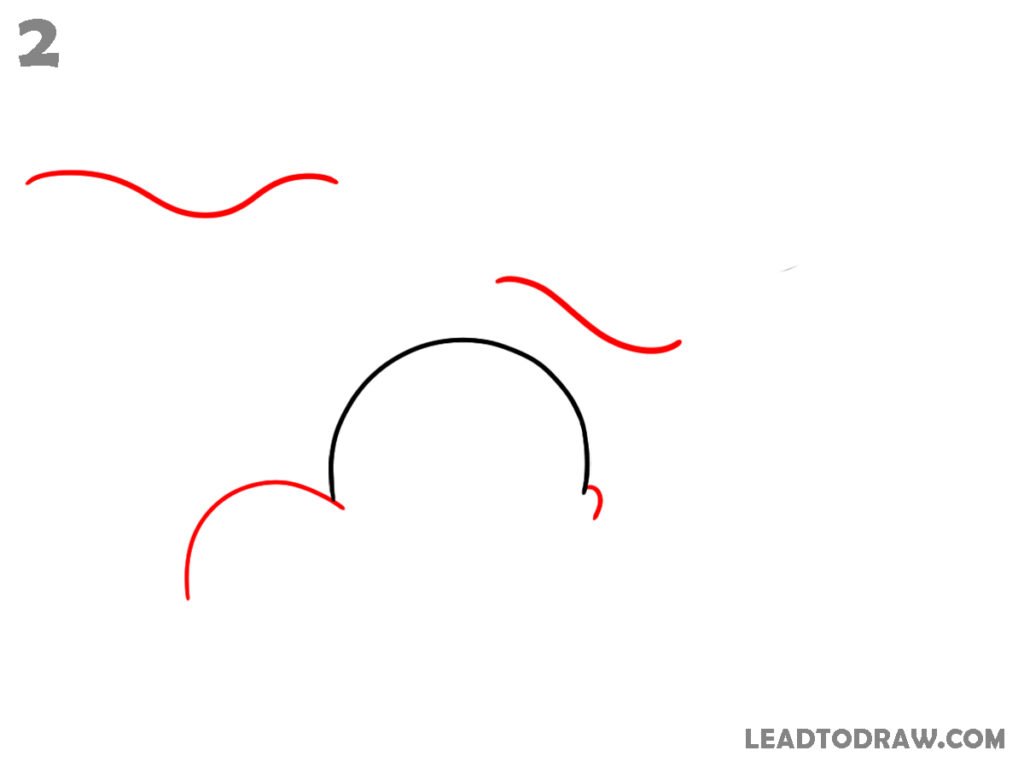
Draw a curved bump on the left side of the first shape and another curved bump on the right side. Above the large cloud, add one long wavy line for a thin cloud. Draw another short wavy line on the upper right. These are the first outlines of the smaller clouds.
Step 3: Continue Building the Clouds
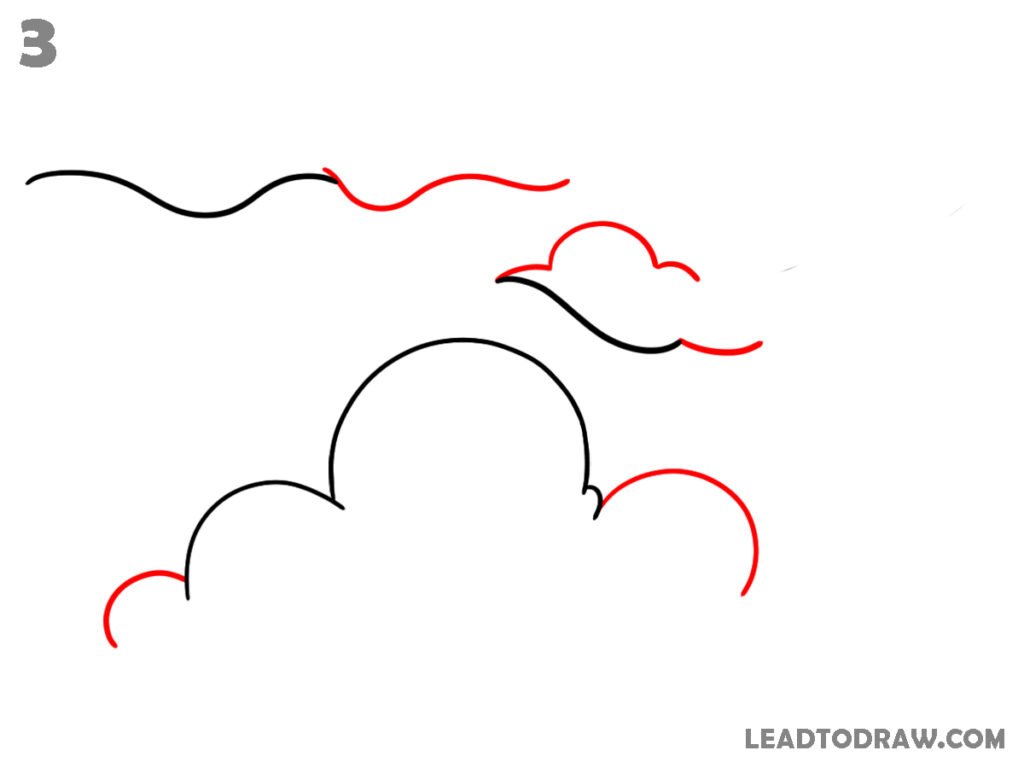
Extend the long wavy cloud by adding another curved section to its right side. Draw small rounded bumps to form the second cloud below it. Continue the large cloud by adding a rounded section on the left and another rounded section on the right, leaving the bottom still open.
Step 4: Extend Every Cloud Shape
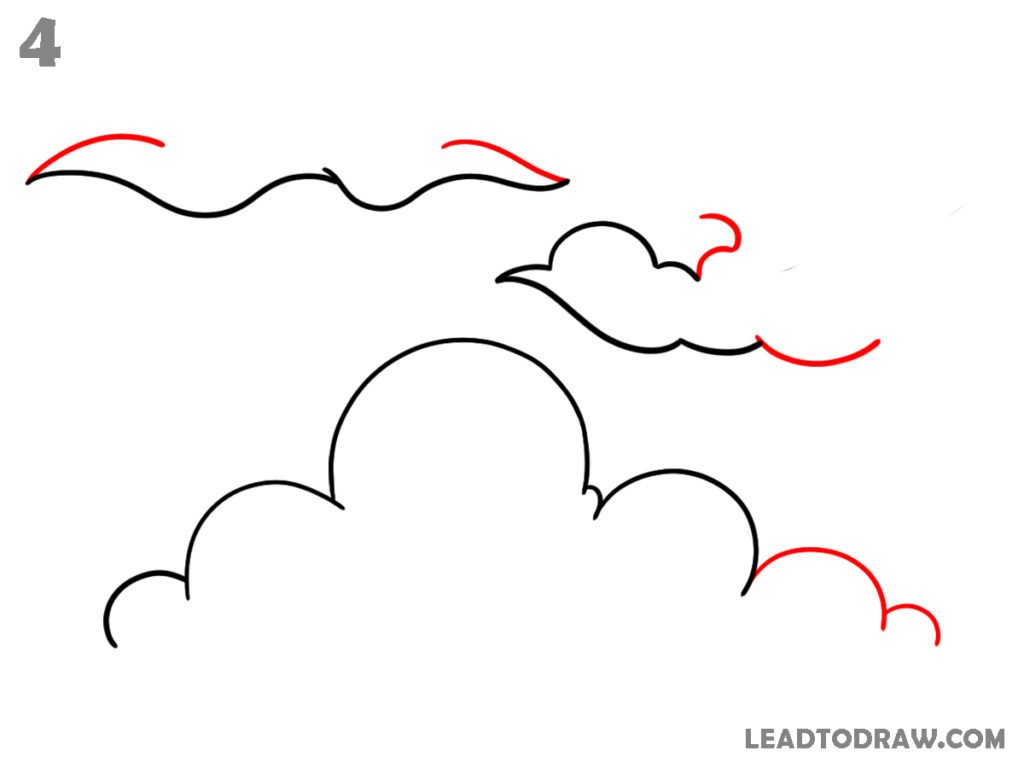
Finish the top thin cloud by adding another curved section across its length. Add more rounded bumps to the second cloud, making it wider. Continue the large cloud by drawing another rounded bump on both the left and right sides, giving the cloud a fuller outline while keeping the bottom open.
Step 5: Add More Rounded Sections
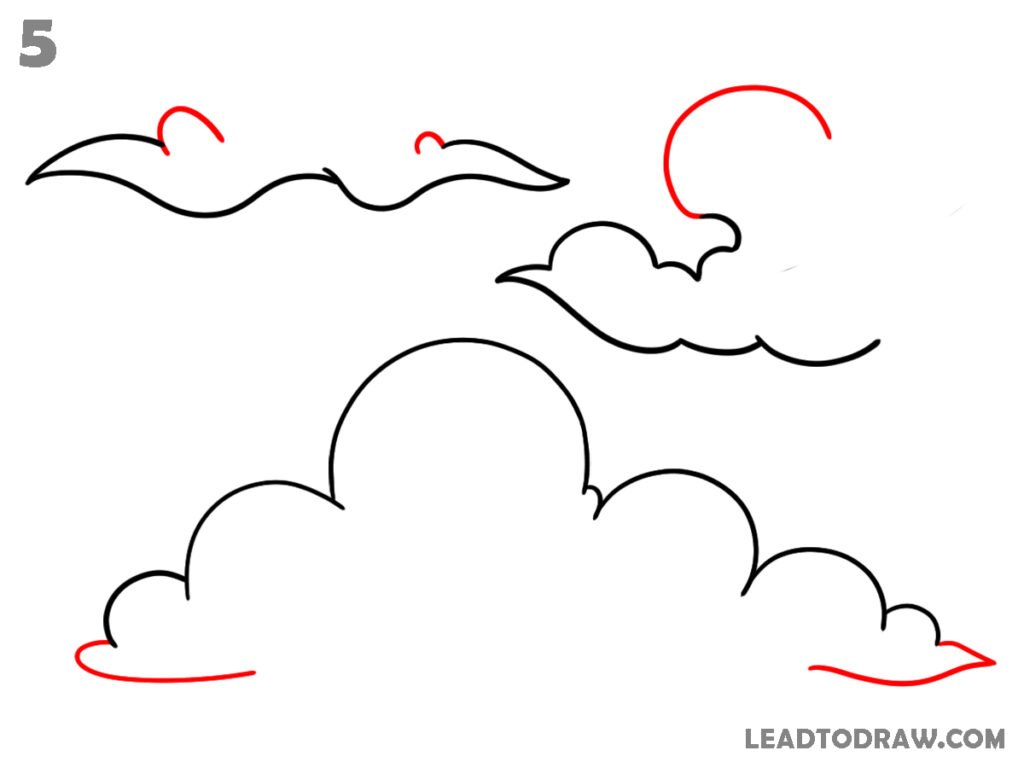
Draw another curved bump on the top thin cloud. Continue the second cloud by extending its right side with rounded curves. Add one large rounded curve on the upper right for another cloud. Extend the bottom edges of the large cloud with long curved lines on both the left and right sides.
Step 6: Complete the Main Outlines
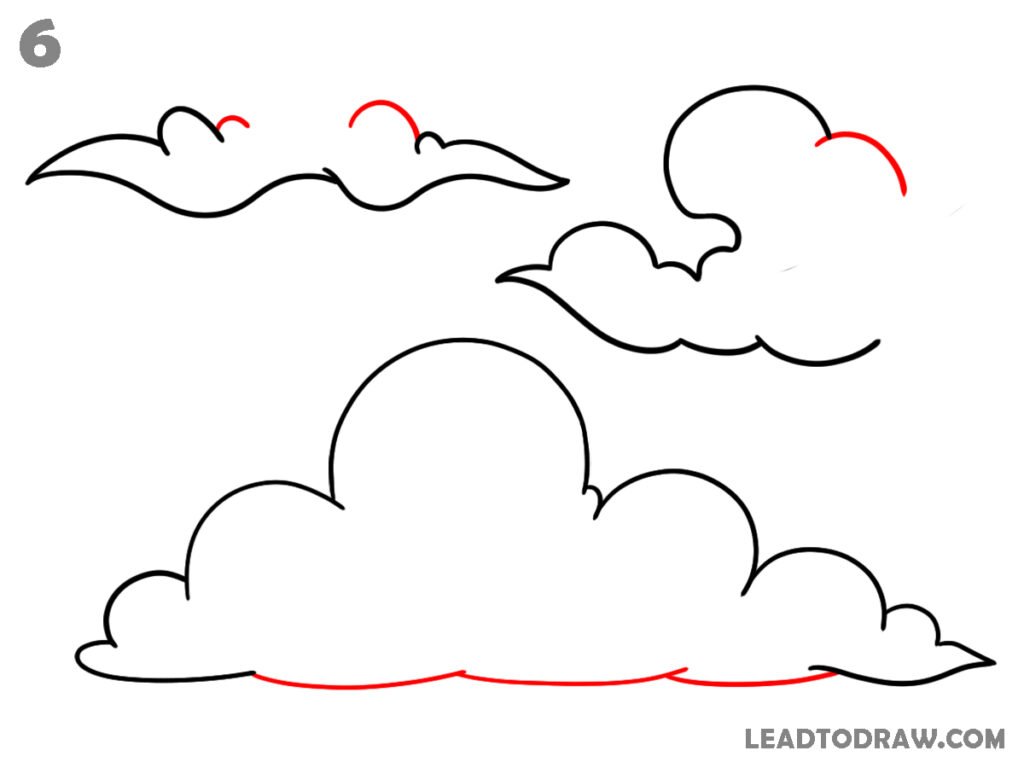
Finish the top thin cloud by adding small rounded bumps across its middle. Extend the new upper-right cloud with another rounded curve. Continue the second cloud with extra curved bumps along its right side. Draw the lower curved edge of the large cloud, connecting the bottom while leaving small curved ends at both sides.
Step 7: Finish the Cloud Shapes
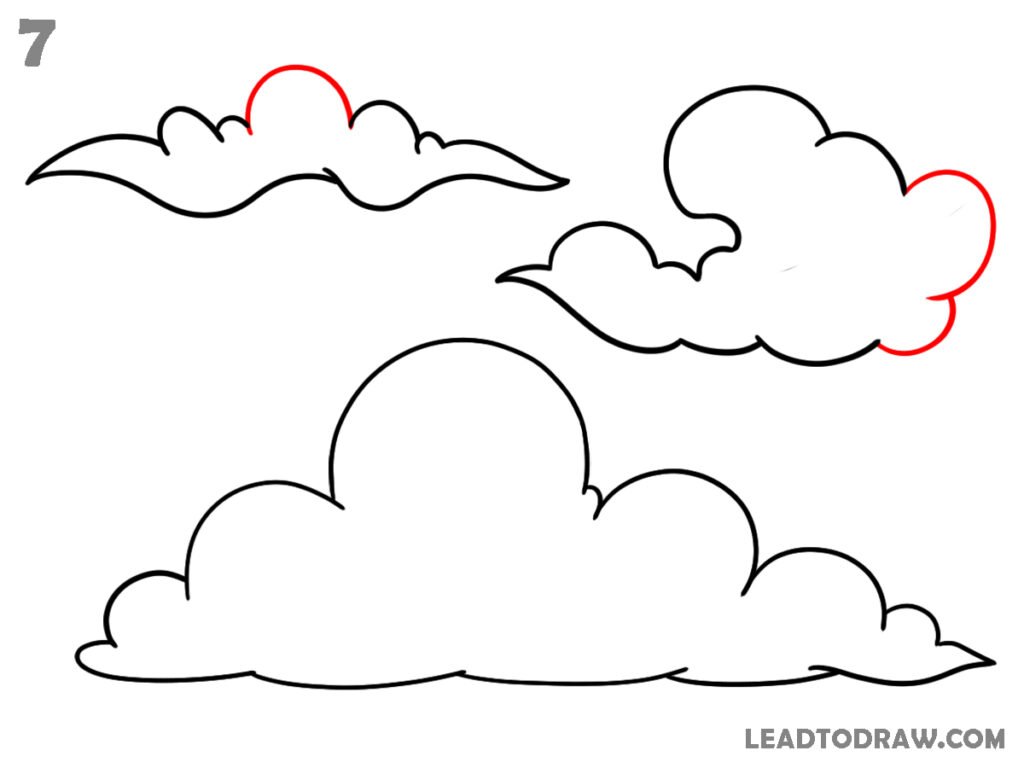
Complete the top thin cloud by adding the last rounded section across its upper edge. Finish the upper-right cloud with extra curved bumps on the right side. Close the remaining open sections of the large cloud by joining the left and right bottom edges into one continuous cloud outline.
Step 8: Add Inner Cloud Details
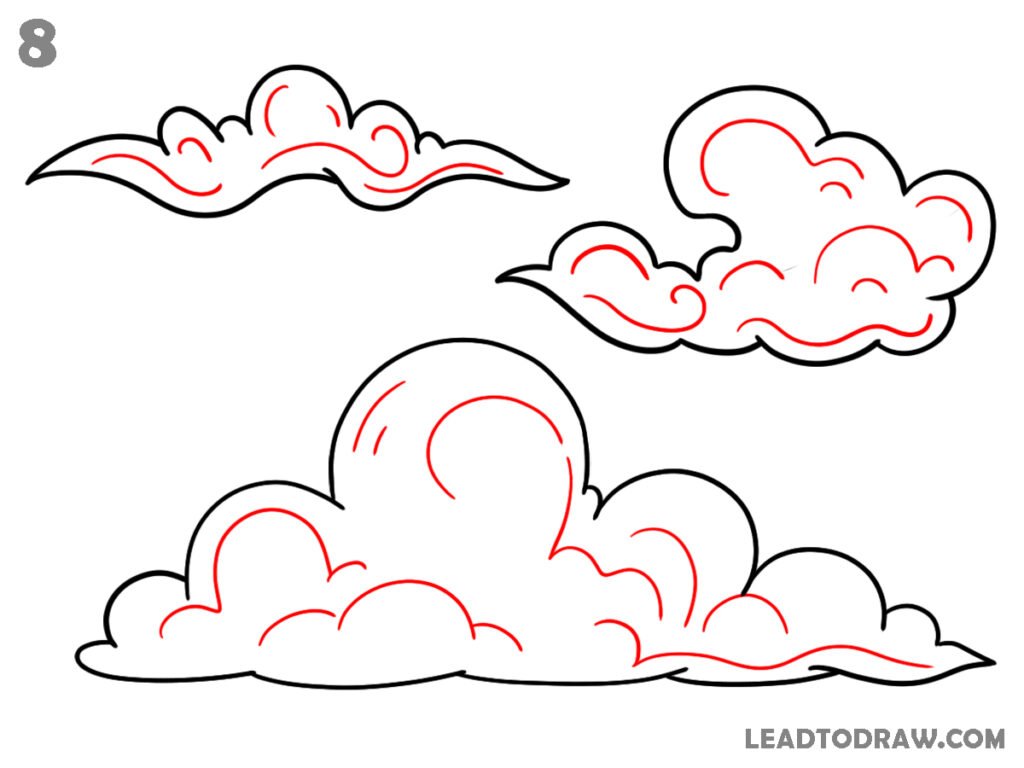
Draw short curved lines inside the top thin cloud. Add similar curved details inside the upper-right cloud. Continue by drawing several curved lines inside the large cloud, including the middle and side bumps. Add two short curved marks near the top of the centre bump to complete the inner details as shown in the image.
Step 9: Check and Clean the Drawing
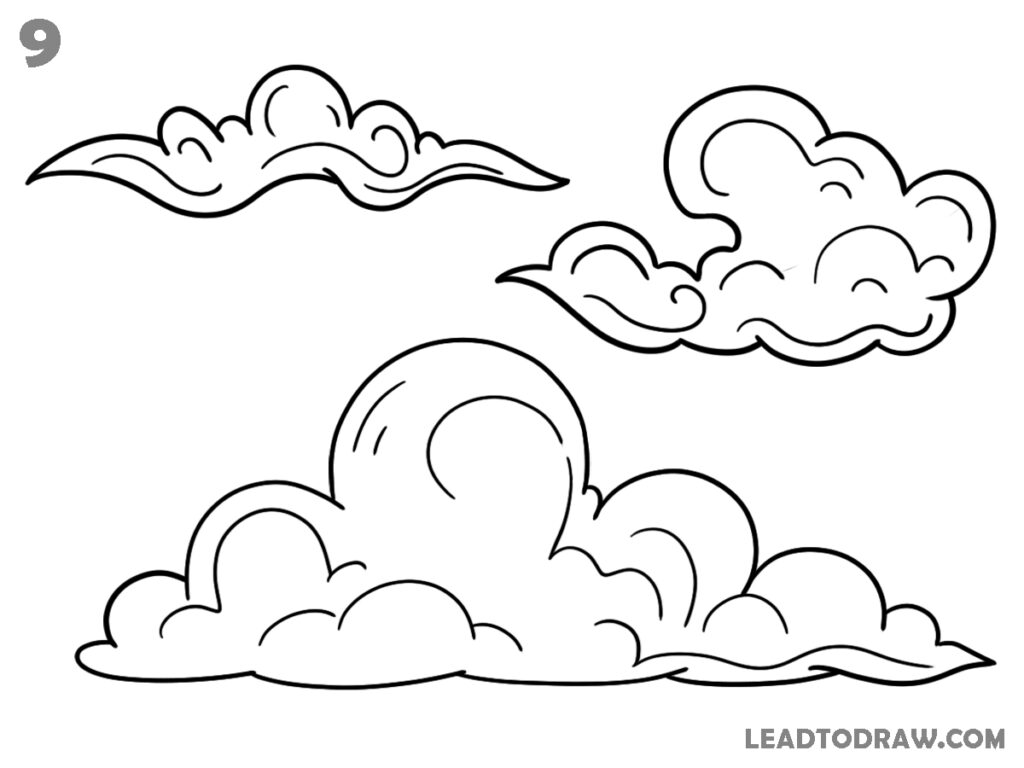
Check every cloud outline and compare each curved section with the drawing. Correct any uneven lines and redraw small parts if needed. Remove unwanted marks and keep only the final cloud outlines with the inner curved details. Finish after all shapes match the completed drawing.
For more similar drawing tutorials, explore the guides below.
- How to Draw Jeans: Easy Step-by-Step
- How to draw waves in water easily in 7 steps
- How to draw a perfect star in an easy way
Conclusion
Now the how to draw clouds tutorial is complete. Check every curved line, clean unwanted marks, and keep only the final drawing. Practice the same steps again to draw similar cloud shapes with smooth curves. Regular practice helps improve line control and drawing accuracy over time.