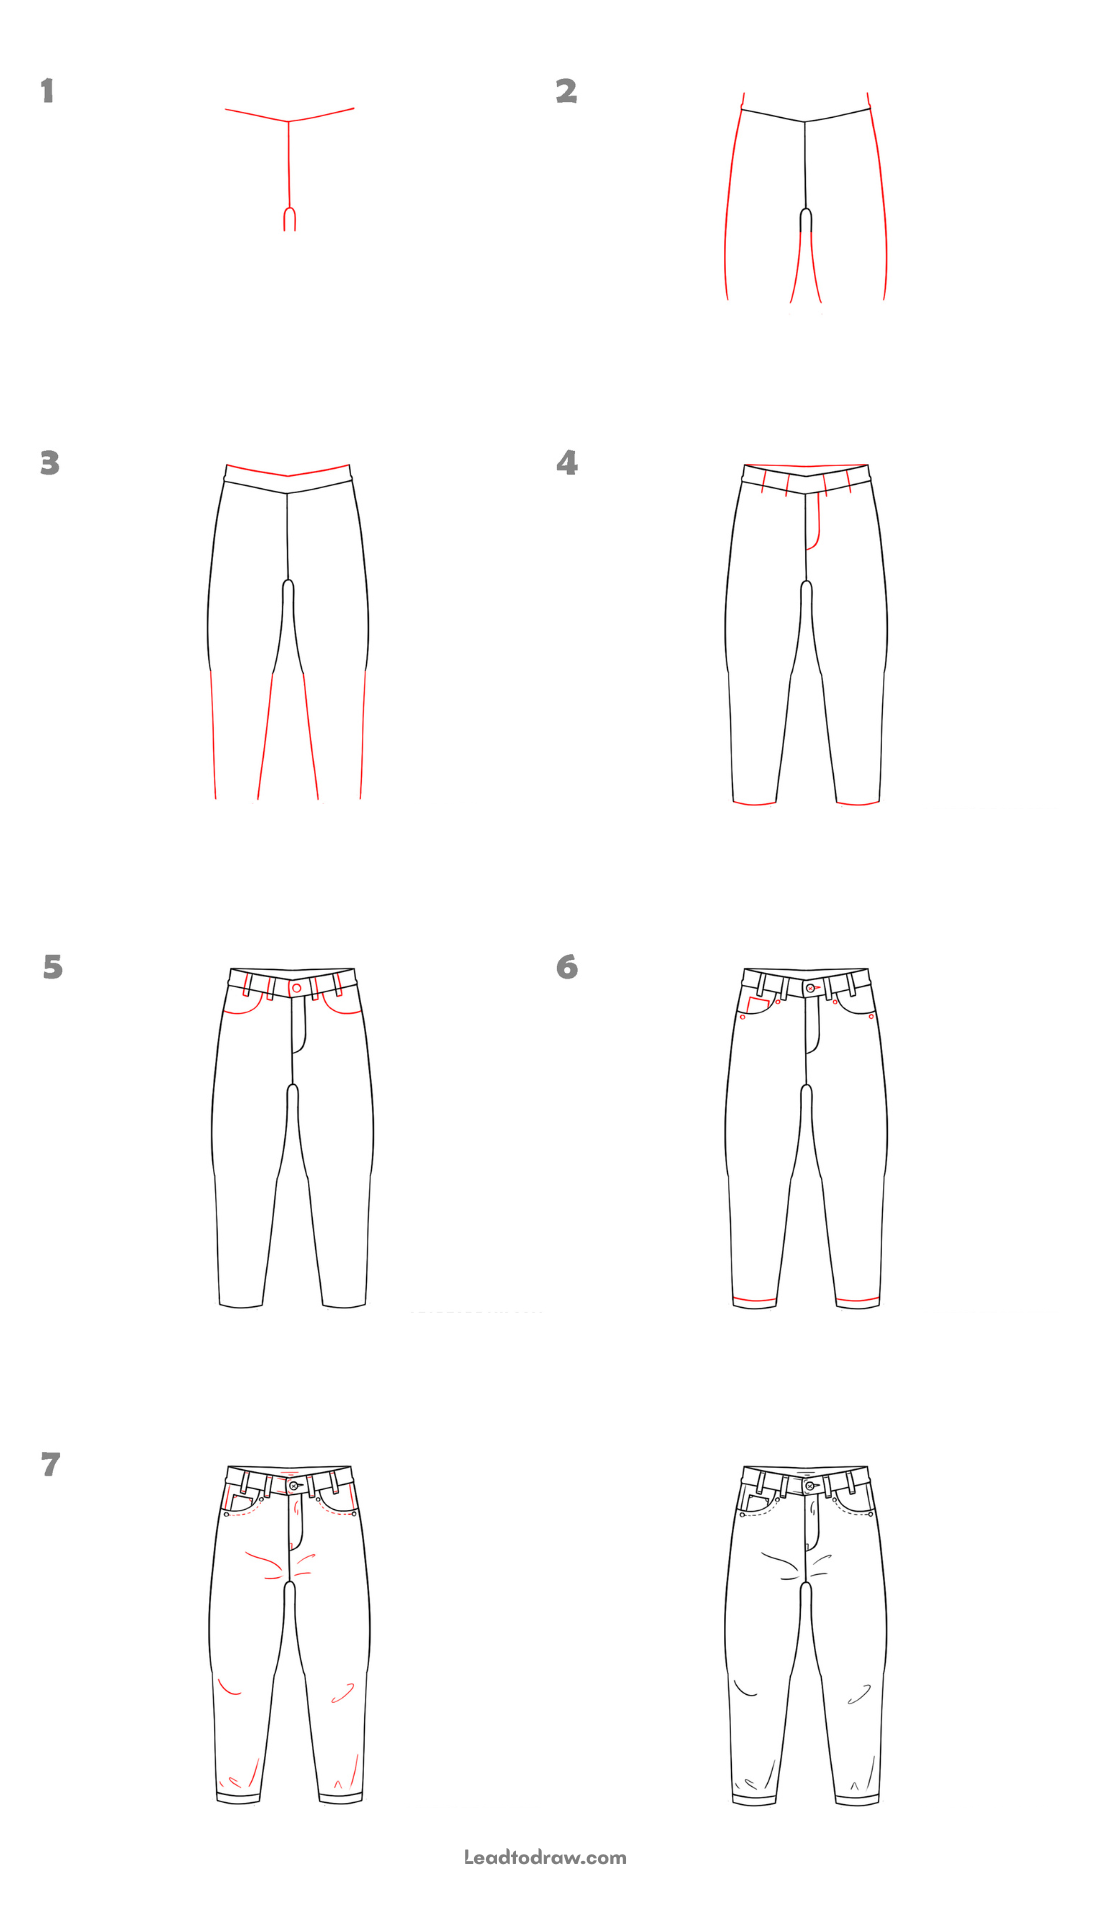
Learning how to draw jeans is simple when you follow each stage carefully. In this tutorial, every new line is shown in red, making it easy to follow the correct order. Draw each part one by one until the jeans shape and small clothing details are finished.
Lets Begin
Step 1: Draw the Waist Guide
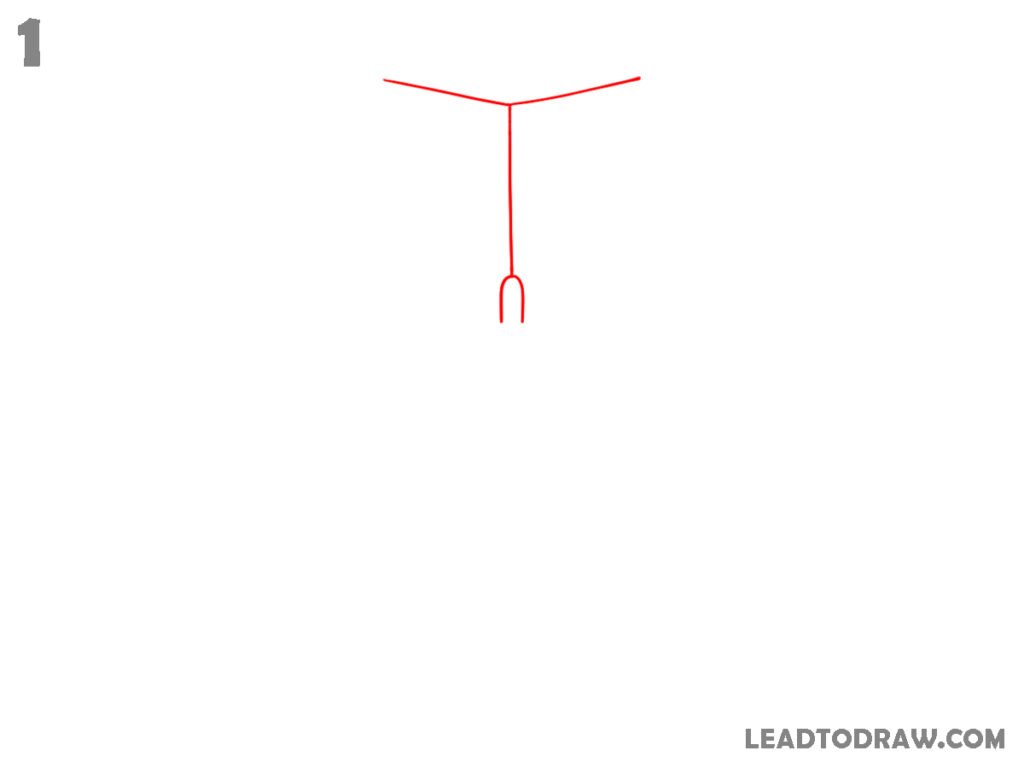
Start by drawing a short vertical line. Add two slanted lines from its top to make a wide Y shape. At the bottom of the vertical line, draw a small narrow U-shaped curve. Keep the upper lines slightly angled outward while leaving enough space below for the jeans legs in the next step.
Step 2: Draw the Outer Legs
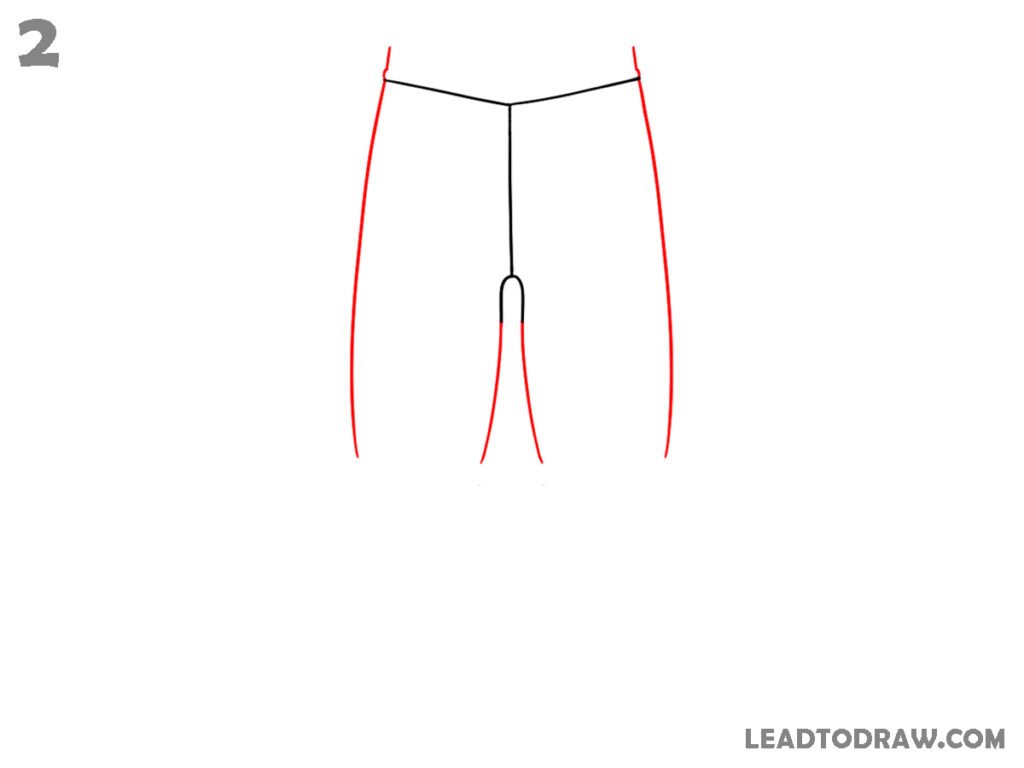
Draw two long curved lines starting from the ends of the top slanted lines. Extend both lines downward to form the outer sides of the jeans. Next, draw two long inner leg lines beginning below the small U-shaped curve. Leave the lower ends open because the bottom edges are not added in this step.
Step 3: Add the Waistband and Leg Ends
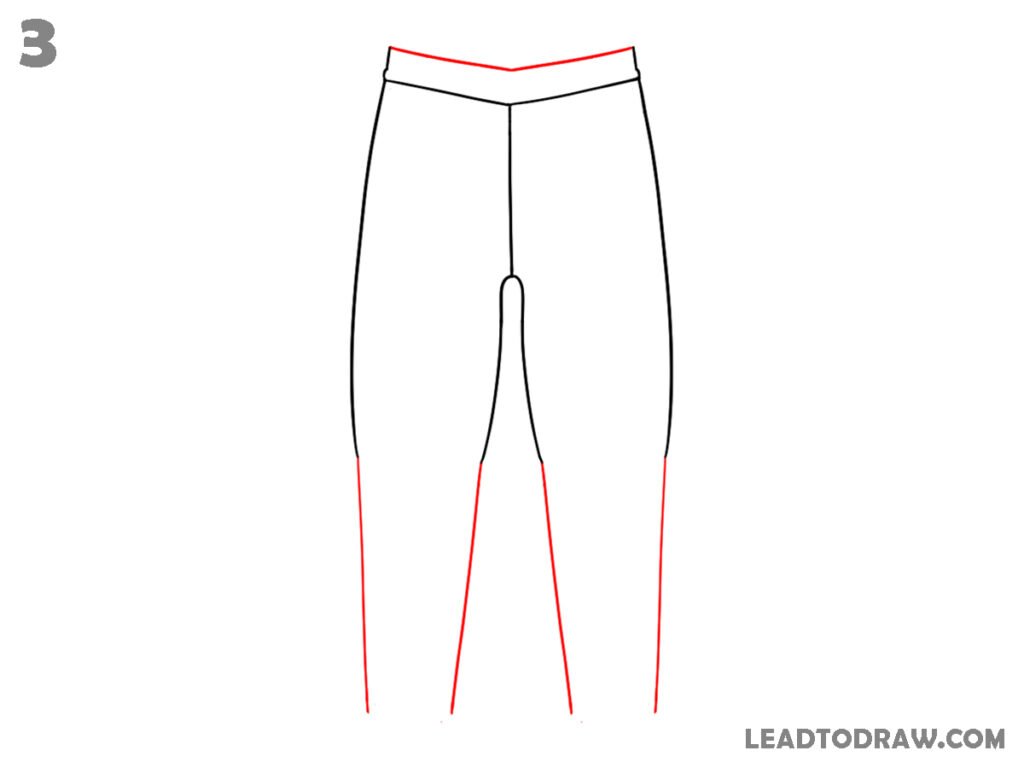
Draw a second line above the top edge to create the waistband across the waist. Then finish both legs by extending the outer edges slightly lower and connecting the lower parts with short bottom openings. Keep the inner leg lines reaching neatly toward the lower opening.
Step 4: Draw Belt Loops and Fly
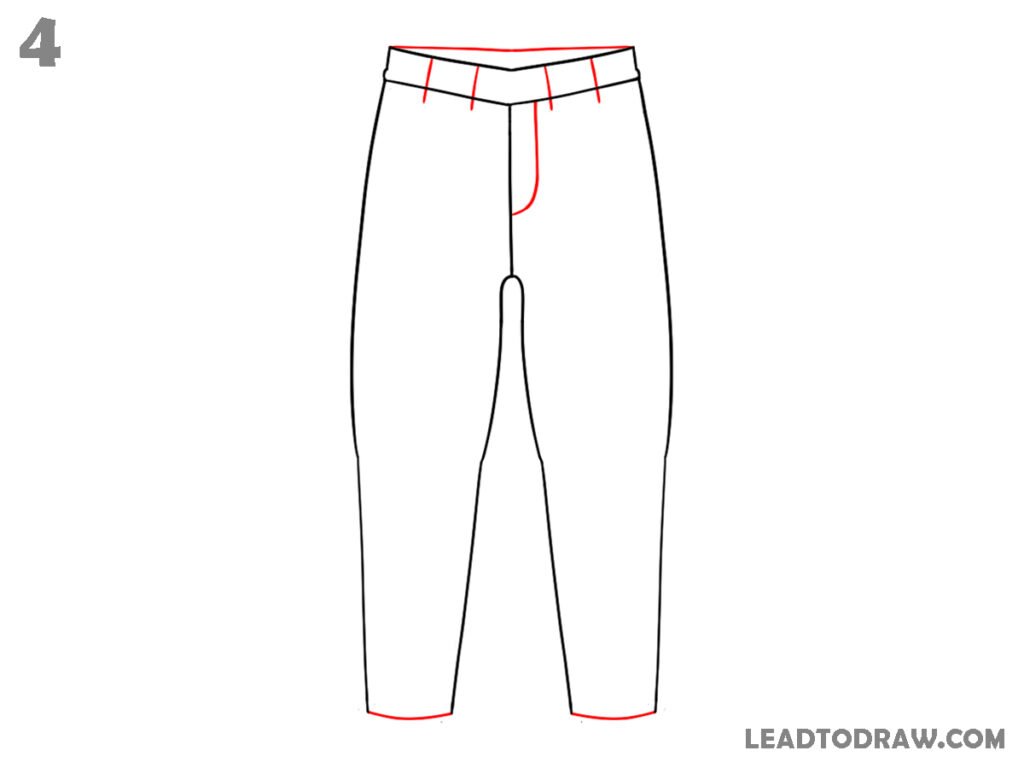
Add several short vertical belt loops evenly across the waistband. Draw a curved fly line starting below the waistband and ending near the centre seam. Finish by adding short horizontal lines across both leg openings to create the folded bottom edges shown in the drawing before moving ahead.
Step 5: Draw the Front Pockets
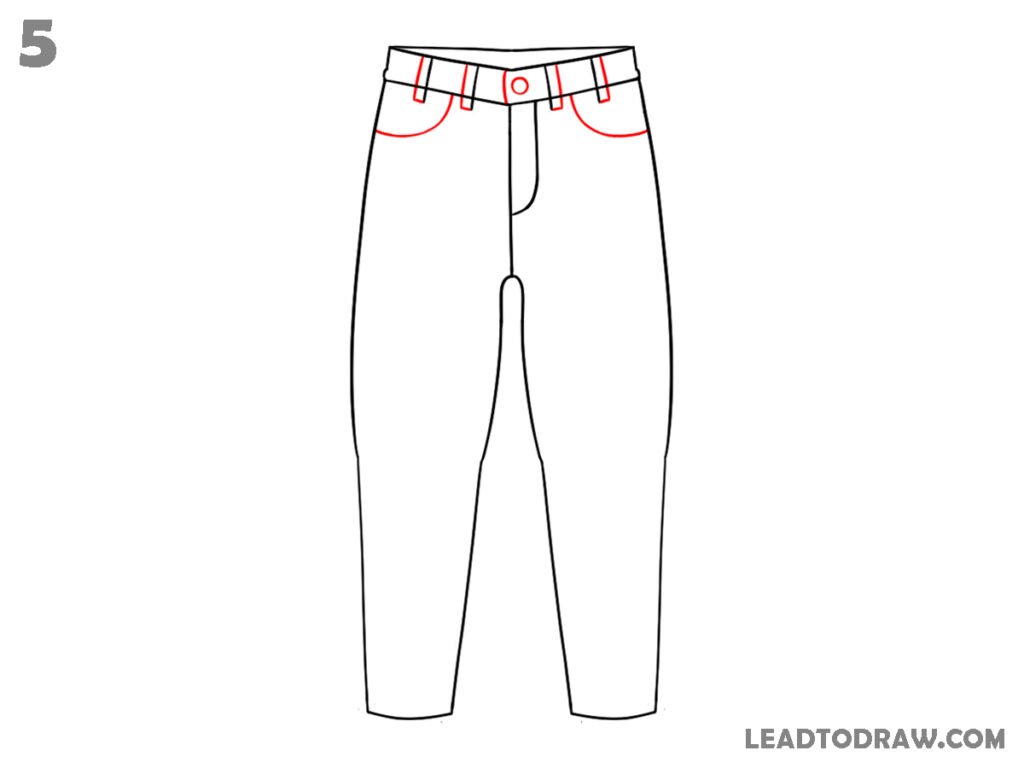
Draw curved pocket openings on both sides below the waistband. Add a small coin pocket inside the left front pocket. Draw a round button at the waistband centre. Keep the fly line visible while placing every pocket neatly inside the upper part of the jeans.
Step 6: Add Stitching and Pocket Details
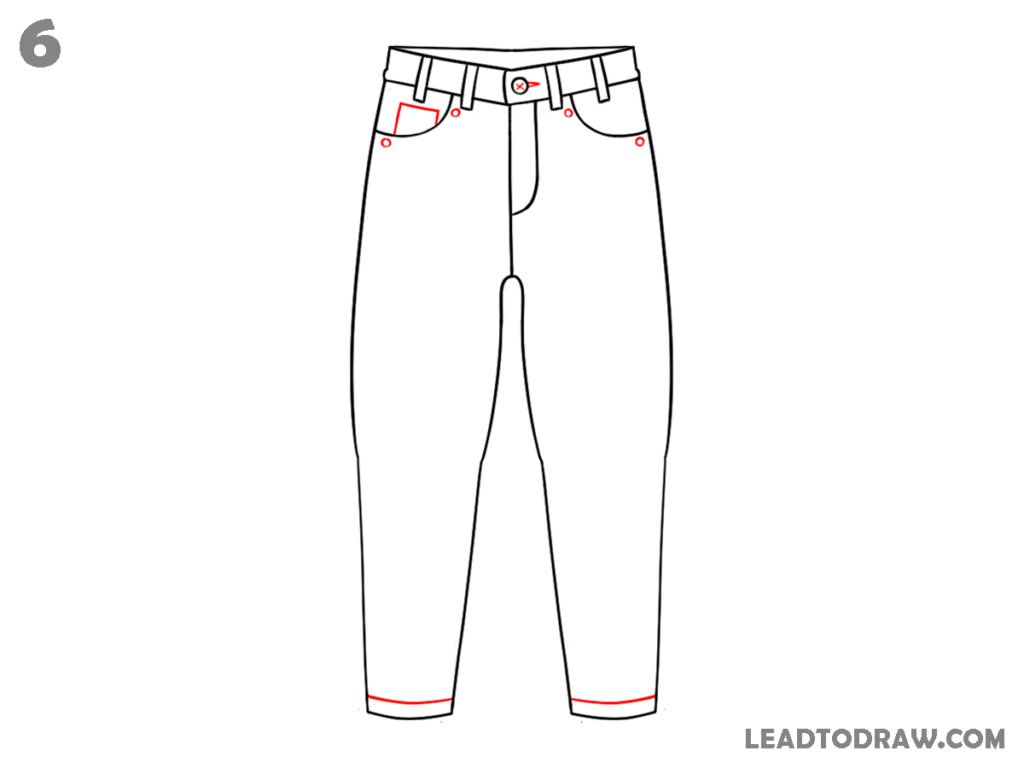
Draw small circular rivets near the pocket corners on both sides. Add dotted stitch lines following each pocket opening. Draw short stitch details around the waistband and belt loops. Finish by adding another narrow line across each folded bottom edge to complete the cuff details shown in the image.
Step 7: Draw Fabric Creases
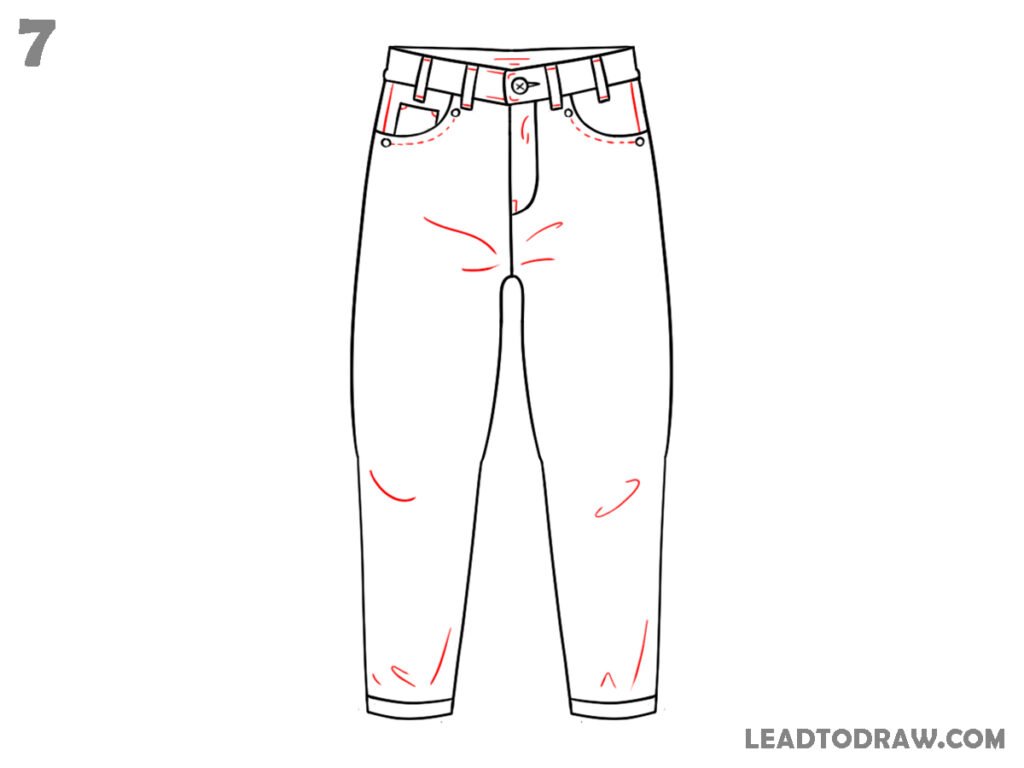
Add short curved crease lines around the upper thigh area near the centre seam. Draw a few curved wrinkle lines on both lower legs and close to each ankle. Place small fold marks above the cuffs. Keep every crease light and short, matching the positions shown without adding extra clothing details.
Step 8: Check and Clean the Drawing
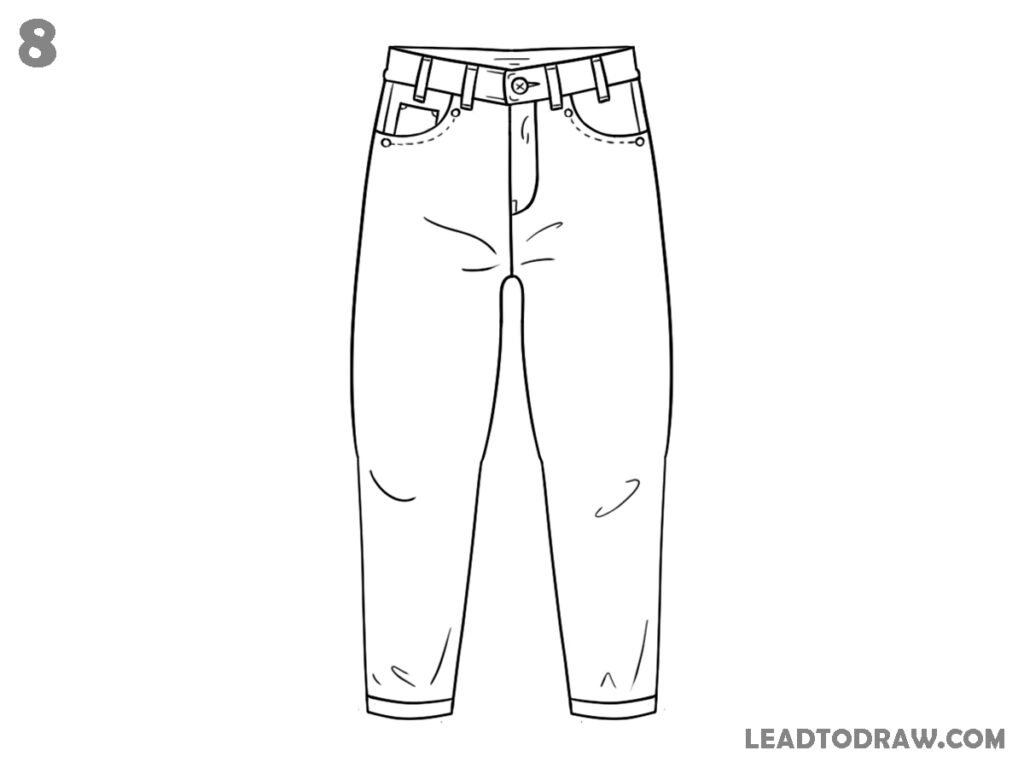
Check the full jeans drawing carefully. Correct any uneven curves around the waistband, pockets, fly, legs, cuffs, and crease lines. Remove unwanted marks if needed and darken the final outline where required. Keep every clothing detail neat so the finished jeans match the completed drawing shown above.
For more similar drawing tutorials, explore the guides below.
- How to draw a gas mask in as easy way
- How to draw a hoodie in 7 steps easily
- How to draw socks in an easy way
Conclusion
Now you know how to draw jeans by following each step in the correct order. Draw the same tutorial again to improve the waistband, pockets, legs, and small clothing details. Regular practice helps make each line cleaner and more accurate. Keep this guide ready whenever you want to draw jeans again.