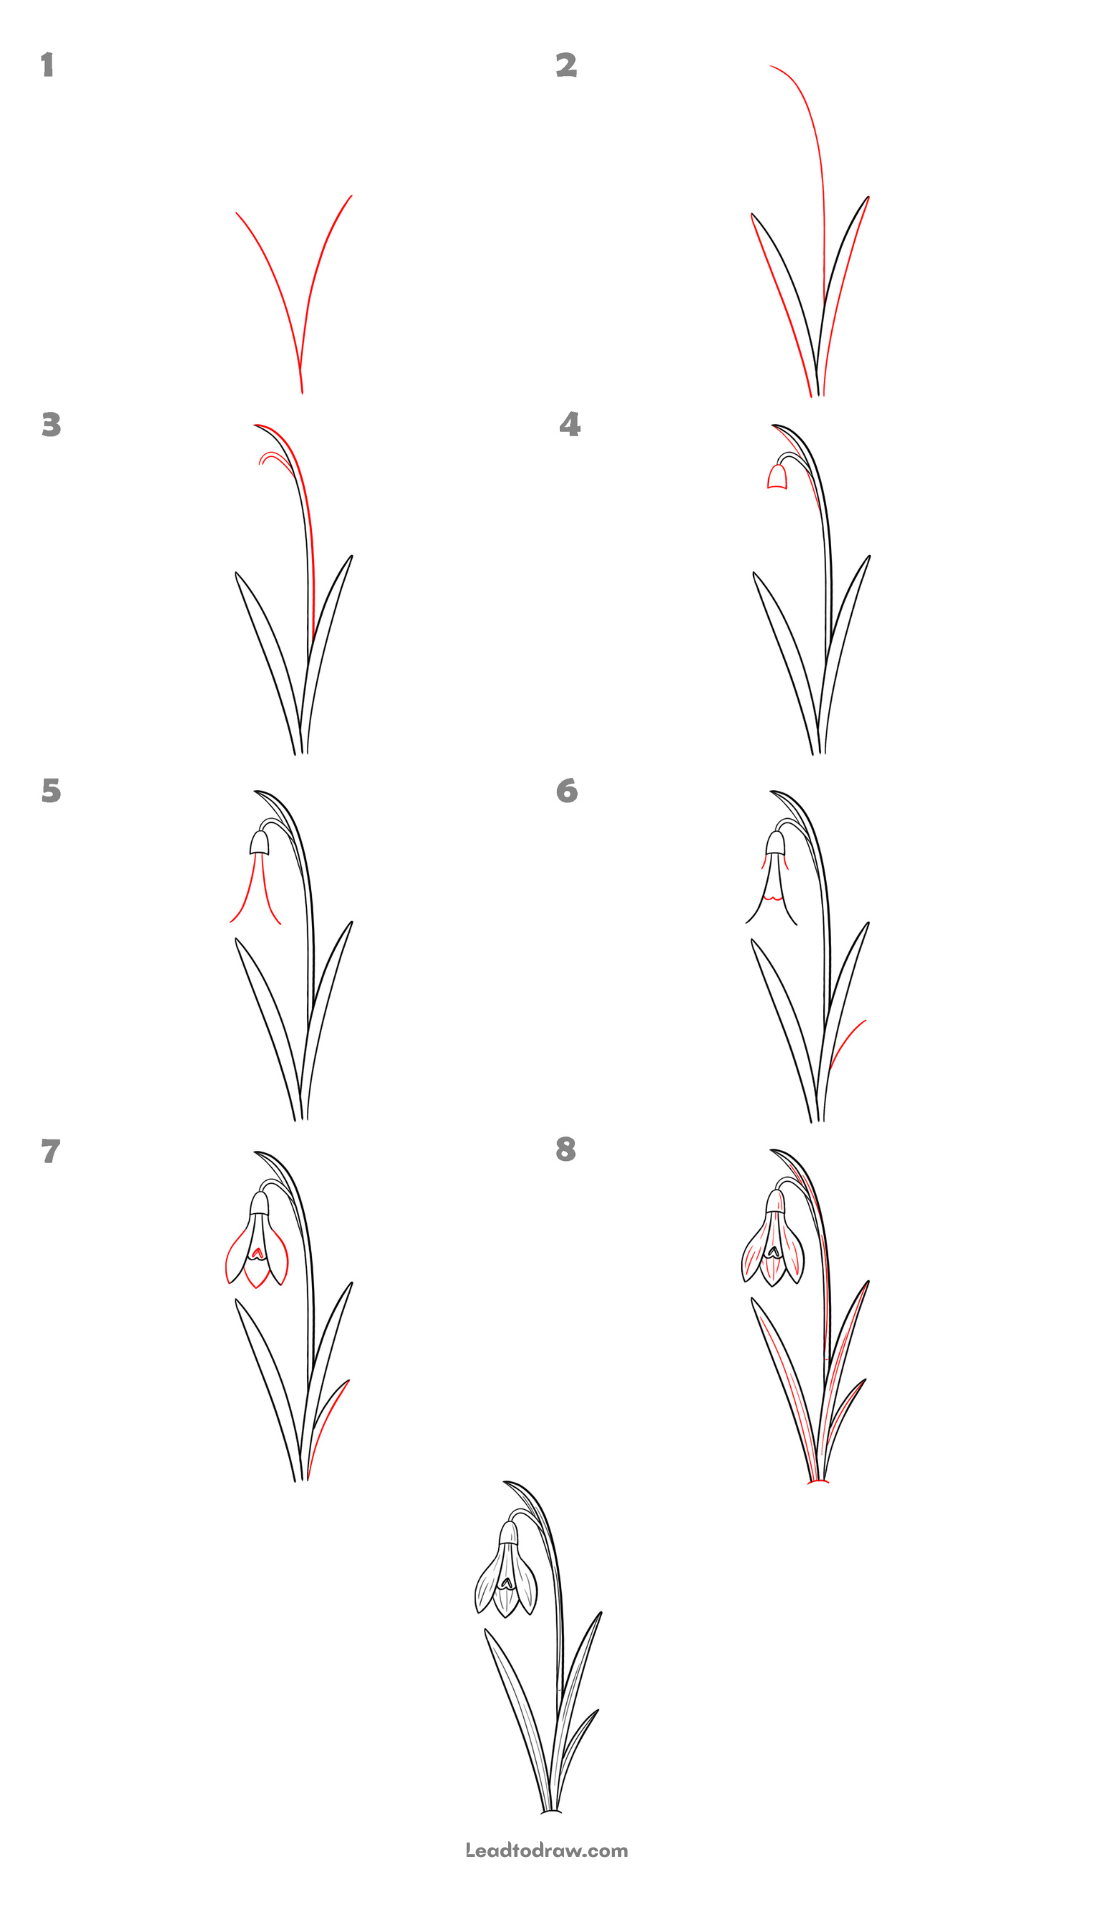
Learn how to draw a snowdrop flower step by step with simple lines. This tutorial shows the stem, leaves, curved flower top, hanging petals, and inner details in order. The red lines in the images mark the new parts added in each step, while the earlier drawing stays in place.
lets start
Step 1: Draw the Starting Shape
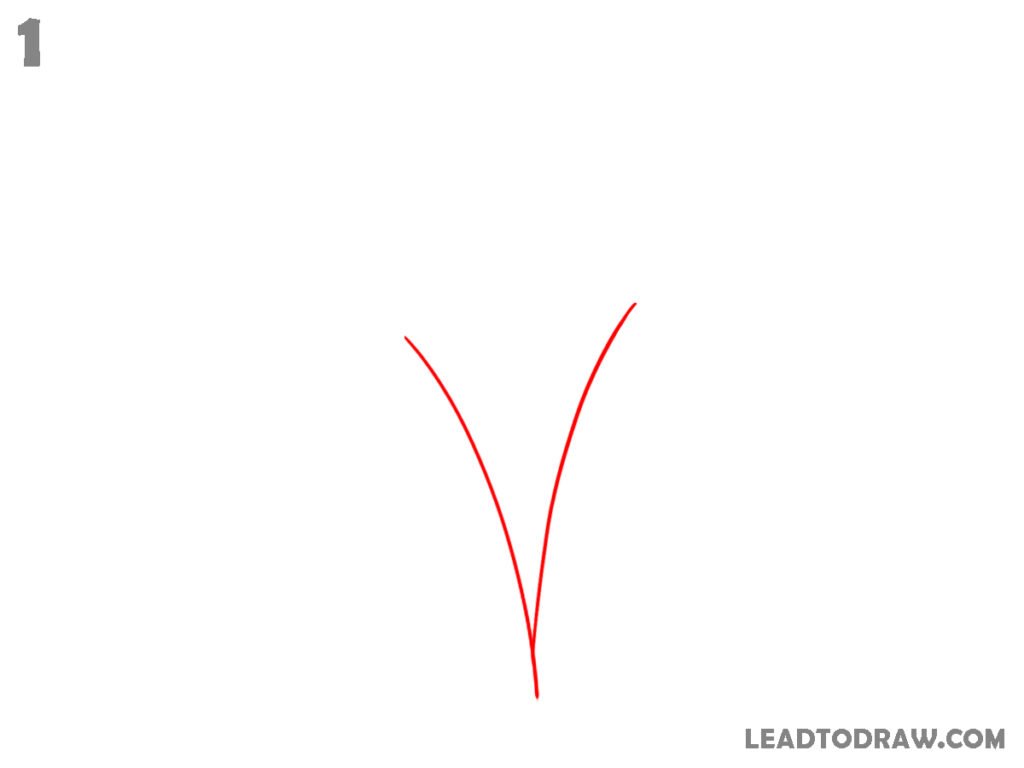
Start the snowdrop flower with two curved lines that meet at the bottom. Draw one line bending gently left and another bending gently right, leaving a narrow opening at the top. Keep both lines connected at the lower point. This forms the first simple stem shape and sets the main direction of the flower.
Step 2: Add the Leaves and Stem
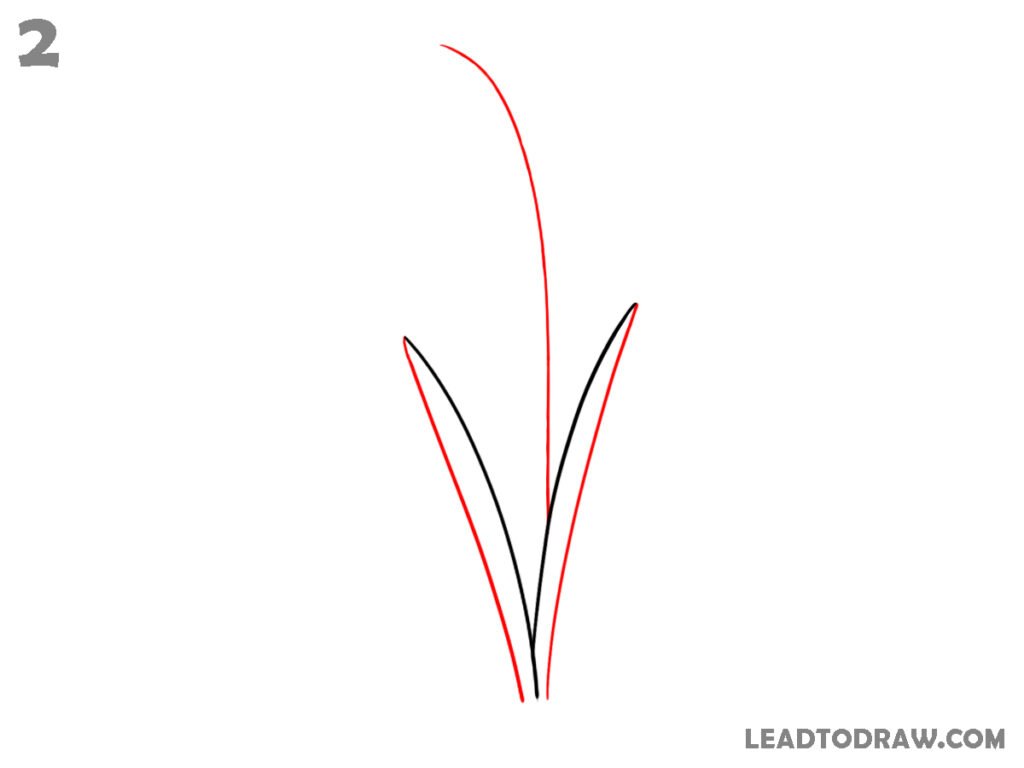
Add the two long leaves from the lower point. Draw one narrow leaf rising toward the left and another rising toward the right. Then draw the tall flower stem from the bottom, curving upward and slightly left near the top. Finish the stem with a smooth bend that follows the shape shown in the image.
Step 3: Extend the Curved Stem
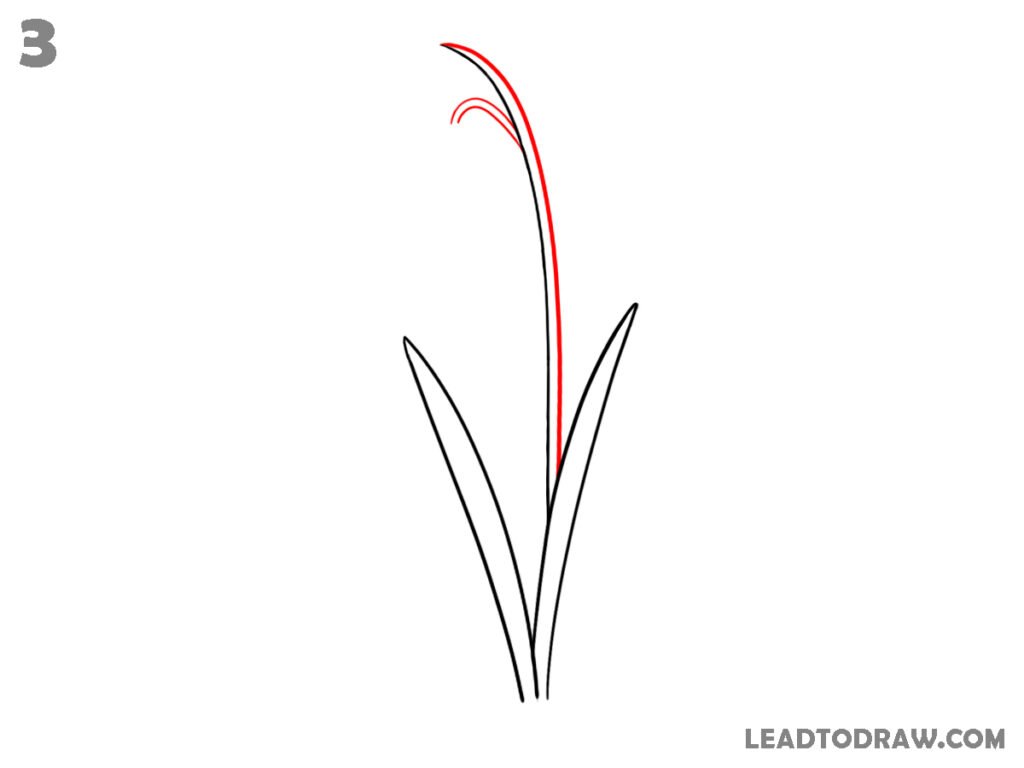
Extend the upper part of the flower stem and add the small curved detail at its top. Draw a second curved line beside the stem near the upper end, then add the small inward curve below it. The two leaves remain pointed upward from the base, while the tall stem reaches above them with a gentle curve.
Step 4: Draw the Flower Cap
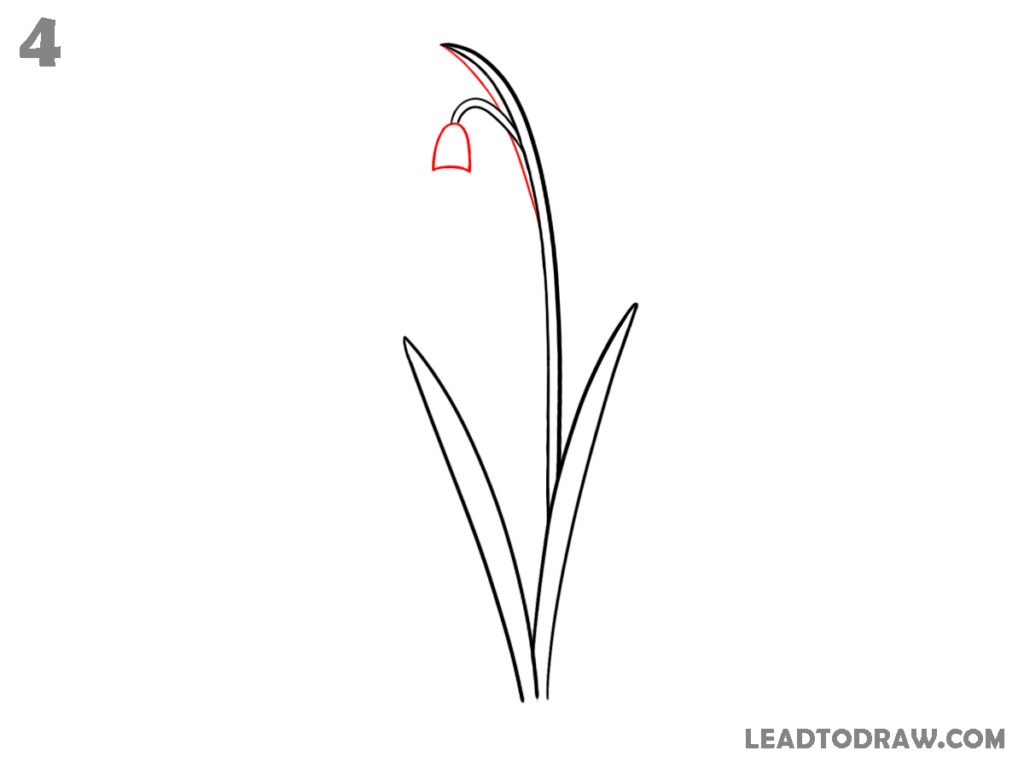
Draw the small rounded cap beneath the curved top of the stem. Use a short arch with two sides that descend slightly, placing it directly under the upper curved lines. Keep the cap narrow and close to the stem. The flower now has a small closed top section hanging near the upper end.
Step 5: Add the Hanging Petals
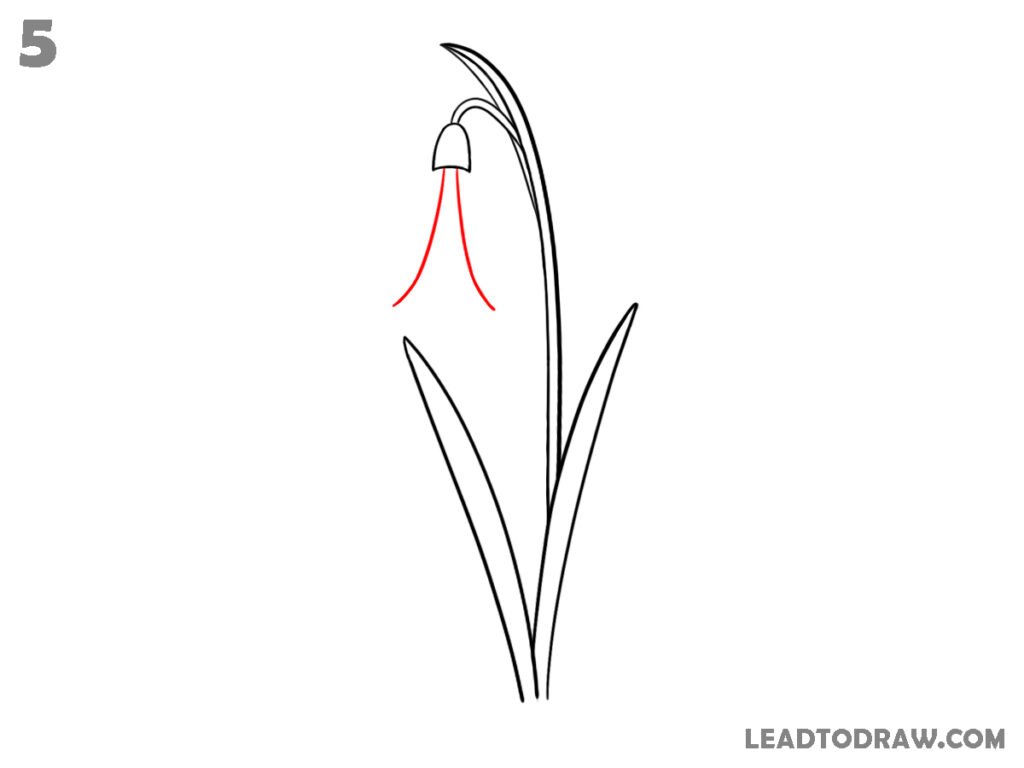
Add the first two hanging petal lines below the small cap. Start both lines close to the lower edge of the cap, then curve them outward and downward before turning gently inward at their ends. Keep the petals open at the bottom. Place one line on each side so they hang beneath the flower cap.
Step 6: Add the Centre and Right Leaf
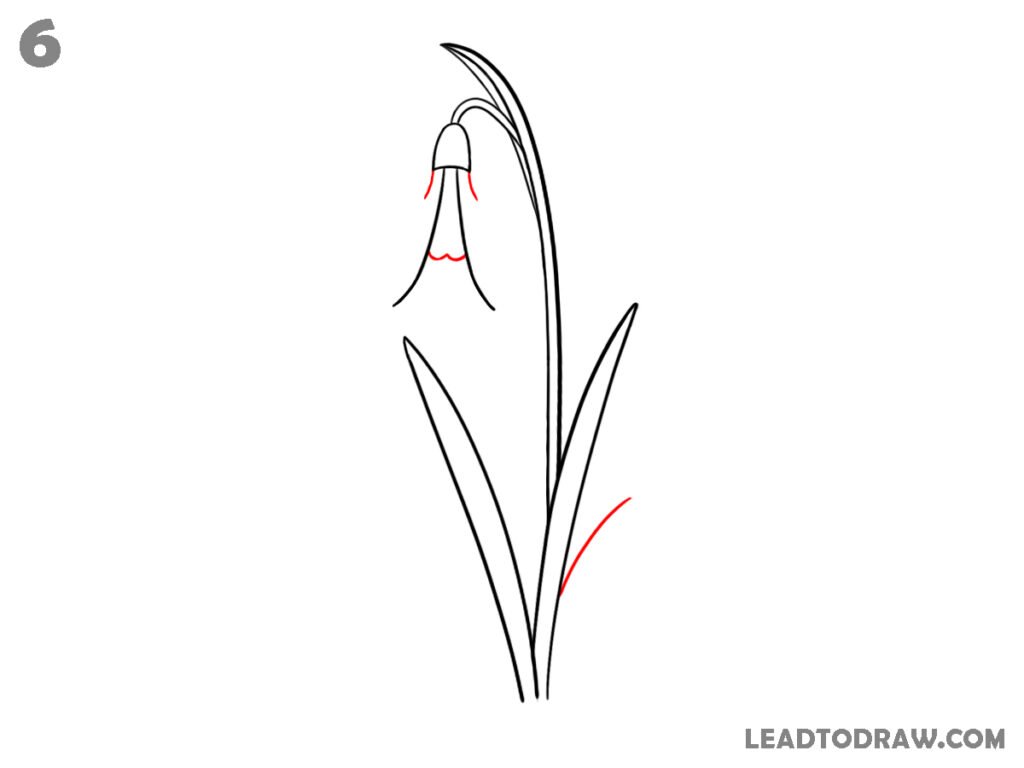
Add the small central lower petal detail beneath the cap, using short curved lines that meet near the middle. Then add the second narrow leaf on the right side of the plant, starting from the lower stem and curving upward to a pointed end. Keep the new leaf close to the existing right side.
Step 7: Complete the Flower Petals
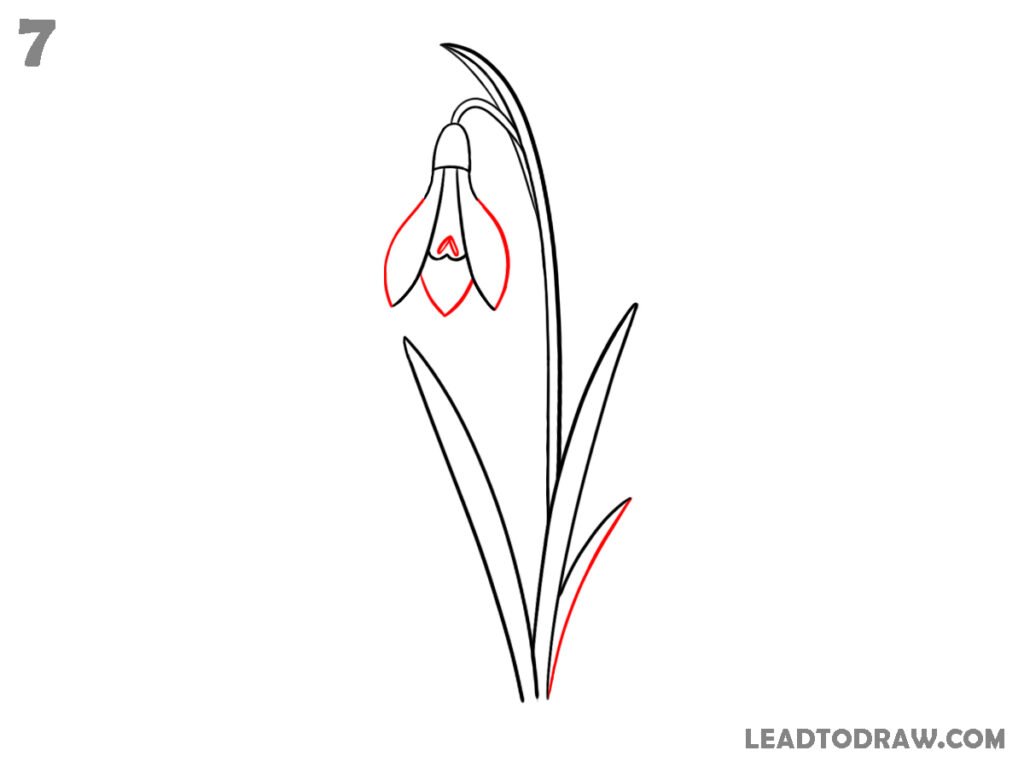
Complete the hanging flower petals by adding the remaining outer curves and the small pointed inner shapes. Form the lower petals around the centre, with curved edges that hang downward. Add the small central pointed detail inside the flower. Also draw the short right-side leaf rising from the lower stem to its pointed tip.
Step 8: Add the Inner Details
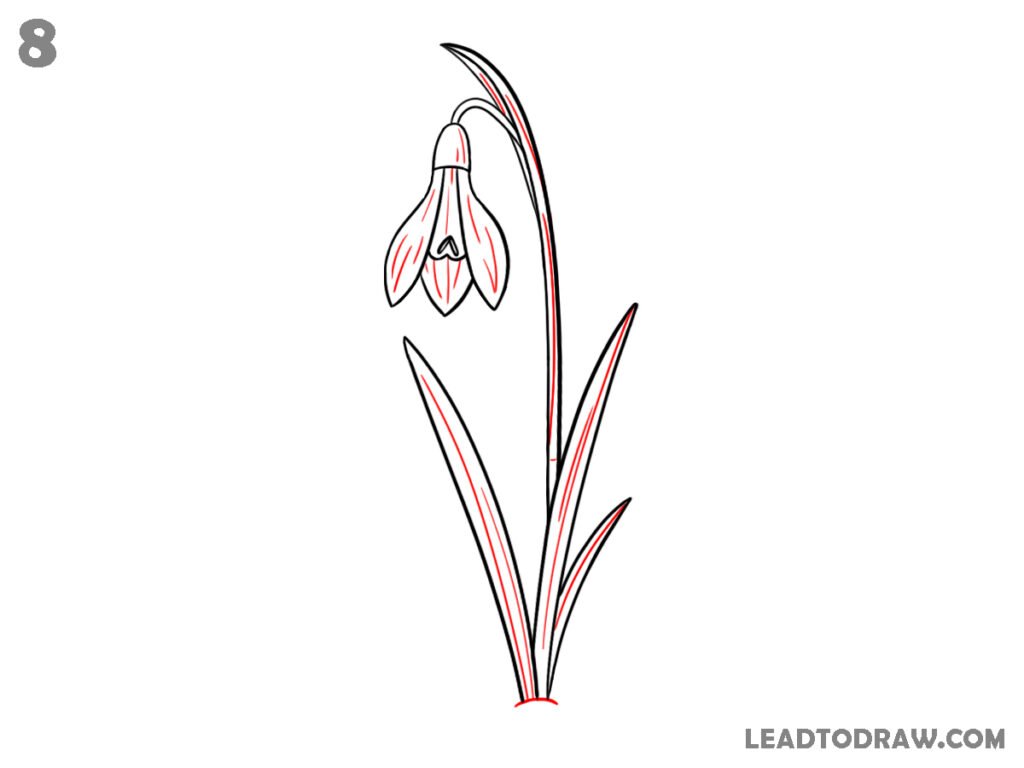
Add the inner lines to the hanging petals, following their curved shapes from the top toward the lower points. Draw the narrow inner marks inside each petal and add the small central details beneath the cap. Then add the remaining inner lines along the long leaves and stem, finishing the visible plant lines at the base.
Step 9: Check the Drawing
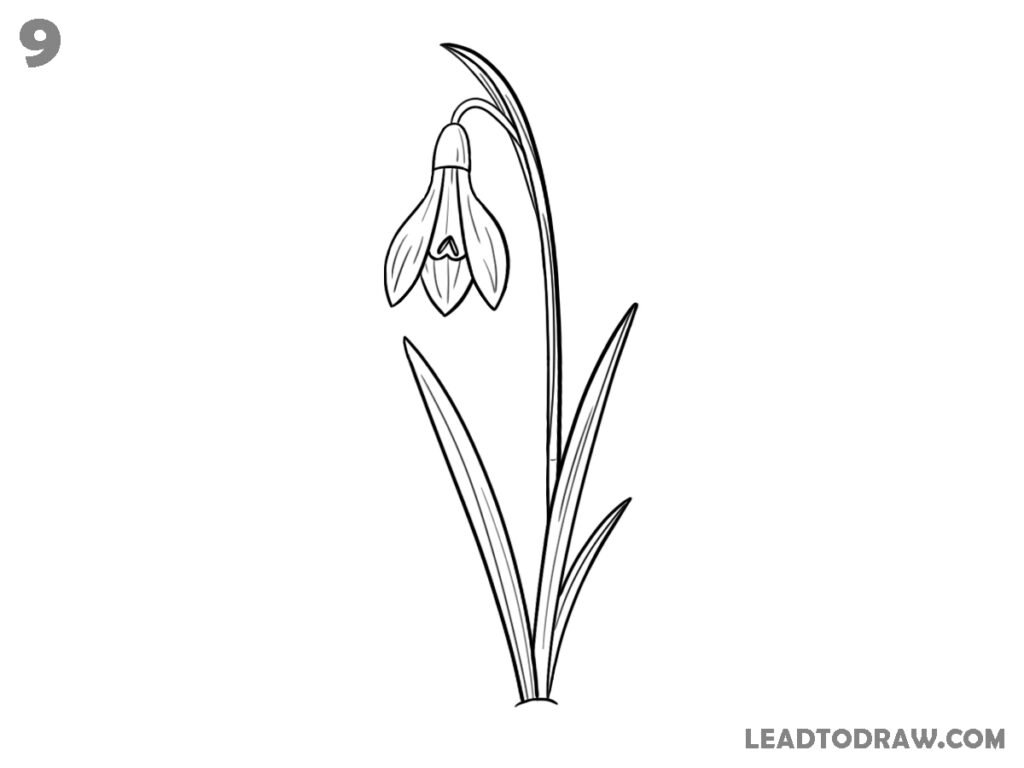
Check the snowdrop flower drawing from top to bottom. Correct any uneven curves, extra marks, or small line errors that are visible. Make sure the flower cap, hanging petals, curved stem, long leaves, inner petal lines, and pointed leaf tips are clean. Remove any unwanted marks and leave the finished drawing neat and clear.
For more similar drawing tutorials, explore the guides below.
- How to draw a tulip easy step by step
- How to draw hibiscus flower step by step easily
- How to Draw a Daffodil Flower
Conclusion
Your snowdrop flower drawing is now finished with its curved stem, long leaves, hanging petals, and small inner details. Check the lines once more and clean any unwanted marks. The final drawing follows the steps shown in the tutorial. Use the same order when practising this snowdrop flower drawing again for future drawing practice and reference.