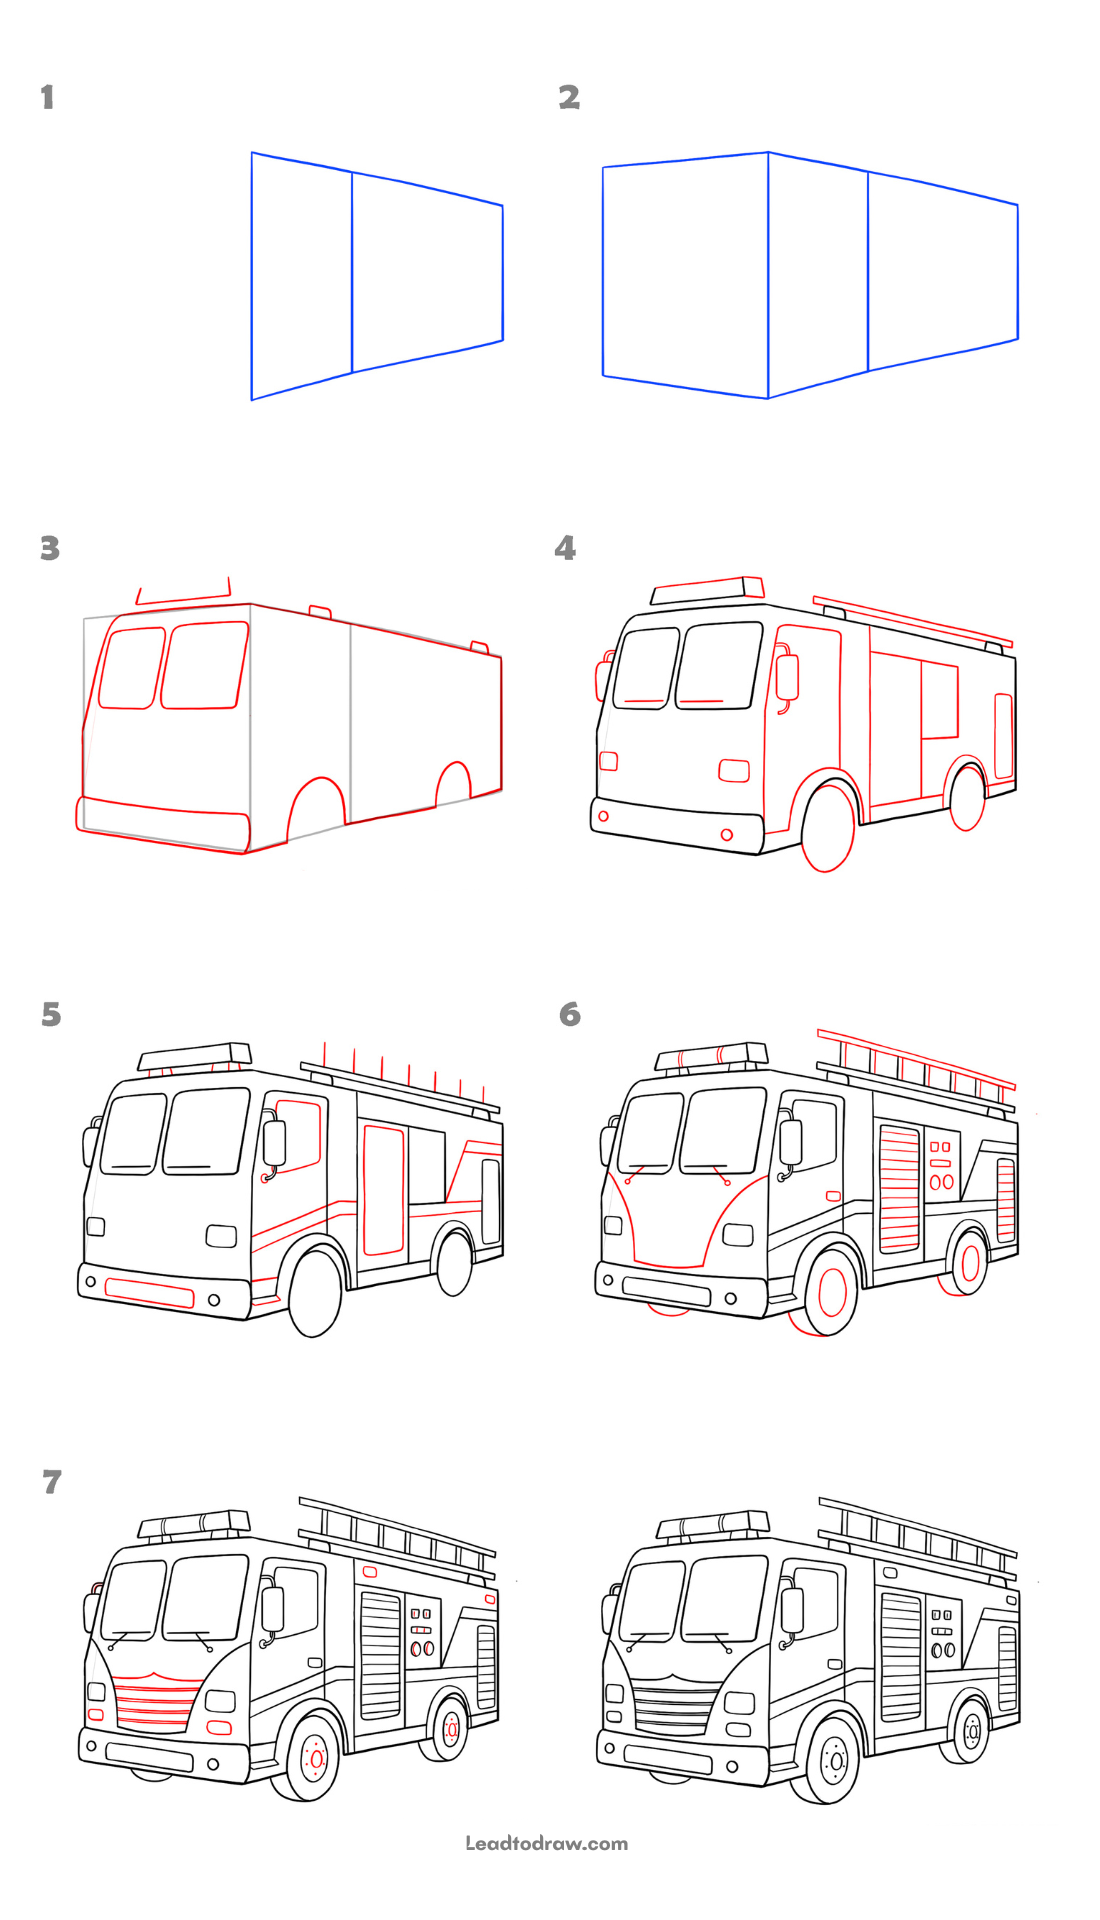
Learn how to draw a fire truck step by step with simple lines and basic shapes. In the tutorial images, new drawing lines are shown in red, while earlier lines stay black. Blue lines are used as body guidelines. Follow the steps in order to add the front, wheels, ladder, equipment, and other details.
Lets Begin
Step 1: Draw the First Body Guide
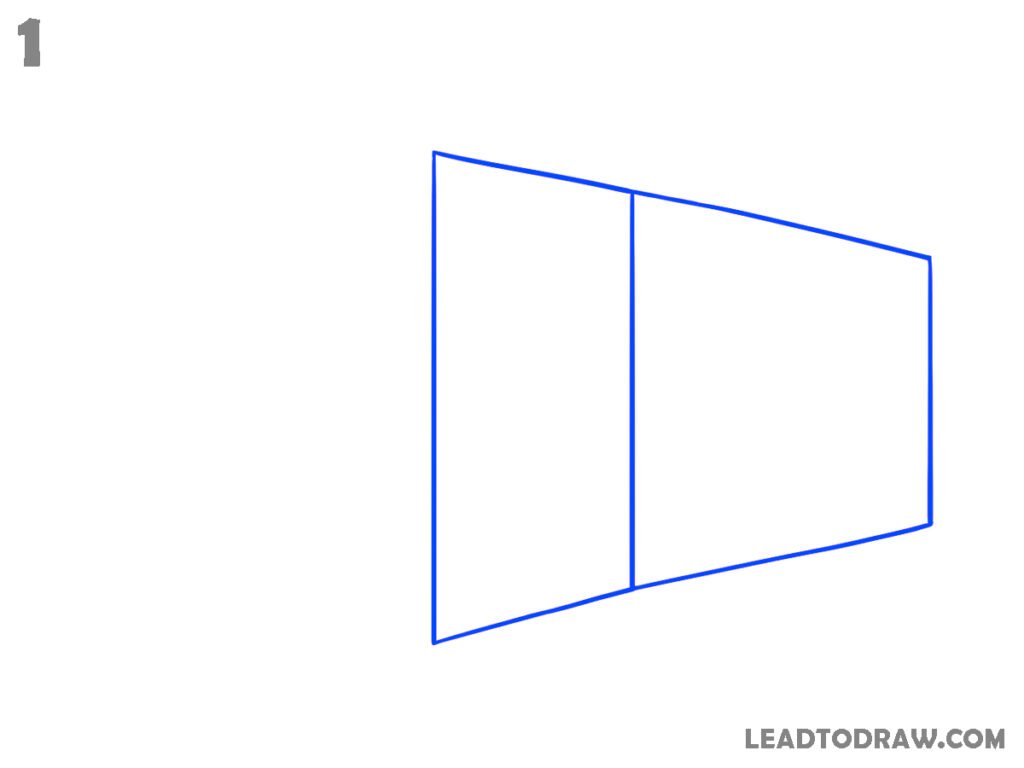
Draw the first guide shape with a tall vertical front line, a slanting top edge, and a slanting bottom edge. Add the shorter vertical line at the right end. Draw the inner vertical division between the front and side sections, connecting it to the upper and lower edges as clearly shown.
Step 2: Extend the Body Guide
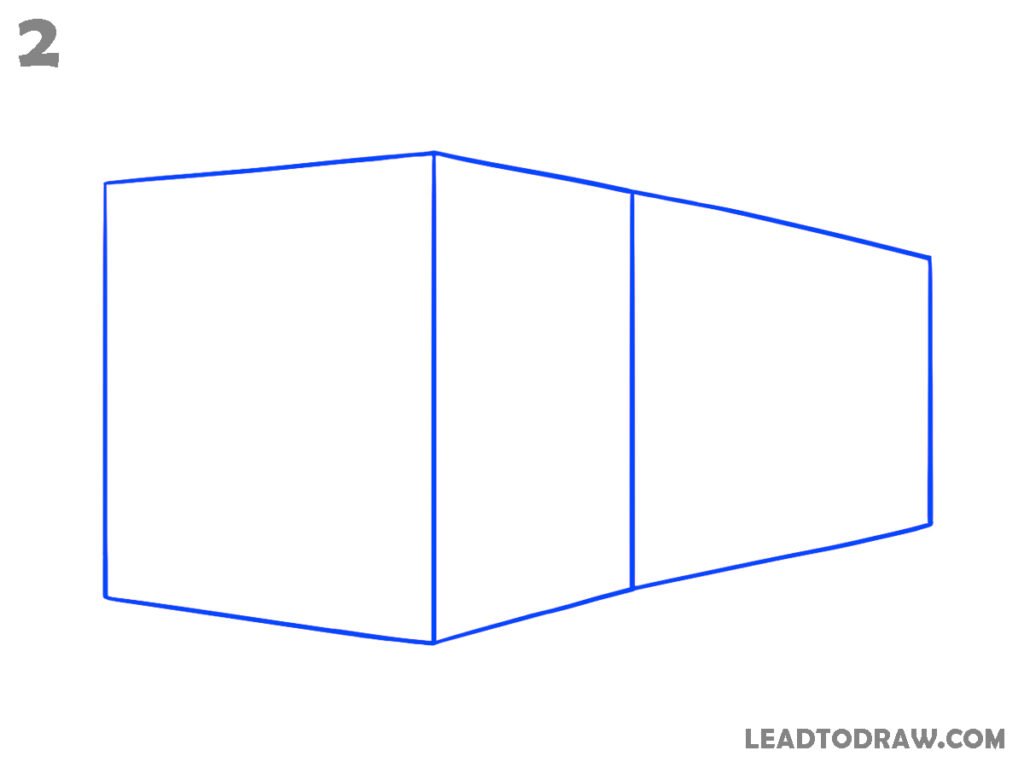
Draw the second guide shape by extending the front section to the left. Add the vertical front edge, then connect its top and bottom to the central point with slanted lines. Keep the inner vertical divisions and extend the right section with its upper and lower edges to form the complete basic truck body guide.
Step 3: Draw the Main Body Details
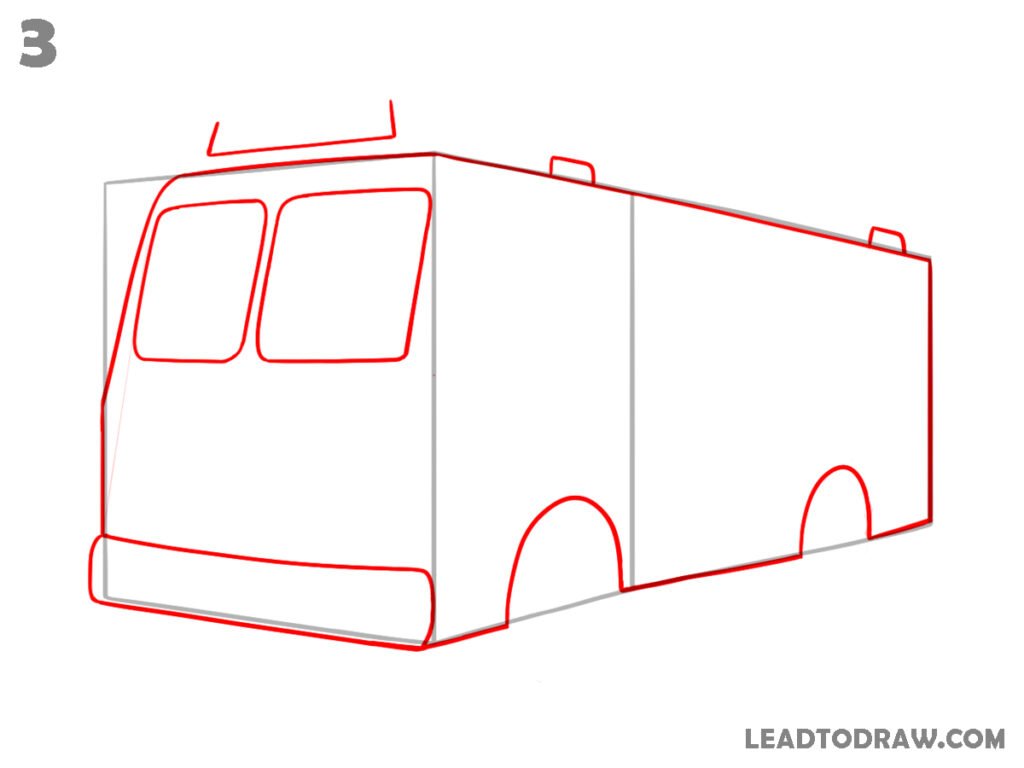
Using the guide shape, draw the two front windows with rounded corners, the curved front sides, and the lower bumper. Add the two wheel arches along the bottom, then draw the small roof fittings and the long upper side line. Add the rear vertical edge and the visible side lines shown in this step.
Step 4: Add the Main Truck Outline
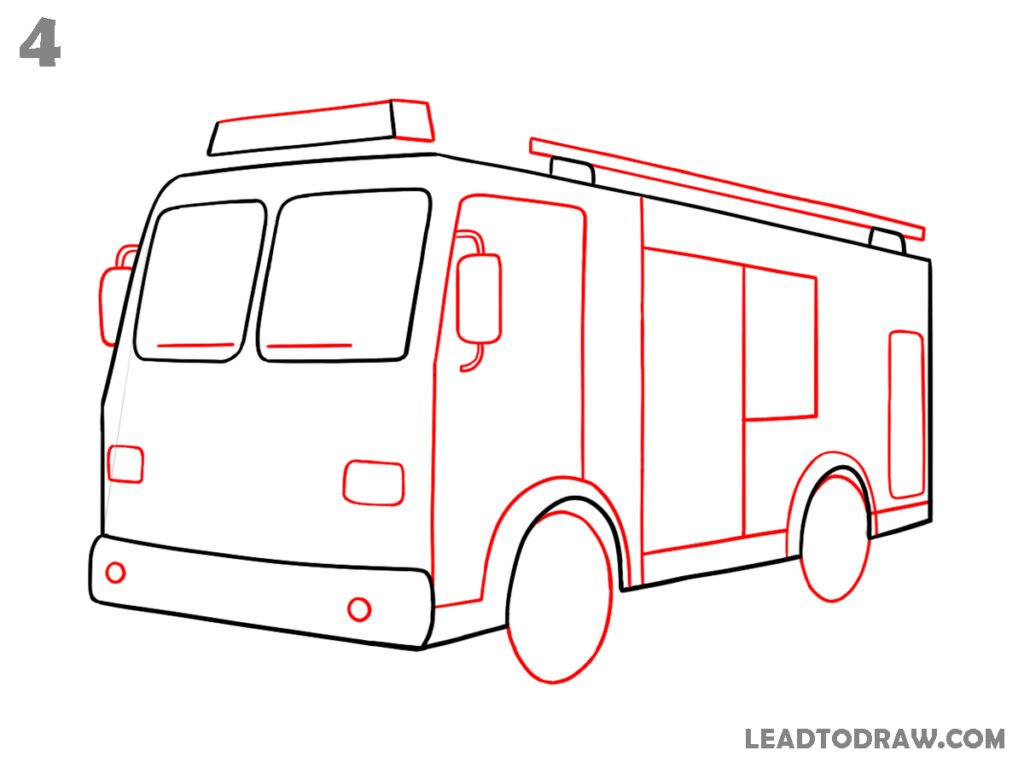
Draw the main black fire truck outline over the guide shape, including the front windshield frames, front bumper, side mirror, door outline, door handle, front lights, and front wheel. Add the rear wheel and rear compartment. Draw the long roof ladder base, small roof fittings, and the visible rear body details shown in the image.
Step 5: Add the Side Equipment
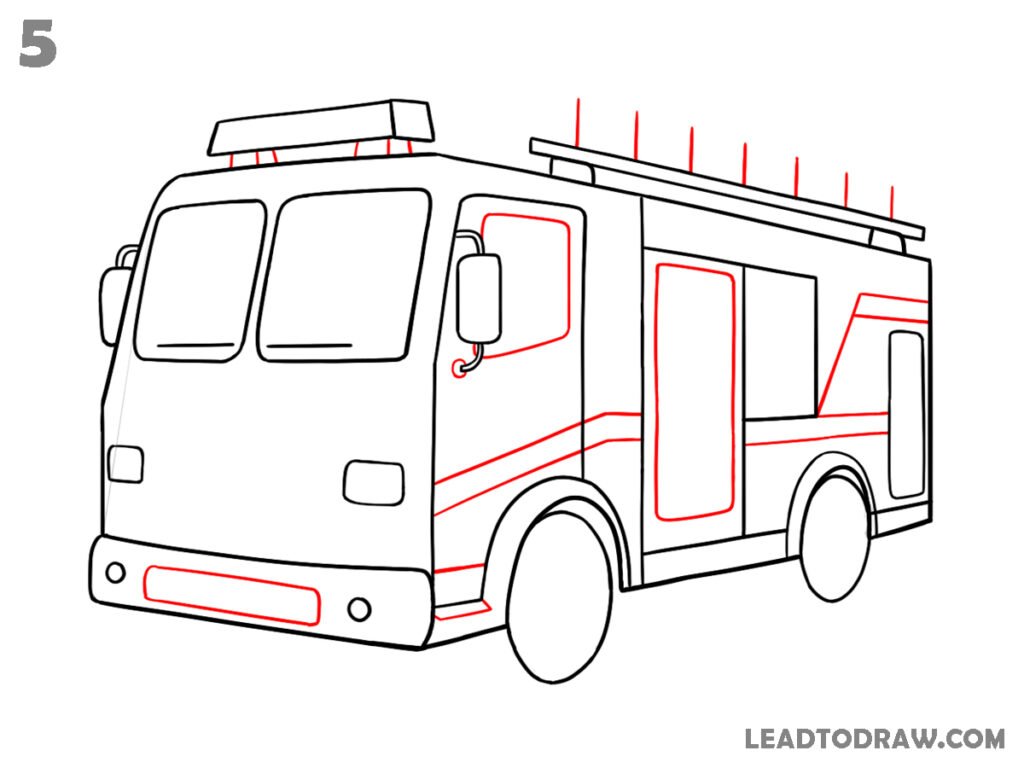
Add the side door with its inner panel, the long diagonal side stripe, and the rear compartment outline. Draw the roof ladder supports and their repeated upright sections. Add the front bumper panel, side mirror details, door handle, and lower side lines. Draw the remaining small roof fittings and side body details visible in this step.
Step 6: Add the Equipment Details
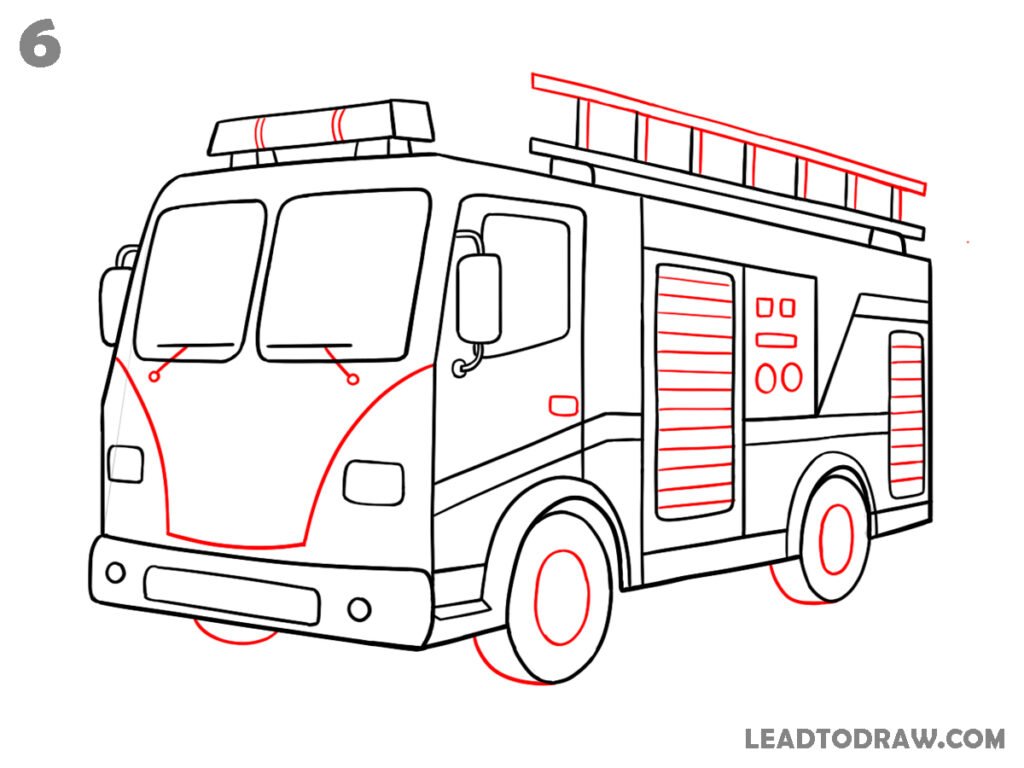
Draw the curved front panel and add the front grille outline. Add horizontal lines across the large side shutter and draw the small control panel beside it with rectangular and circular details. Add horizontal lines to the rear shutter. Extend the roof ladder with rails and cross sections, then add the inner wheel circles.
Step 7: Add the Final Drawing Details
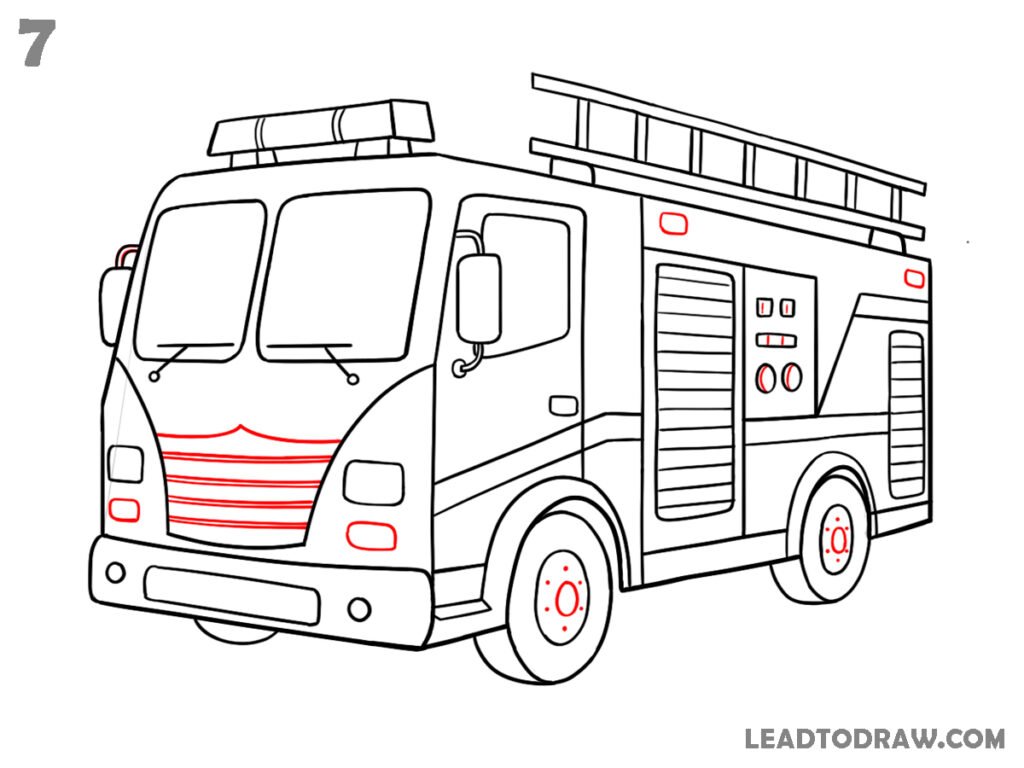
Add the horizontal grille lines across the front and the small front lights. Draw the inner circular details on both wheels. Add the remaining control panel shapes, side fittings, rear compartment lines, and ladder sections. Complete the small body details around the front bumper and side panels, following the new lines shown in this image.
Step 8: Check and Clean
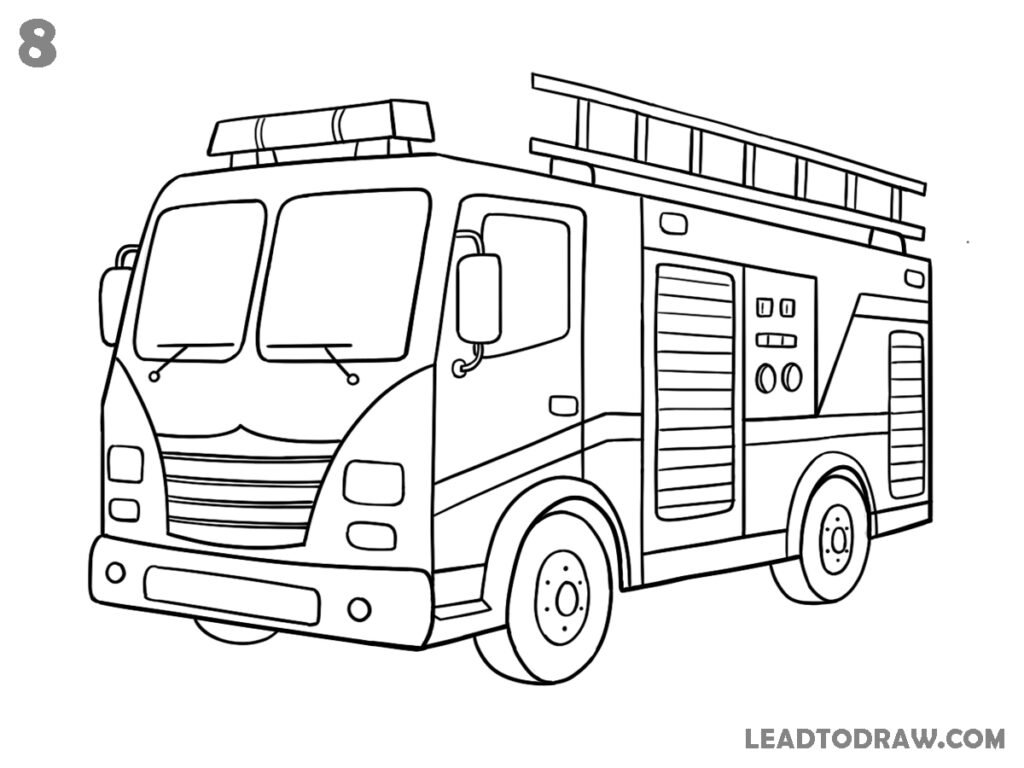
Check the fire truck drawing from front to rear. Correct any uneven outlines, wheel shapes, windows, grille lines, ladder sections, and small equipment details. Remove the blue body guidelines and any remaining construction marks. Clean the drawing so only the finished black outline and its completed fire truck details remain visible in the final drawing.
For more similar drawing tutorials, explore the guides below.
- How to draw a gas mask in as easy way
- How to Draw a Sailboat in 8 Simple Steps
- How to Draw a Jean Jacket Step by Step
Conclusion
Now the fire truck drawing is complete with the body, wheels, windows, ladder, front grille, lights, doors, and equipment details. Check the outline and remove the remaining blue guidelines. Correct any uneven lines and clean the drawing. The final image can be used as a reference for the finished fire truck after checking all parts carefully.