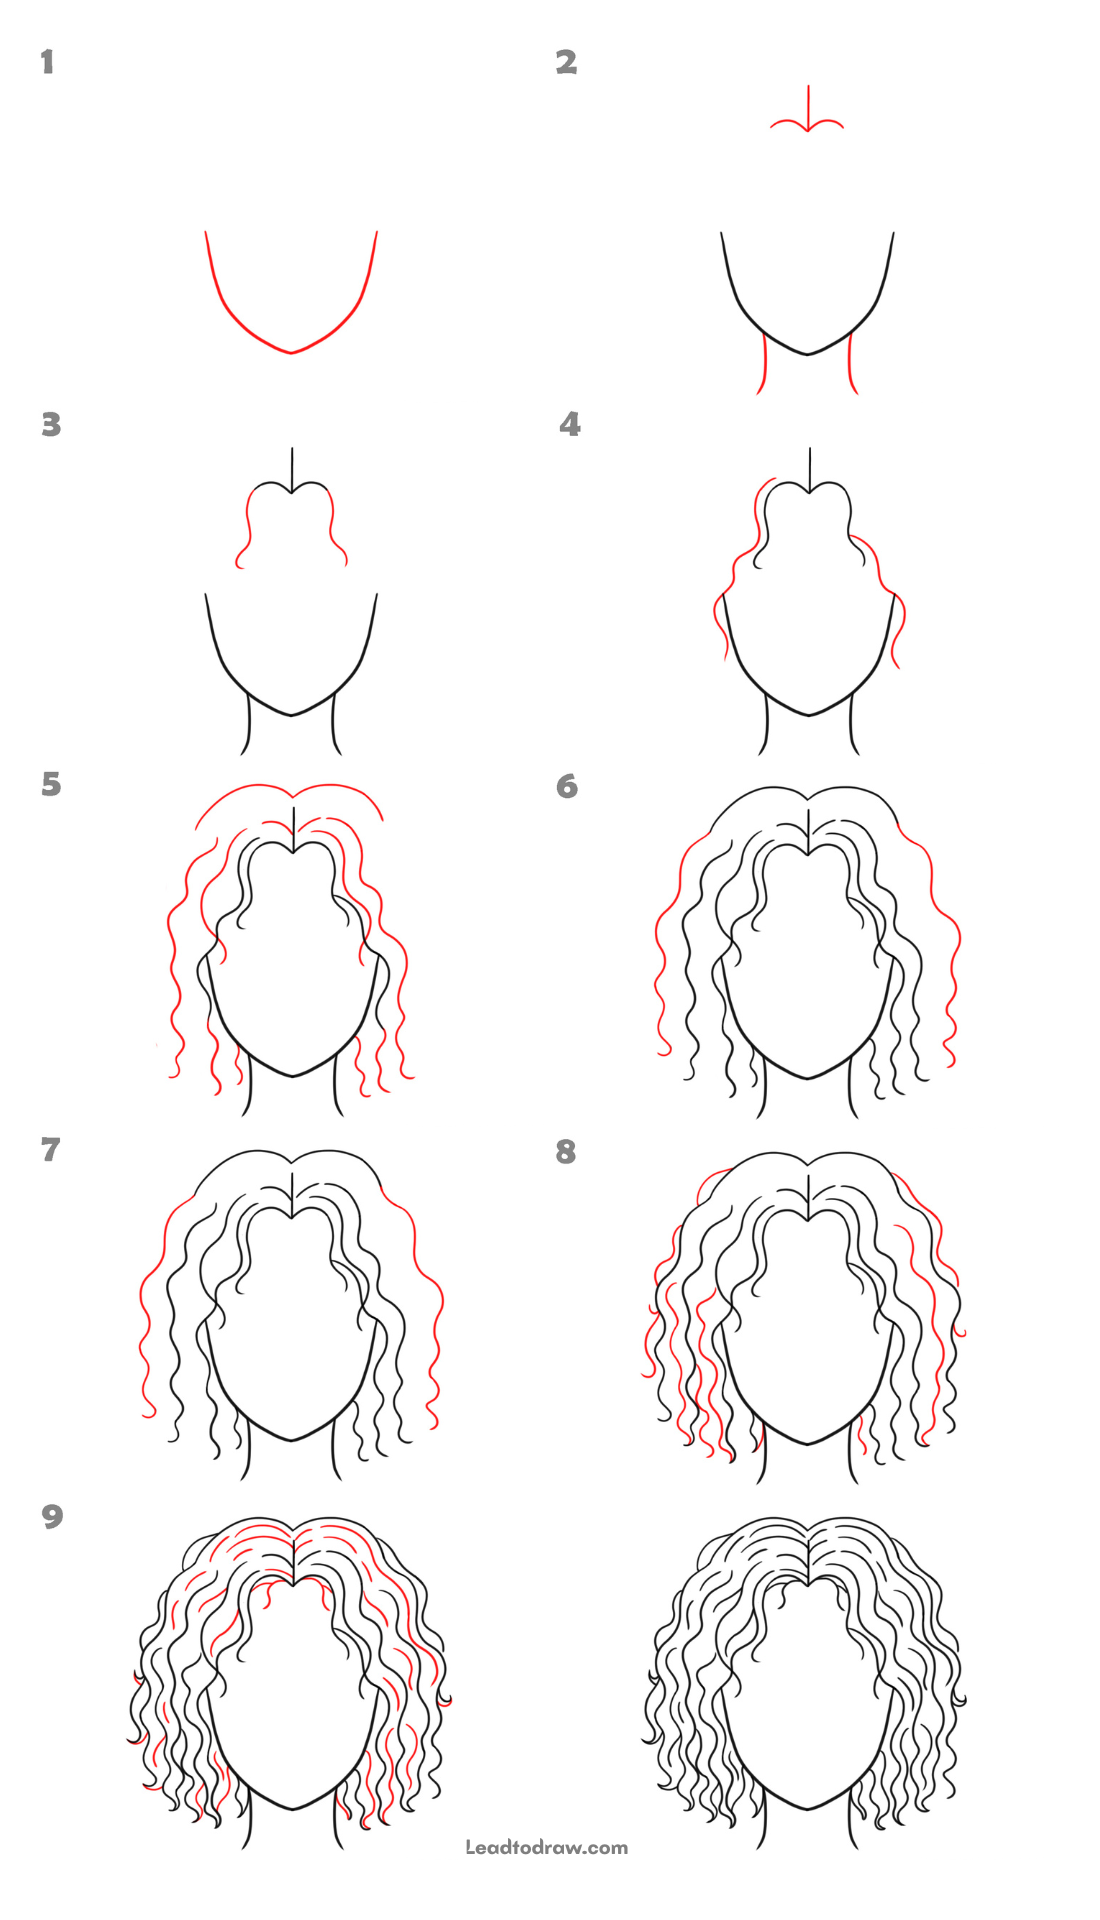
Learn how to draw curly hair female with this simple step-by-step tutorial. New lines are shown in red to help understand what is added in each step, while earlier lines stay black. Follow every image in order and complete the drawing from the head outline to the final curly hairstyle.
Lets Start
Step 1 – Draw the Face Shape
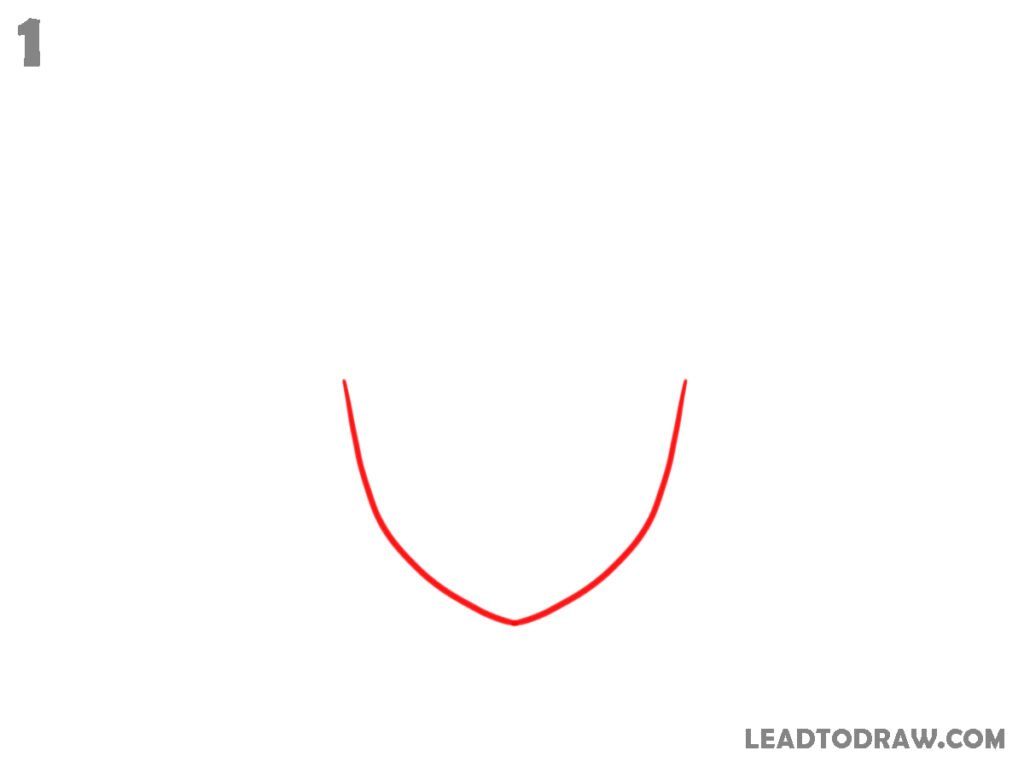
Start by drawing the outline of the face. Make a wide curved line on both sides, bringing them down evenly. Join both curves with a pointed chin at the bottom. Keep the upper part open because the hair and head details will be added later.
Step 2 – Add the Hair Part and Neck
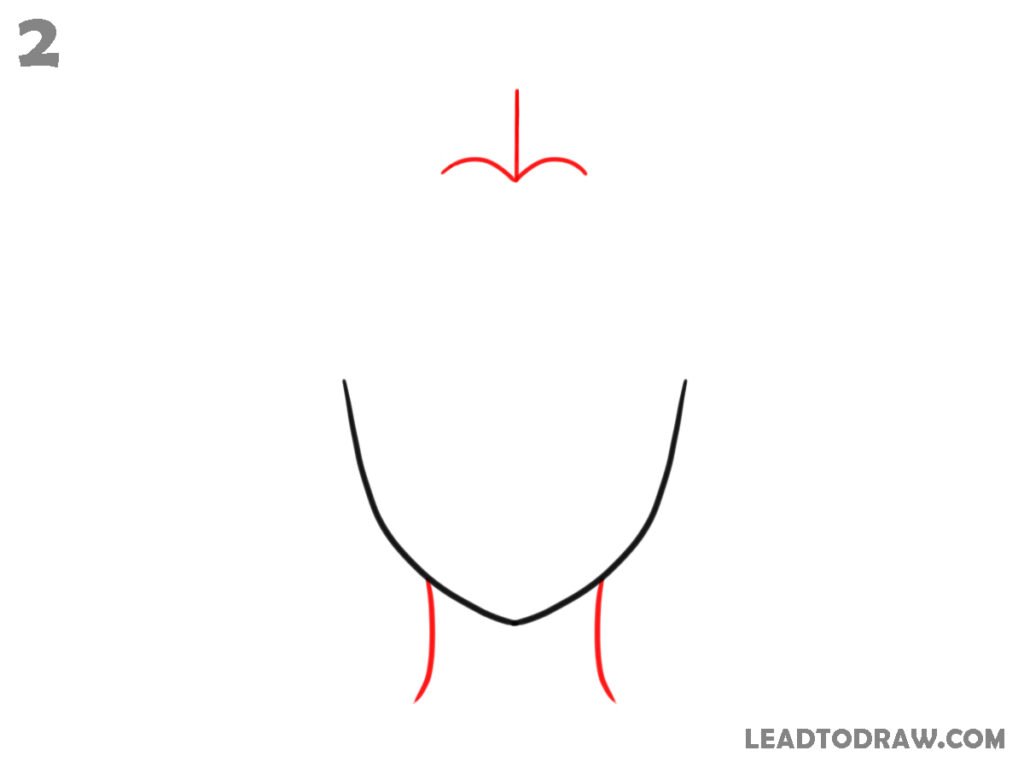
Draw a short vertical line at the top centre. Add two small curved bumps on both sides to create the middle hair part. Below the face, draw two slightly curved neck lines starting near the jaw and extending downward. Keep the neck narrow and leave enough space above for the remaining hairstyle.
Step 3 – Draw the First Curly Hair Strands
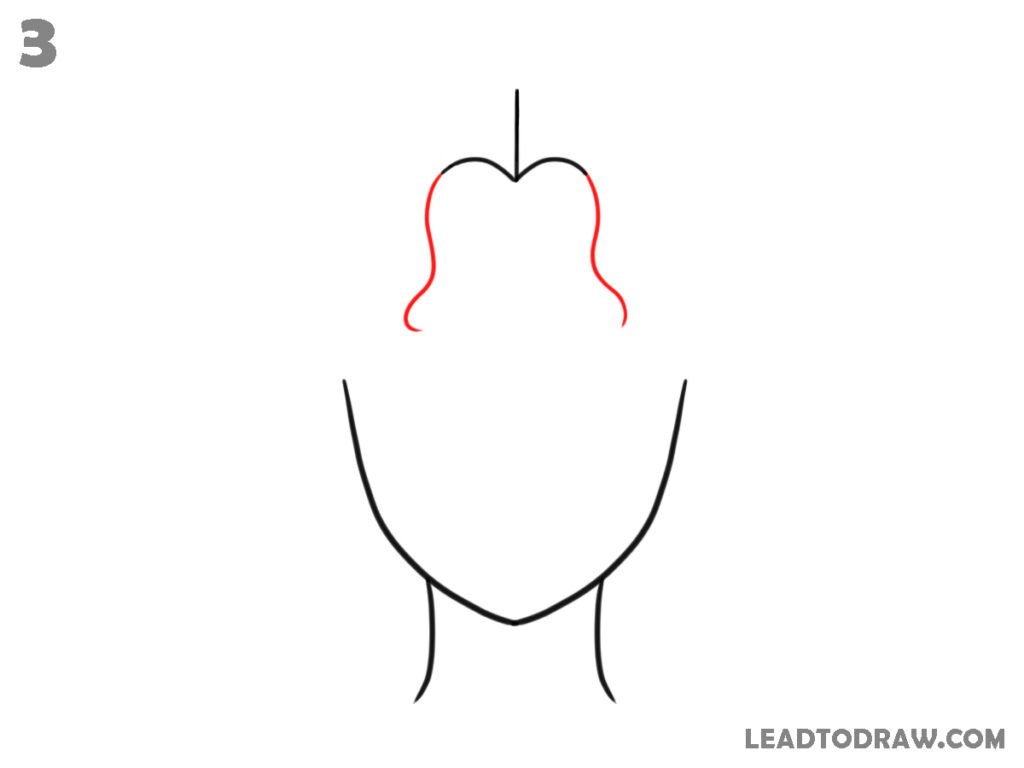
From both sides of the middle hair part, draw soft wavy lines flowing downward. Each side forms a loose curl that stops above the shoulders. Keep both strands similar in size with gentle curves instead of sharp bends. Leave the outer sides open because more hair will be added in the following steps.
Step 4 – Extend the Outer Hair Shape
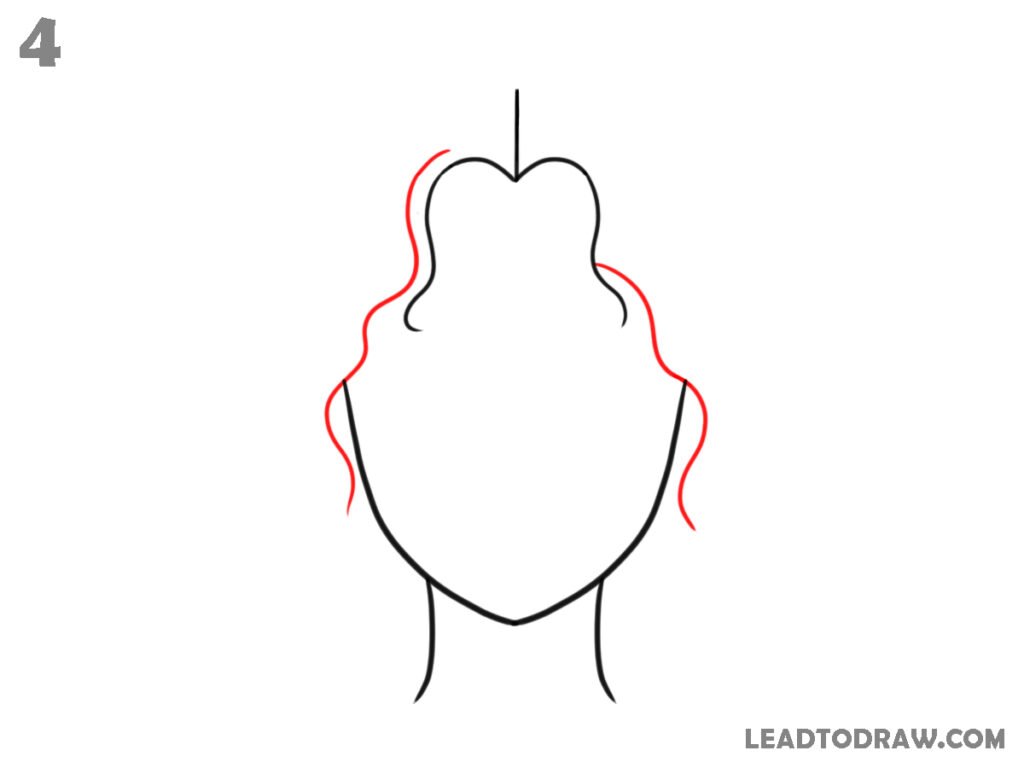
Draw larger wavy hair sections outside the first curls on both sides. Begin near the top of the head and continue downward with smooth wave patterns. Extend these outer curls slightly below the earlier strands.
Step 5 – Build the Top Hair Volume
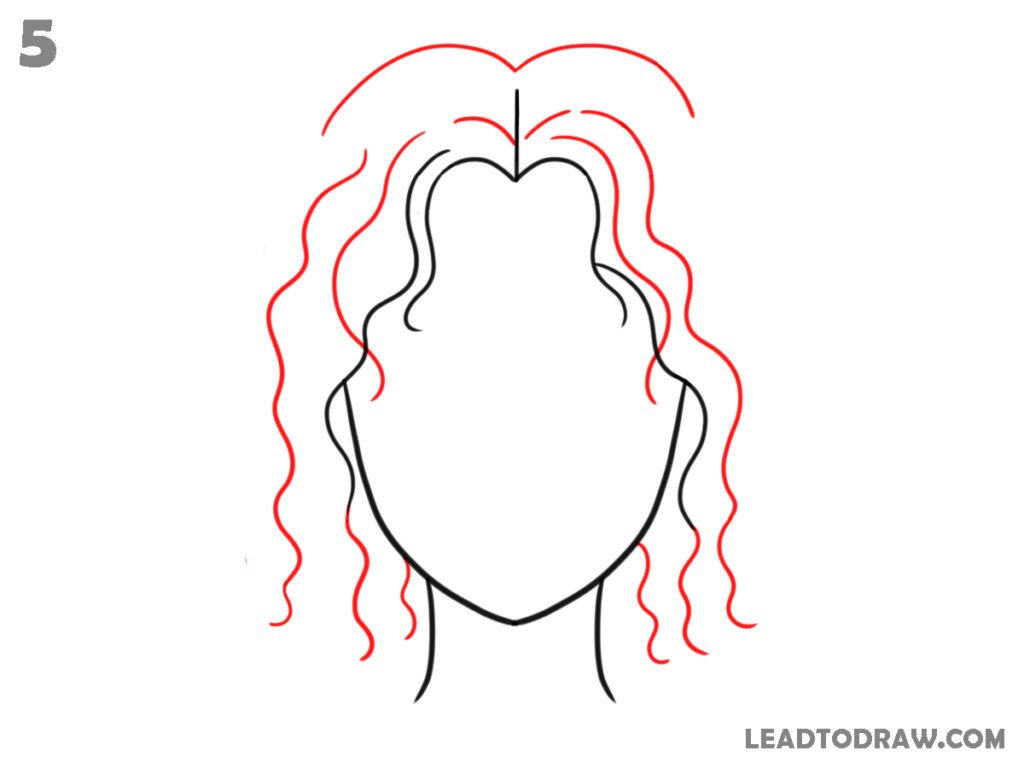
Draw a large curved outline across the top of the head, joining both outer sides. Add two long curved hair sections flowing from the centre part toward each side. Extend extra curly strands downward along both sides, making the hairstyle fuller. Keep every curl loose with gentle wave shapes from top to bottom.
Step 6 – Add More Outer Curls
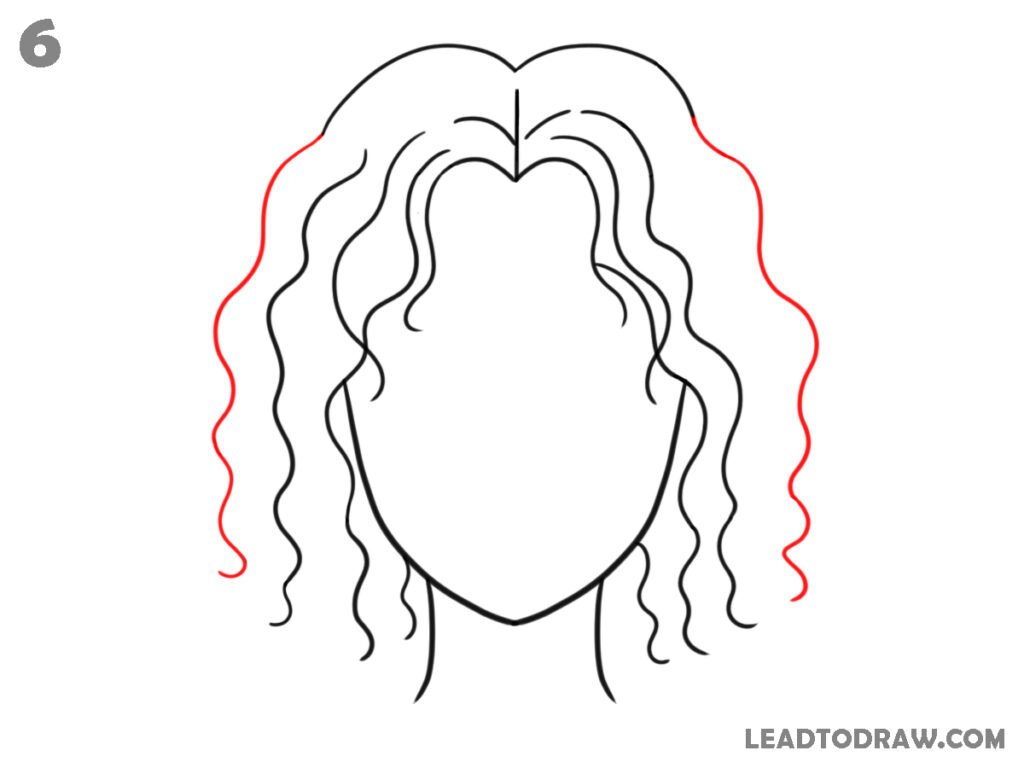
Continue drawing longer wavy curls along the outside edges of the hairstyle. Extend both sides downward with similar wave patterns until they reach below the jaw area. Keep the curves soft and natural while matching the existing hair direction. Leave small spaces between strands to show separate curly sections.
Step 7 – Complete the Main Hair Outline
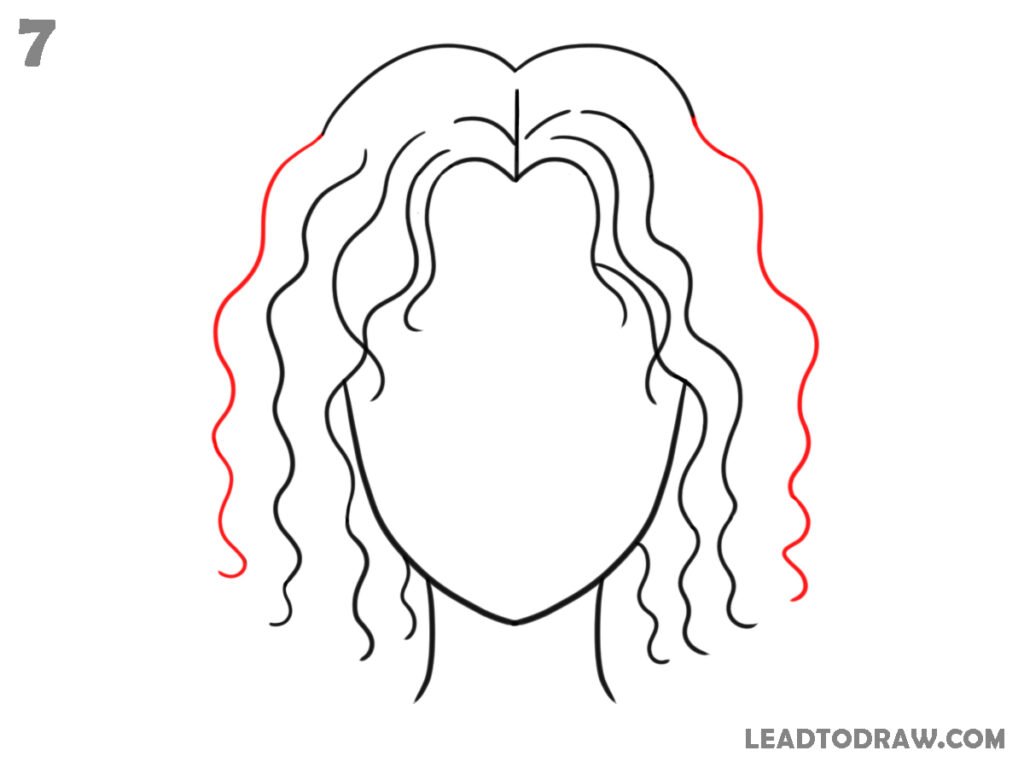
Draw the remaining outer hair curves to finish the overall hairstyle shape. Continue the waves downward on both sides until both edges look even. Keep the top rounded around the head and connect naturally with the existing curls. Maintain similar spacing so the hairstyle stays consistent from top to bottom.
Step 8 – Add Extra Curly Strands
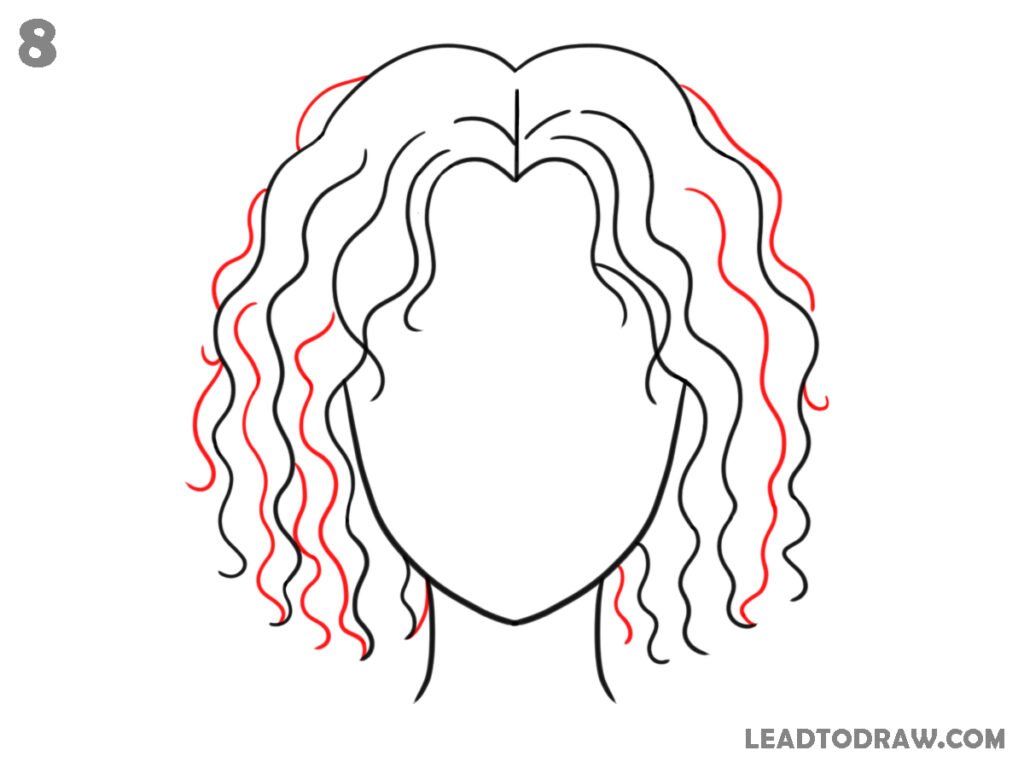
Draw several additional curly strands between the existing hair sections on both sides. Add longer waves near the left side and a few extra curls near the right side. Include a short neck line below the hair where shown. Keep each new strand following the same curly pattern.
Step 9 – Draw Hair Texture Lines
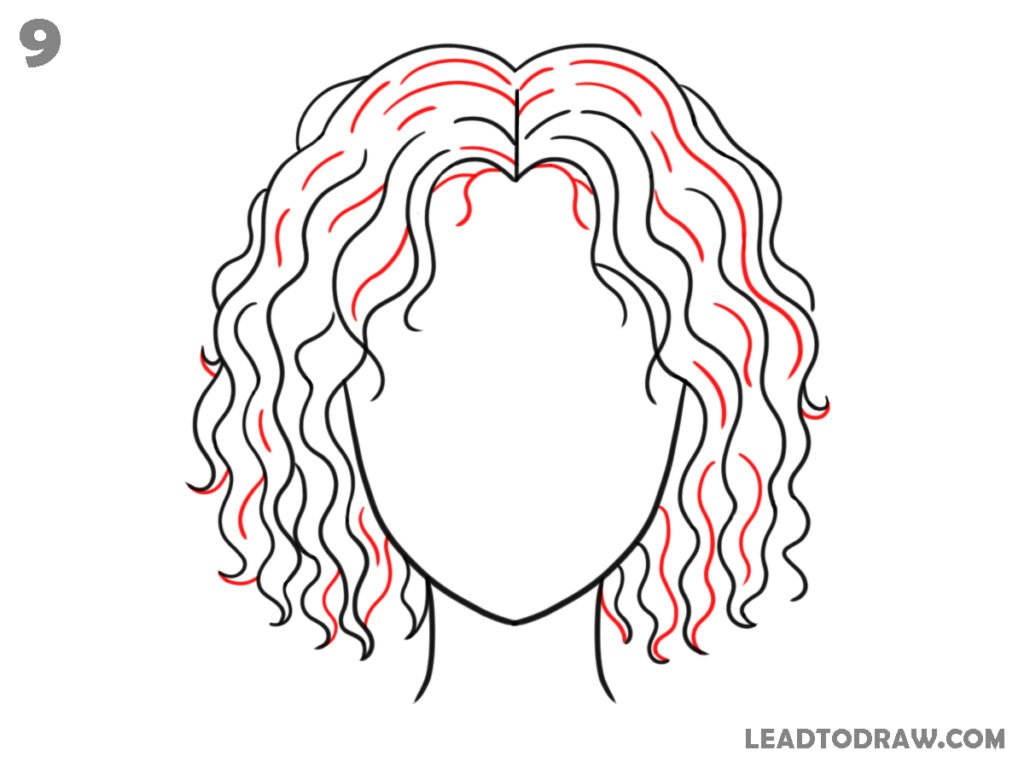
Add many short curved lines across the top of the head following the hair direction. Draw extra flowing texture lines inside the curls from top to bottom on both sides. Continue filling empty spaces with matching curved strands while keeping the middle hair part visible. Do not overcrowd the hair with lines.
Step 10 – Check and Clean the Drawing
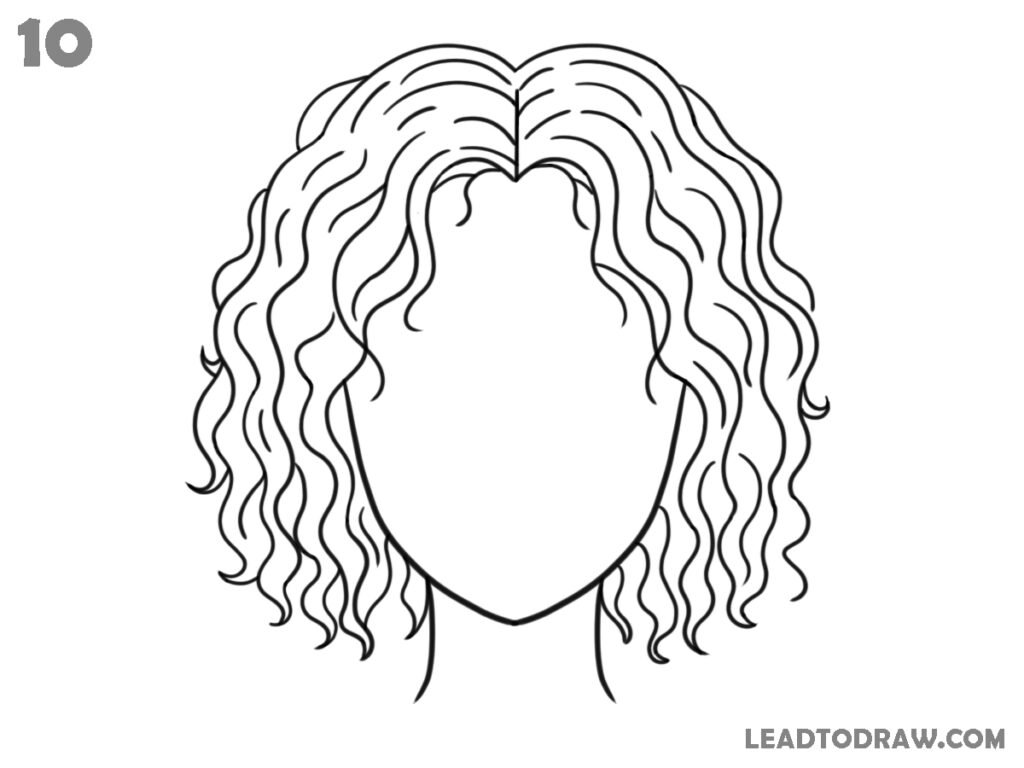
Check the entire drawing carefully and compare every curl, hair strand, face outline, neck, and hair part. Correct any uneven curves, complete any missing lines, and erase unwanted sketch marks if present. Keep the hairstyle neat while maintaining the same curly pattern across both sides and the top.
For more similar drawing tutorials, explore the guides below.
- How to Draw Jeans: Easy Step-by-Step
- How to draw a gas mask in as easy way
- How to Draw a Spiral Book Step by Step
Conclusion
Now the how to draw curly hair female tutorial is complete. Compare every part with the final drawing, correct any missing lines, and clean unwanted sketch marks. After checking everything, the curly hairstyle drawing is ready. Practice again using the same steps to improve drawing control every time.