
Learn how to draw a wallet by following simple sketch lines and small details shown in each step. The red marks show the newly added parts in every image to help you follow easily. You will draw the outer shape, flap, button strap, stitching, and final shading in a clean wallet drawing.
Lets Begin
Step 1 – Draw the Main Shape
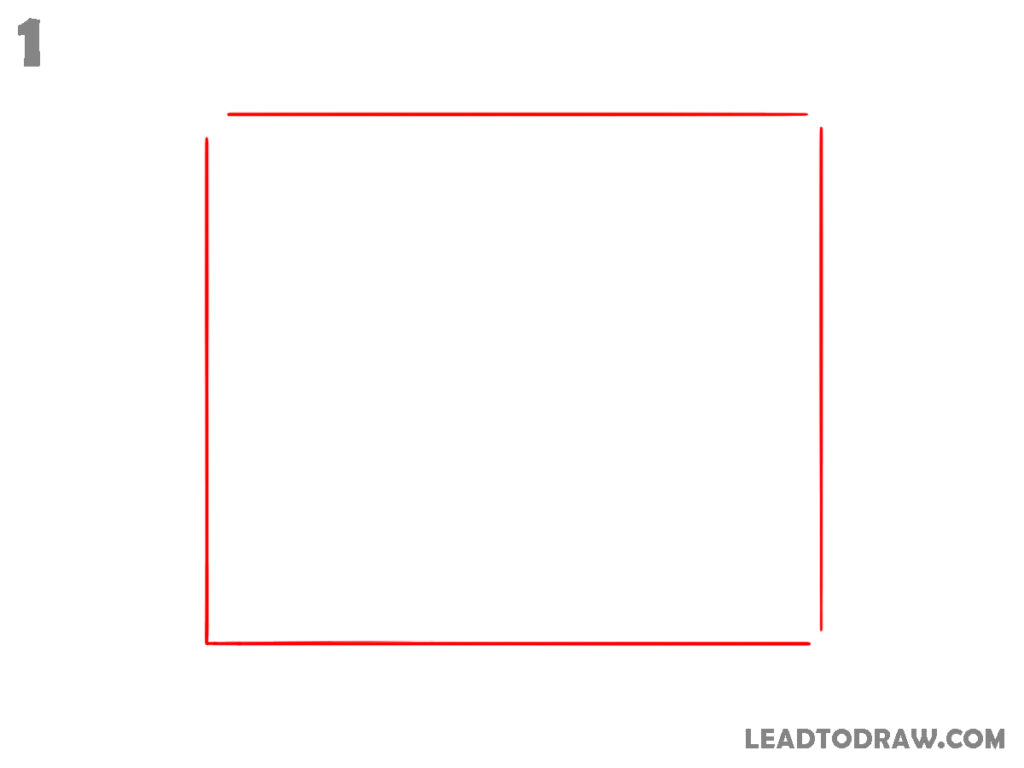
Start by drawing a large square shape for the wallet body.Keep the top and bottom lines horizontal and the side lines vertical, matching the shape shown in the image. Leave enough space inside the shape because more wallet parts will be added later around the outer edges and front section.
Step 2 – Add Rounded Corners and Top Curve
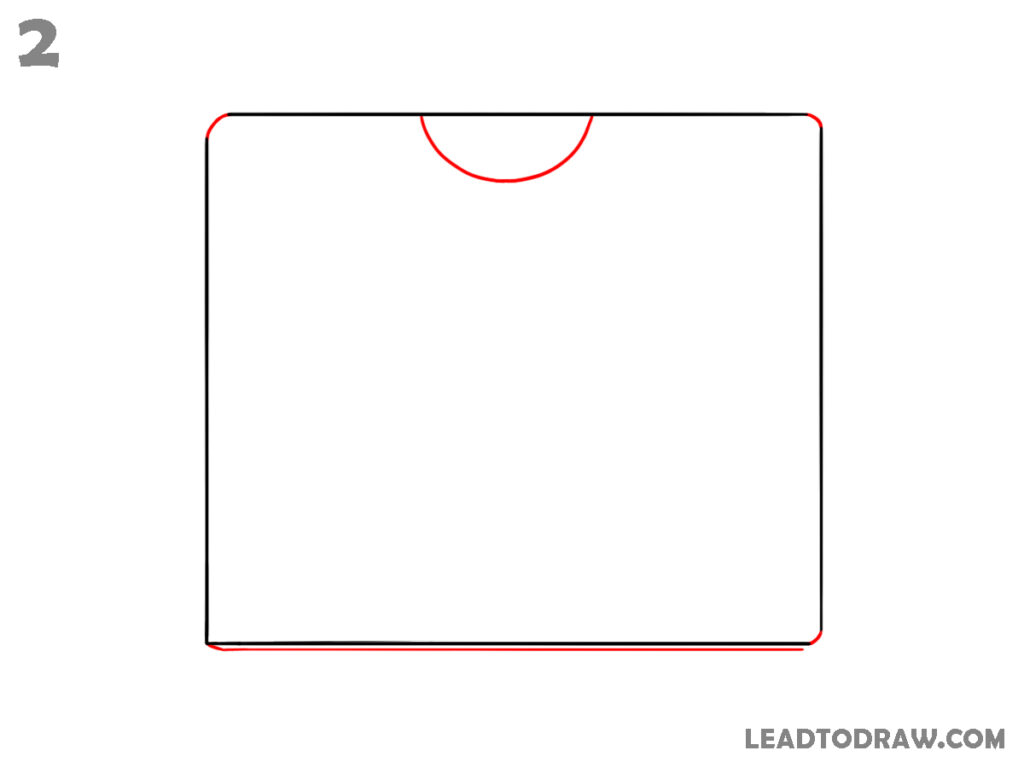
Round all four corners of the square to make the wallet edges softer. Draw a curved half-circle shape at the top center edge for the thumb opening section. Add a thin lower border line along the bottom edge. Keep the curve smooth and connected properly with the upper line while maintaining equal spacing near both side corners.
Step 3 – Draw the Front Pocket and Side Lines
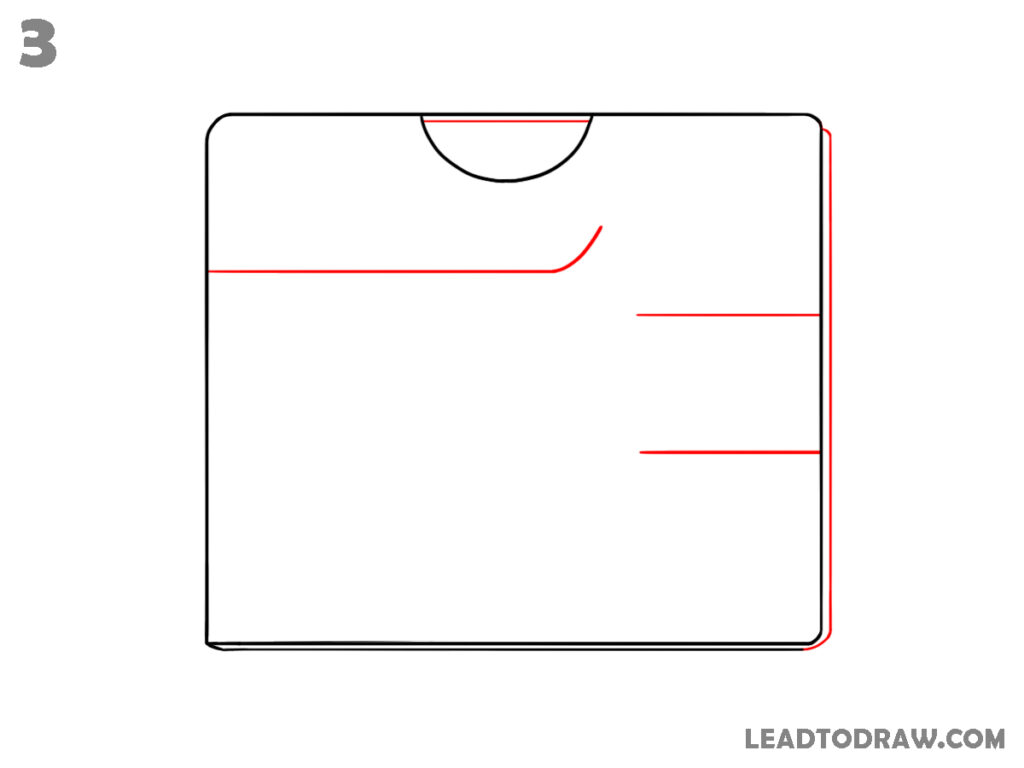
Draw a long horizontal line across the upper front area of the wallet. Curve the right end upward slightly before stopping near the side edge. Add two short horizontal lines on the right side below it. Draw a thin vertical outer border line near the right edge to show the layered wallet thickness from the side view.
Step 4 – Add the Diagonal Section and Strap Shape
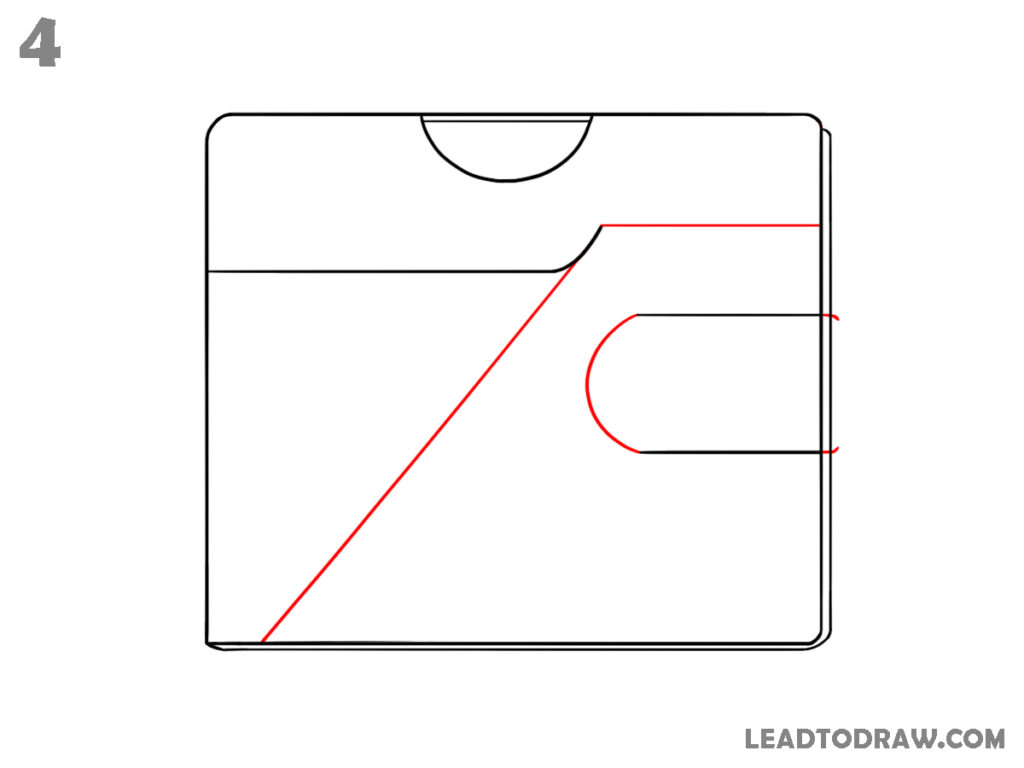
Draw a long diagonal line starting from the lower left corner and connect it upward toward the curved upper line. On the right side, draw a rounded strap shape extending outward from the wallet body. Add a short horizontal line above the strap to connect with the upper front section.
Step 5 – Draw the Button and Strap Details
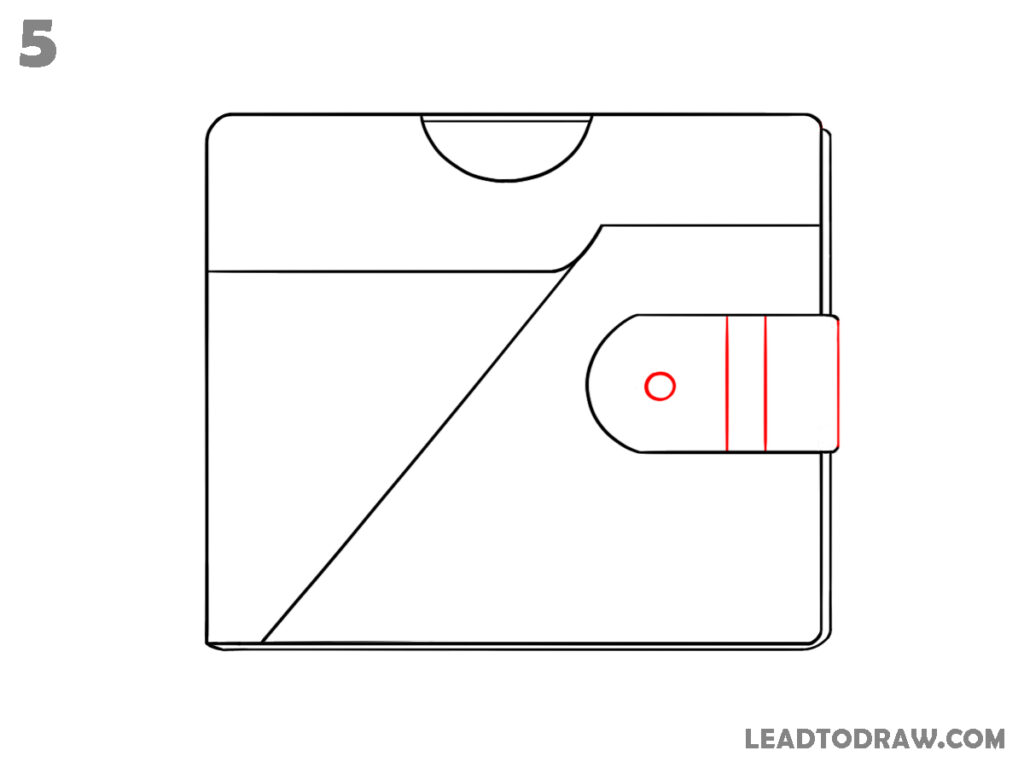
Inside the strap, draw a small circular button near the rounded end. Add two short vertical lines near the right side of the strap to create the band section. Keep the strap width even from top to bottom. Maintain the rounded end smoothly while connecting the strap neatly with the wallet body without changing the earlier shapes.
Step 6 – Add Stitching Guidelines
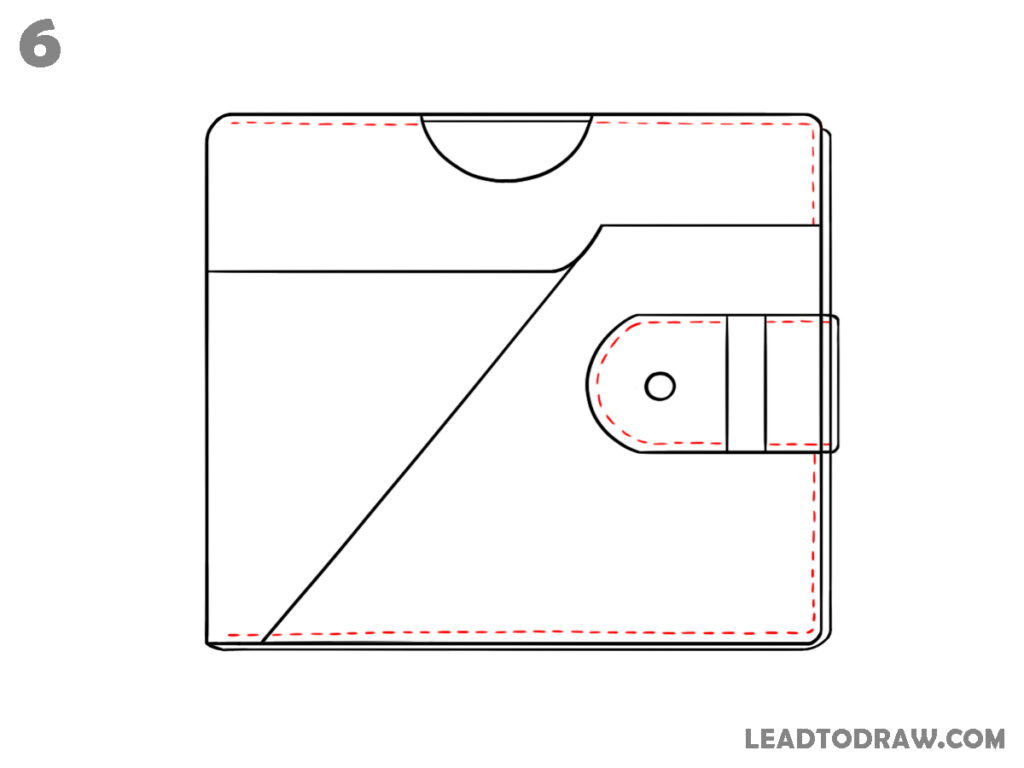
Draw dotted stitching lines close to the wallet borders along the top, left, bottom, and right edges. Add matching dotted stitching around the strap and near the inner strap section. Keep equal spacing between the dotted lines and outer borders. Draw the stitches carefully around curved areas so the wallet design looks realistic from every side.
Step 7 – Add Shading to the Outer Edges

Add soft shading only around the outer edges of the wallet. Shade along the left side, bottom edge, lower corners, and right border while keeping the inner sections plain. Apply slightly darker strokes close to the outer outline to match the image.
Step 8 – Add Shading Inside the Wallet
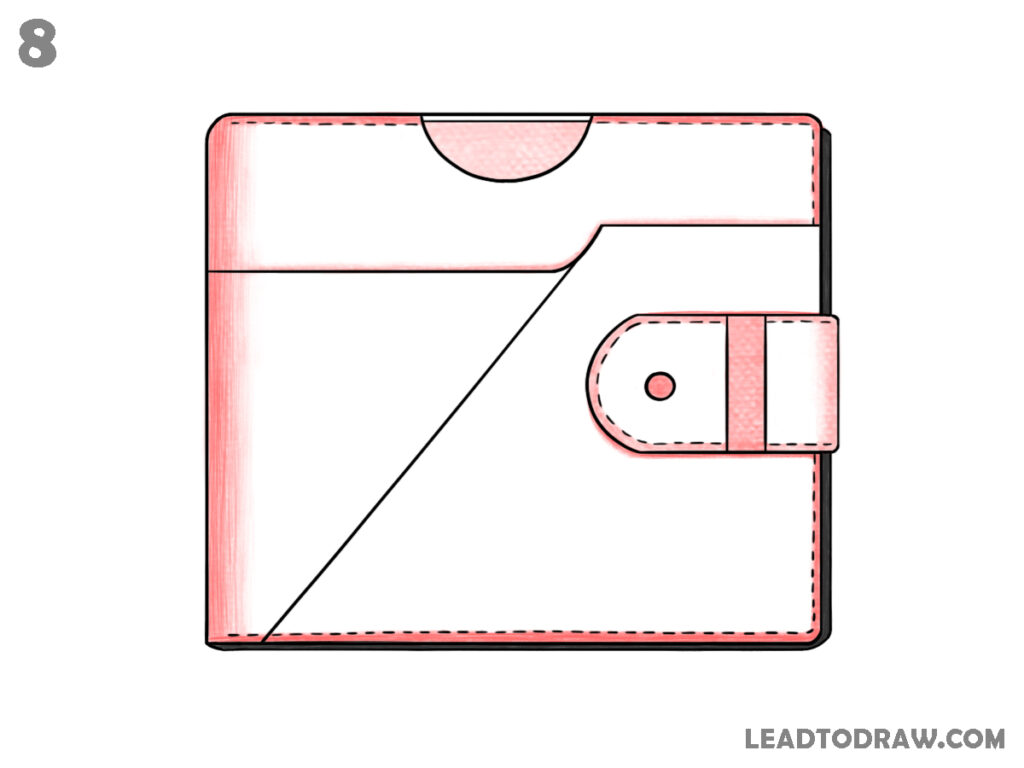
Add soft shading inside the wallet body. Shade the upper pocket section, lower diagonal area, and inner side near the strap connection. Keep the center area lighter while adding darker pencil strokes near the inner corners and folded parts. Shade inside the strap band neatly, exactly like the image above.
Step 9 – Check and Clean the Drawing
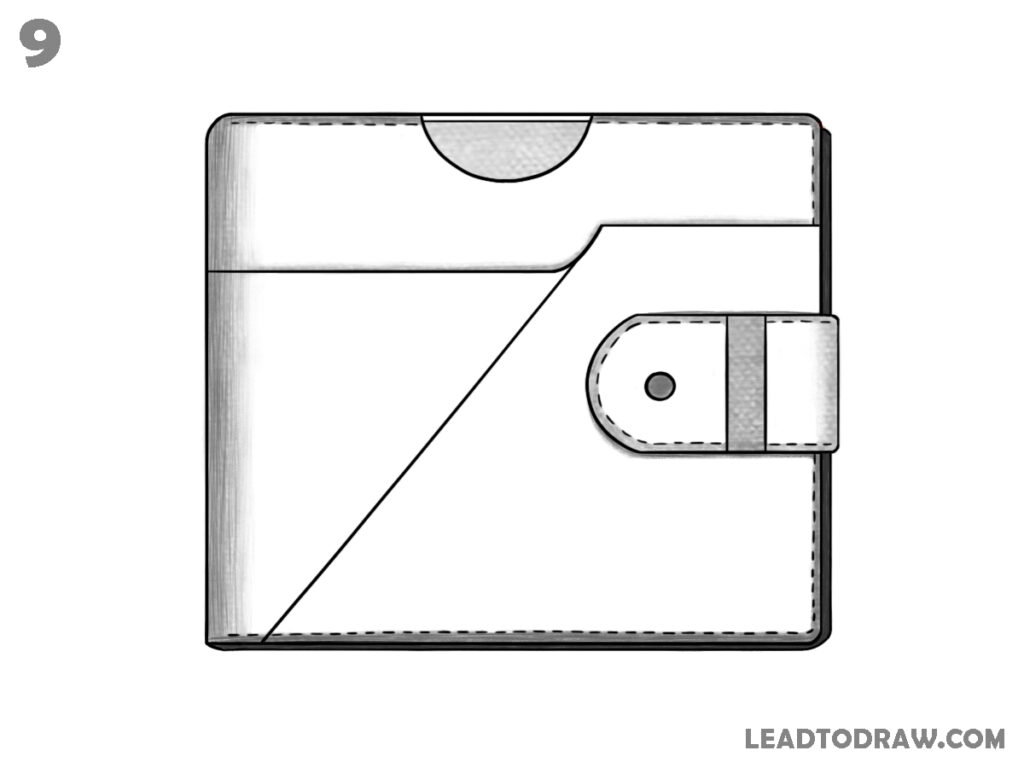
Check the complete wallet drawing carefully and darken any faded outline where needed. Clean remaining rough marks around the corners, strap, and lower diagonal section. Adjust the shading softly along the left side and bottom edge. Keep the stitching visible and smooth. Finish the wallet drawing after removing all extra sketch marks.
For more similar drawing tutorials, explore the guides below.
- How to draw a gas mask in as easy way
- How to draw a perfect star in an easy way
- How to draw a tulip easy step by step
Concluion
Now you know how to draw a wallet using simple lines, curves, stitching, and light shading. Follow each step slowly and keep the shapes neat while drawing the pocket, strap, and button details. Practice the same wallet drawing again to improve line control and smooth finishing. Small corrections and clean shading make the drawing look better overall.