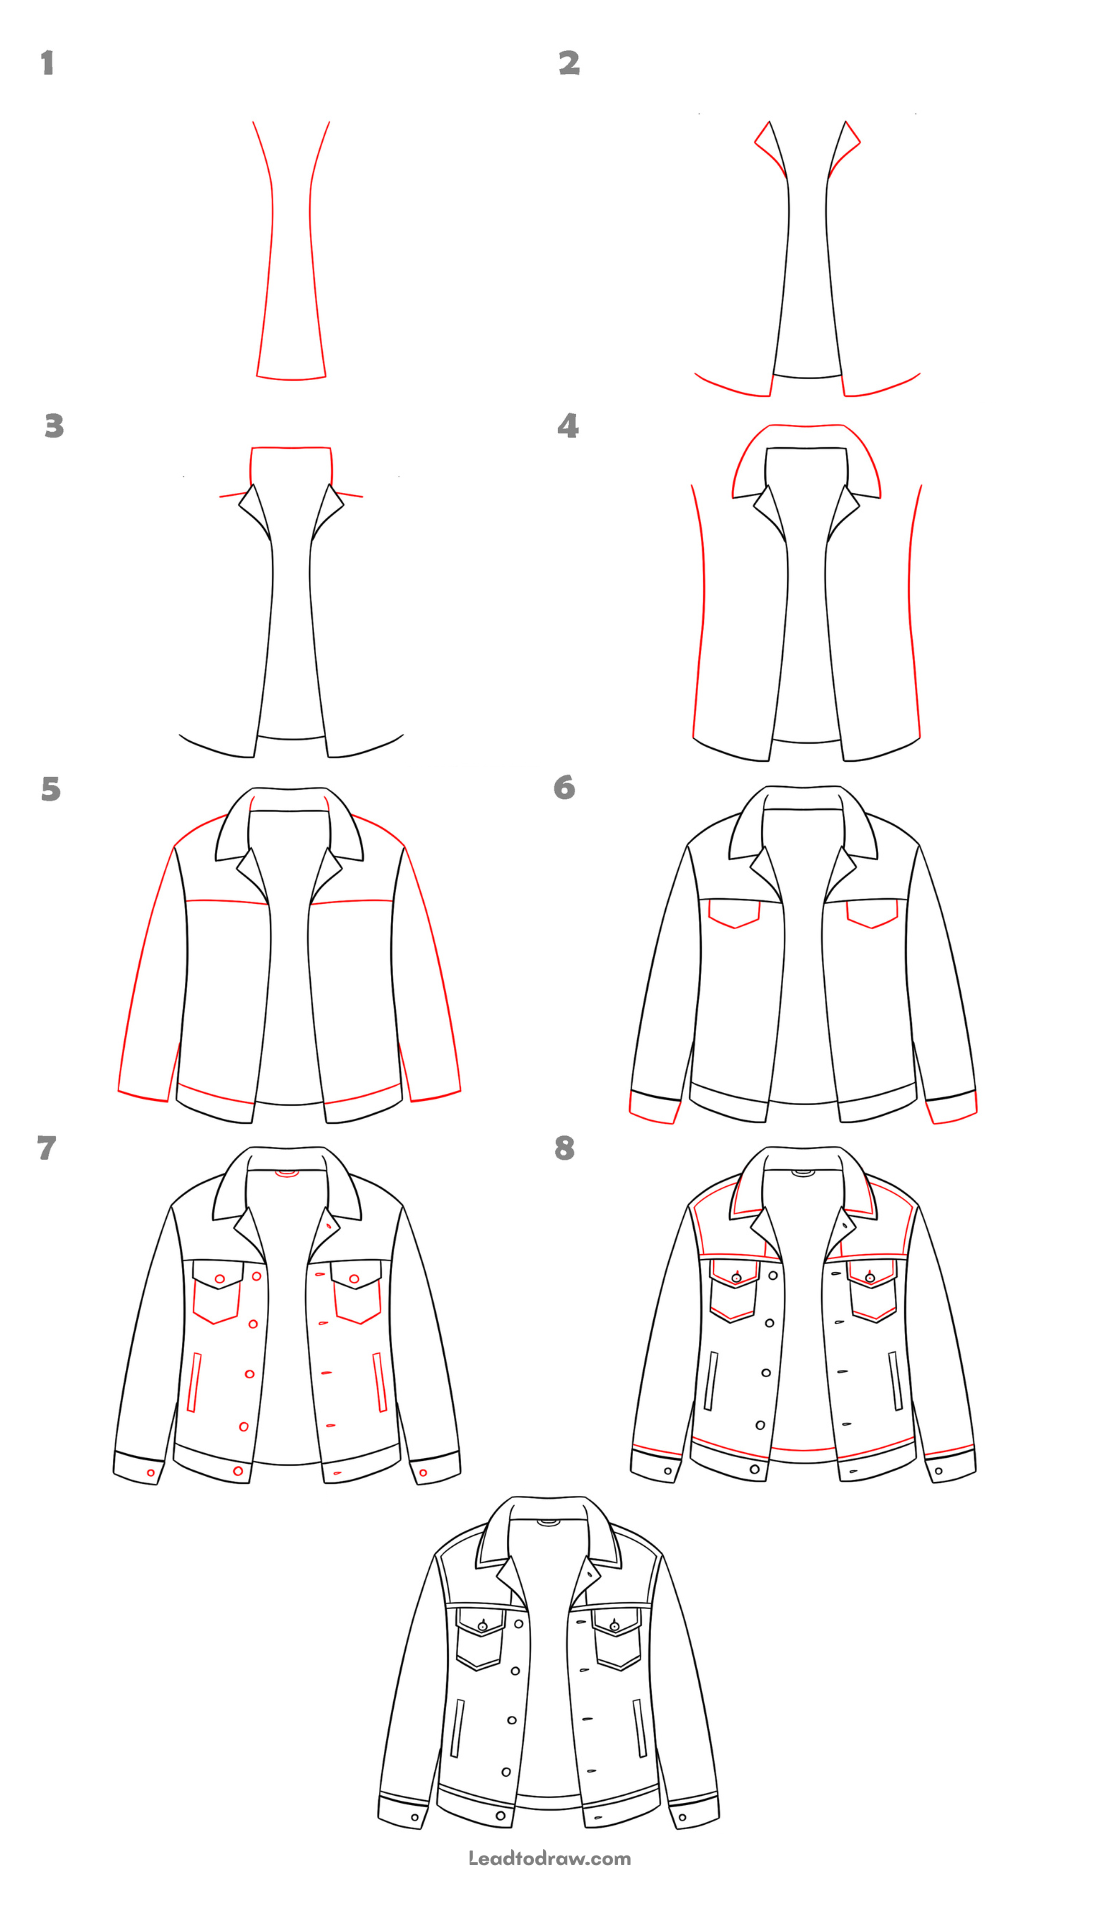
Learn How to draw jean jacket with this simple step-by-step tutorial. Each new part is shown in red to make the drawing order easy to follow. Draw those parts as normal black lines while following each image carefully until the jacket drawing is finished.
Lets start
Step 1: Draw the Jacket Body
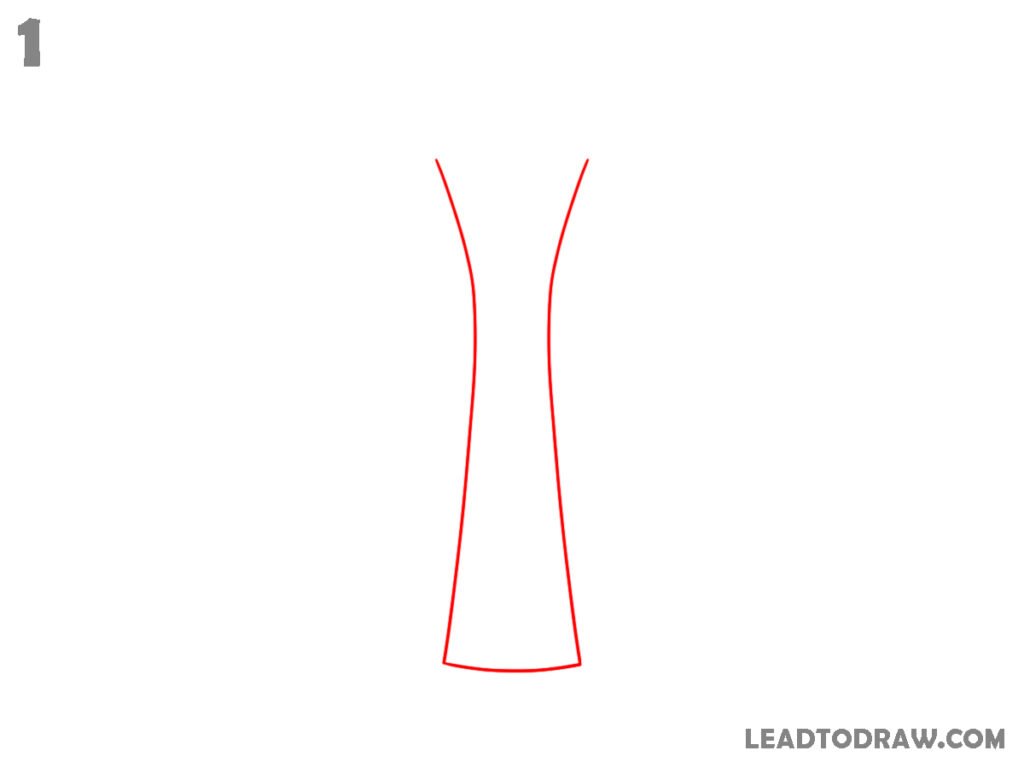
Start by drawing the main shape of the jacket body. Draw two long curved lines that become slightly narrow near the middle and wider at the bottom. Join the lower ends with a gentle curved line to form the bottom edge. Leave the top open without adding any extra details.
Step 2: Add the Collar Ends
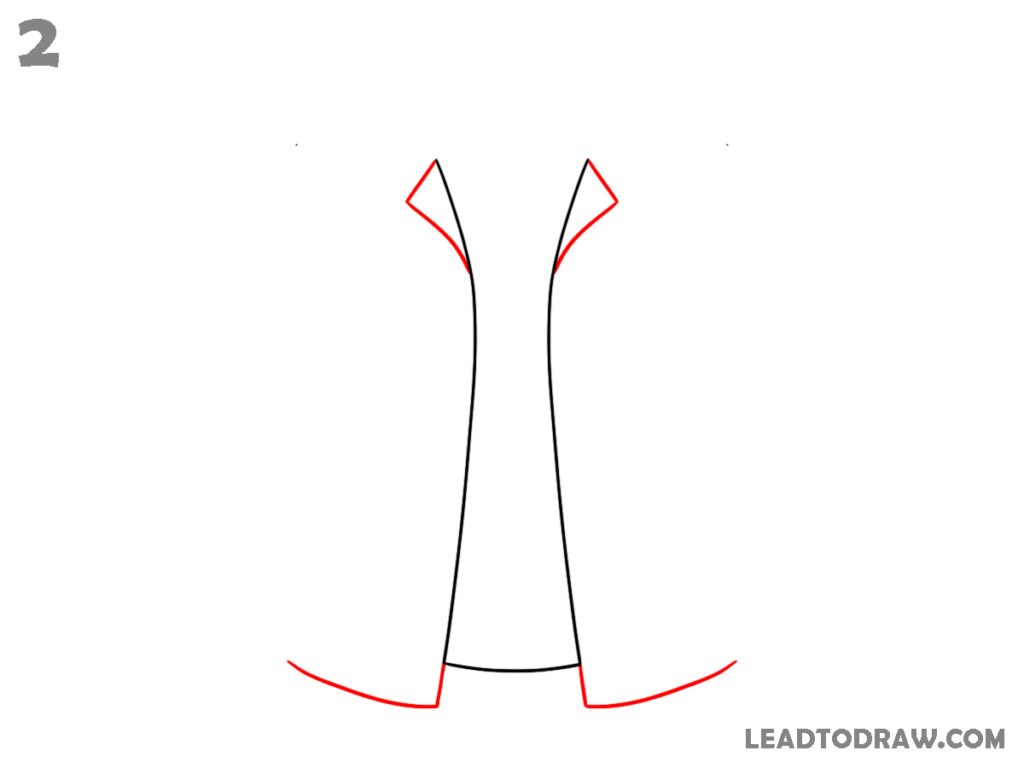
Draw two small pointed collar sections at the top opening, one on each side. Extend the lower curved edges outward from both bottom corners to begin the lower outline of the jacket. Keep the centre opening clear without connecting the front edges. Follow the same curved body shape already drawn.
Step 3: Draw the Top Neck Part
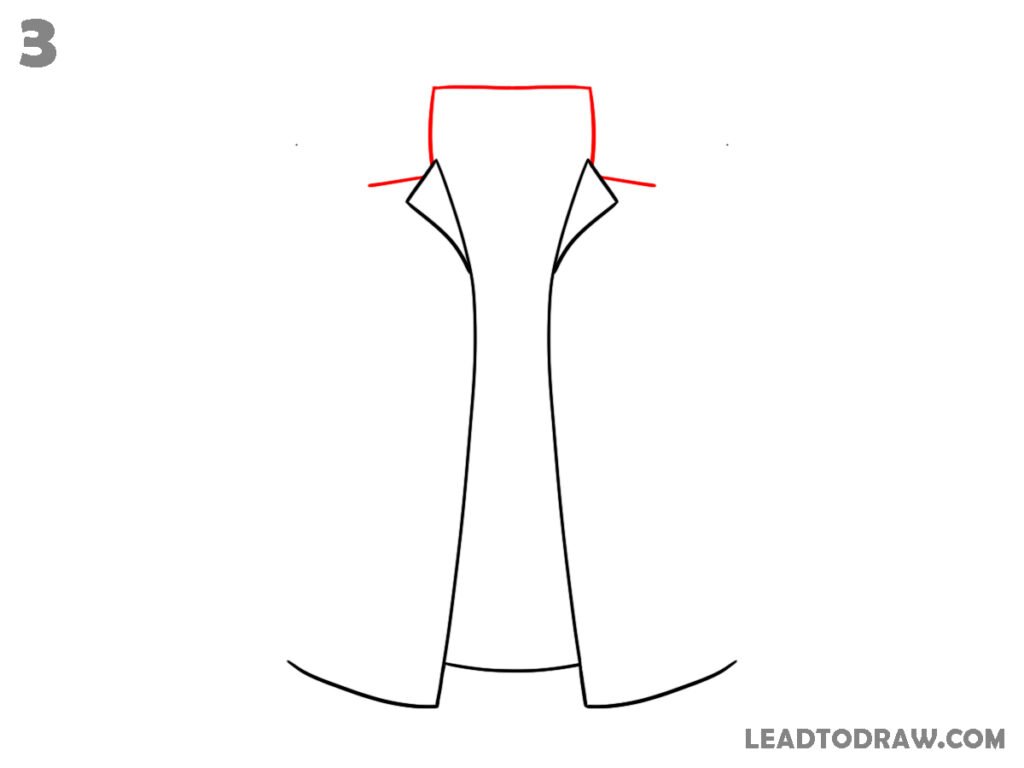
Connect the top with a straight horizontal line to complete the neck opening. Add small short lines extending outward from both sides beside the collar sections. Keep the collar points attached neatly to the front opening. Do not add any other jacket details at this stage of drawing.
Step 4: Draw the Outer Jacket Shape
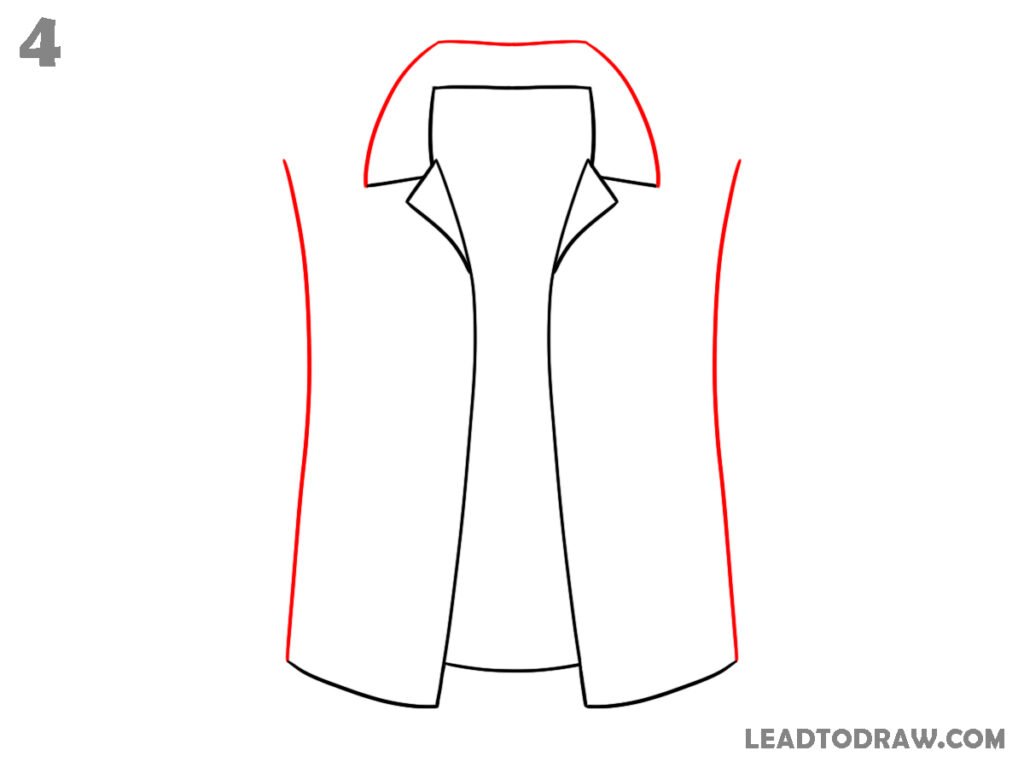
Draw the large outer shape of the jacket around the body. Add two long outer side lines from the shoulder area down to the lower edges. Connect the top with a wide curved line around the neck opening to form the upper jacket section. Finish both lower corners with gentle curves.
Step 5: Add the Sleeves and Yoke
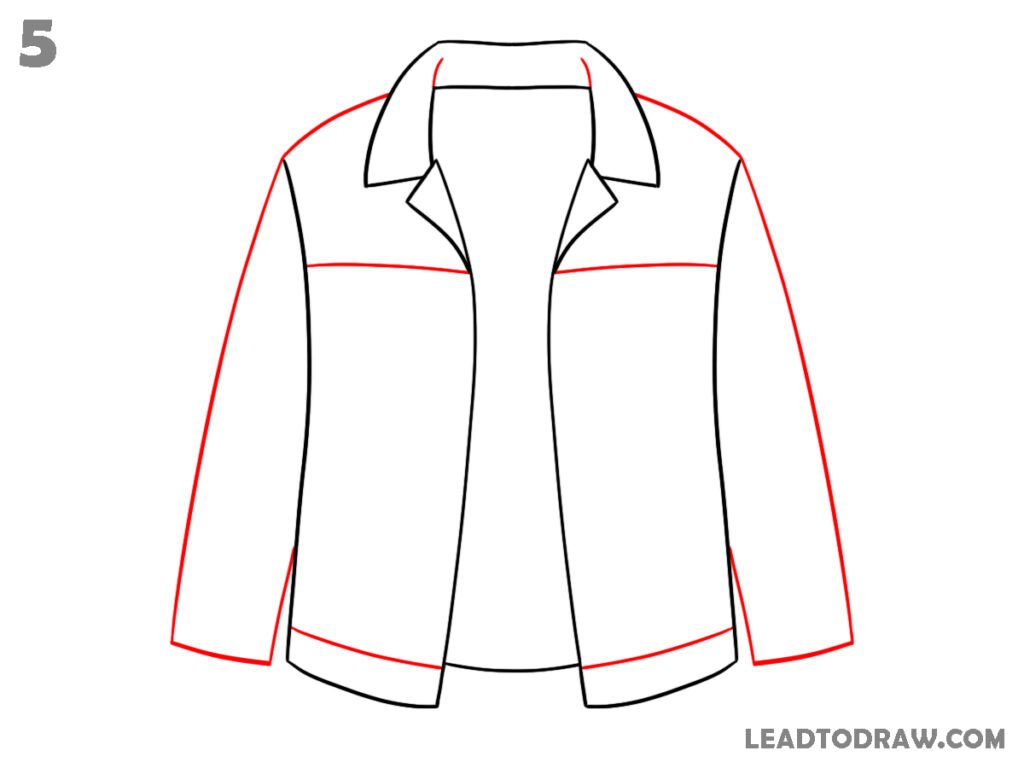
Draw one sleeve on each side using long slightly slanting lines ending with straight cuffs. Add the shoulder yoke by drawing a horizontal line across the upper chest. Extend this line from one side to the other. Finish the lower jacket band with another curved line near the bottom edge.
Step 6: Draw the Chest Pockets and Cuffs
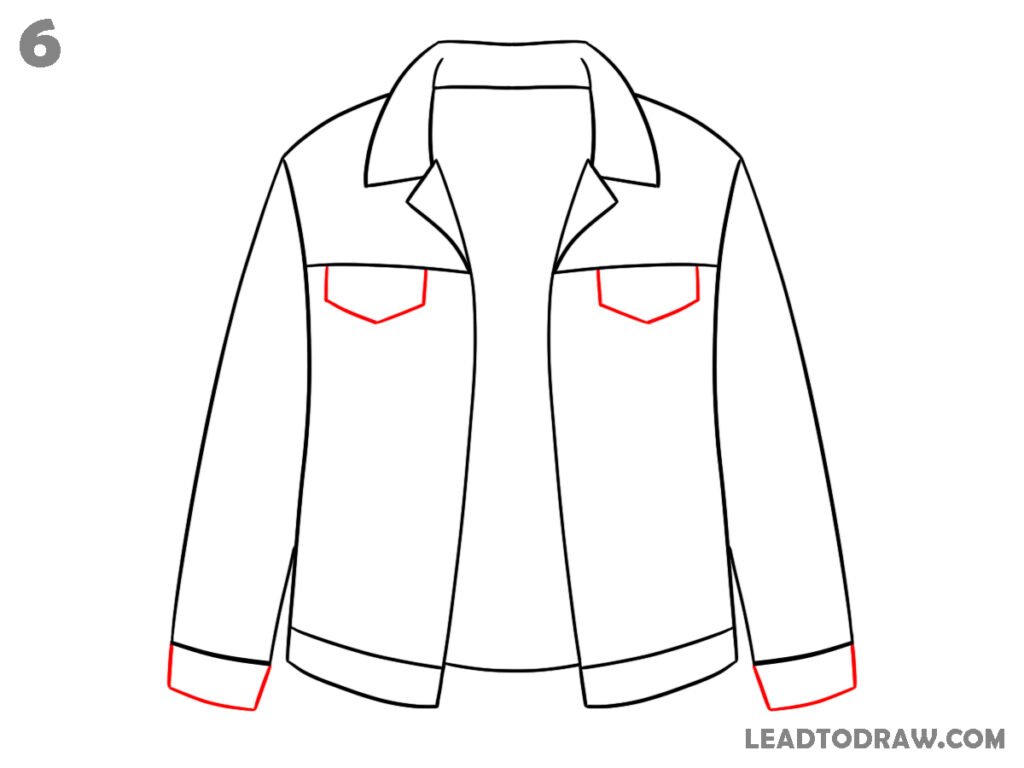
Add one small pocket on each side of the chest using simple straight and angled lines. Draw the pocket flap above each pocket. Add cuff bands at the end of both sleeves with straight lines. Keep every pocket placed evenly below the shoulder yoke and above the middle area.
Step 7: Add Buttons and Front Details
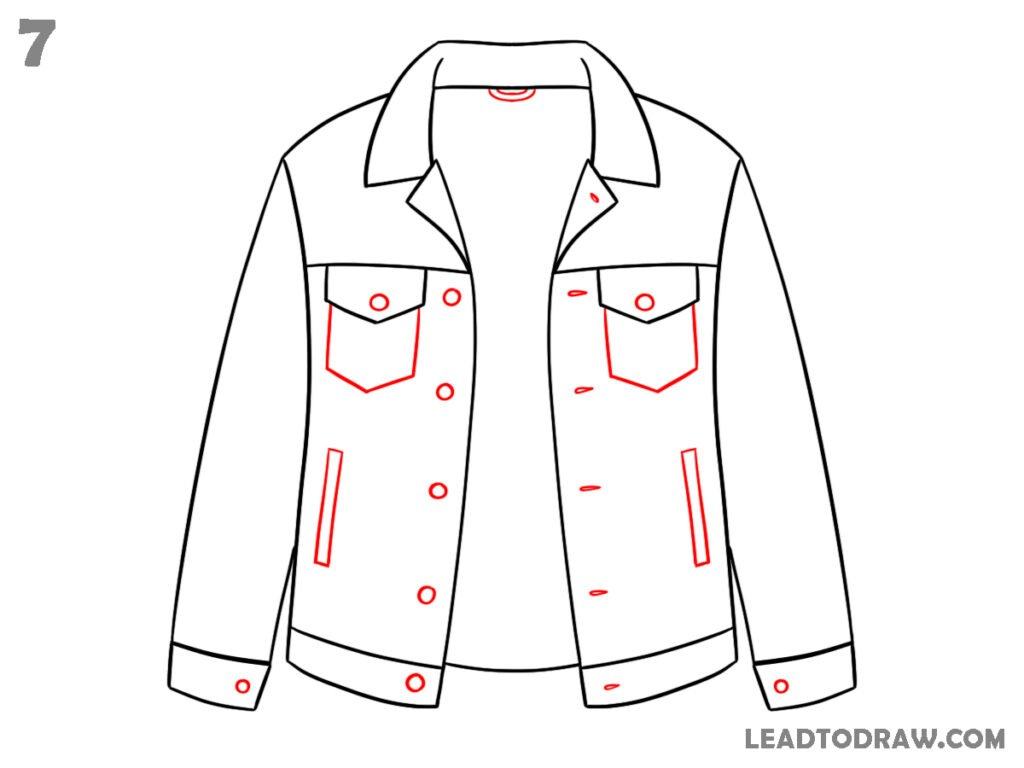
Draw small round buttons down the front opening of the jacket. Add button details on both pocket flaps and sleeve cuffs. Draw two narrow slanted pockets near the lower sides. Include a few short stitch marks on the front and add a small neck label inside the collar opening.
Step 8: Draw the Stitching Lines
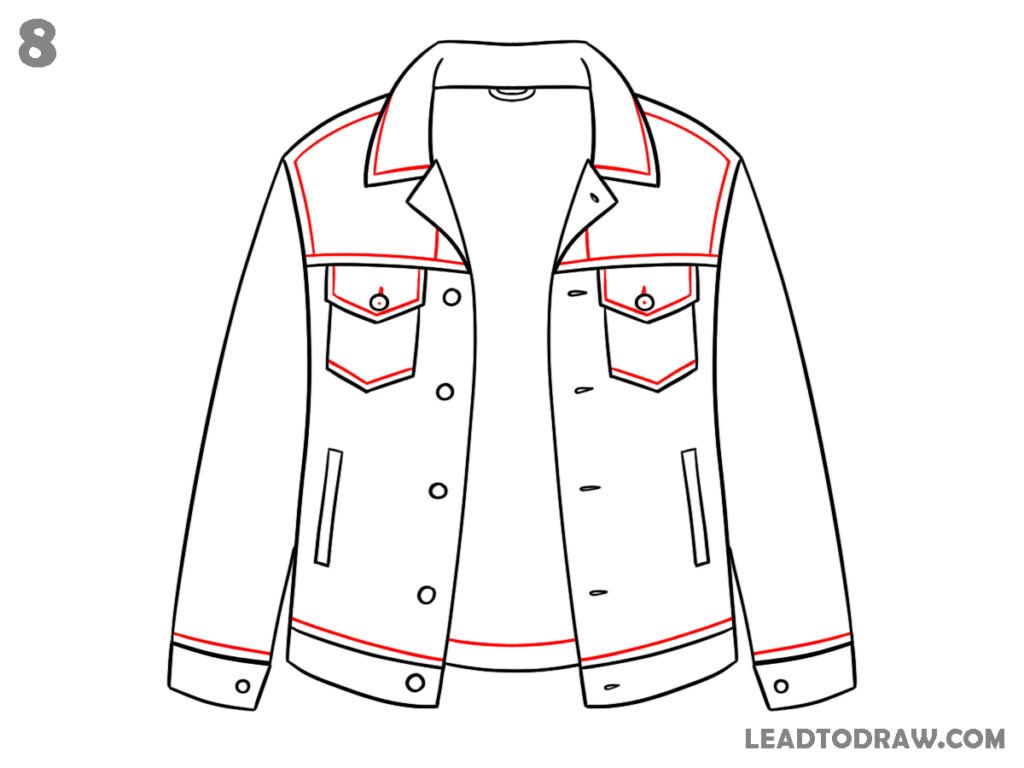
Add stitching lines along the collar, shoulder yoke, pocket flaps, lower band, sleeve edges, and front opening. Draw small seam lines around the upper shoulder area and continue the stitching neatly across both sides. Keep the stitches evenly placed while following the jacket outline already completed.
Step 9: Check and Clean the Drawing
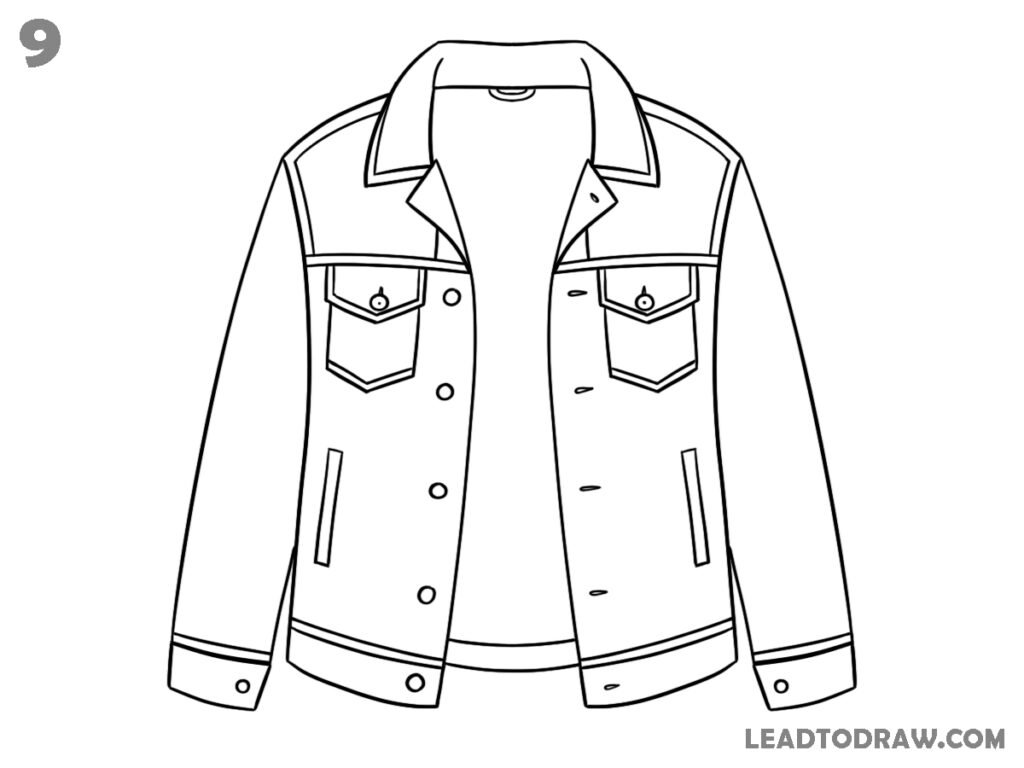
Check the full jean jacket drawing carefully and compare every part with the final image. Correct any missing buttons, pocket lines, stitching, collar edges, cuffs, and side pockets if needed. Erase unwanted marks and keep only the clean outline with all final details completed neatly.
For more similar drawing tutorials, explore the guides below.
- How to draw a gas mask in as easy way
- How to draw a hoodie in 7 steps easily
- How to Draw Jeans: Easy Step-by-Step
Conclusion
Now the How to draw jean jacket tutorial is complete. Check every line once, correct small mistakes if needed, and remove any unwanted marks. The finished drawing shows a simple jean jacket with collar, pockets, buttons, sleeves, and stitching details ready for colouring or another drawing project.